Clarified butter or ghee is a fantastic alternative to most cooking oils. It is deliciously fragrant and adds amazing flavour and richness to any dish. Let me show you this easy process on How to make Clarified butter or Ghee. It is much cheaper than buying and takes under 20 minutes, to turn butter into liquid gold!
What is clarified butter or ghee?
Clarified butter or ghee is made when the butter is slowly melted over low heat. This allows the water to evaporate and the milk solids to separate from the transparent liquid.
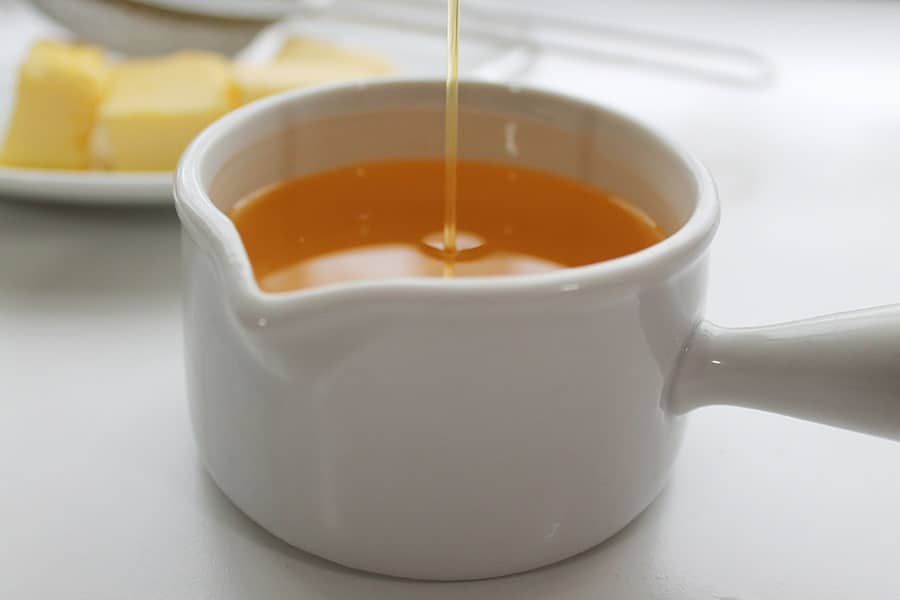
It is then poured through a strainer lined with cheesecloth or paper towel and into a heatproof bowl or jar. With the milk solids trapped in the strainer, you’re left with clarified butter or ghee.
Higher smoke point than most common cooking oils
Clarified butter has a higher smoke point than most common cooking oils like canola, sunflower or coconut oil. These oils have a lower smoke point.
A low smoke point means that the oil starts to reach a burning and smoking point earlier, sometimes before the food has been fully cooked. This creates a burnt flavour in the dish being prepared.
Using clarified butter with its heat-sensitive component which is milk solids removed, you have this amazing liquid with a higher smoke point.
This is perfect for stir-frying, searing, frying, or even making the most amazing popcorn which stays crisp for hours.
Long shelf life
Clarified butter and ghee has a long shelf life and can be stored away from sunlight at room temperature for up to 3 months. In the refrigerator, it lasts longer, up to one year.
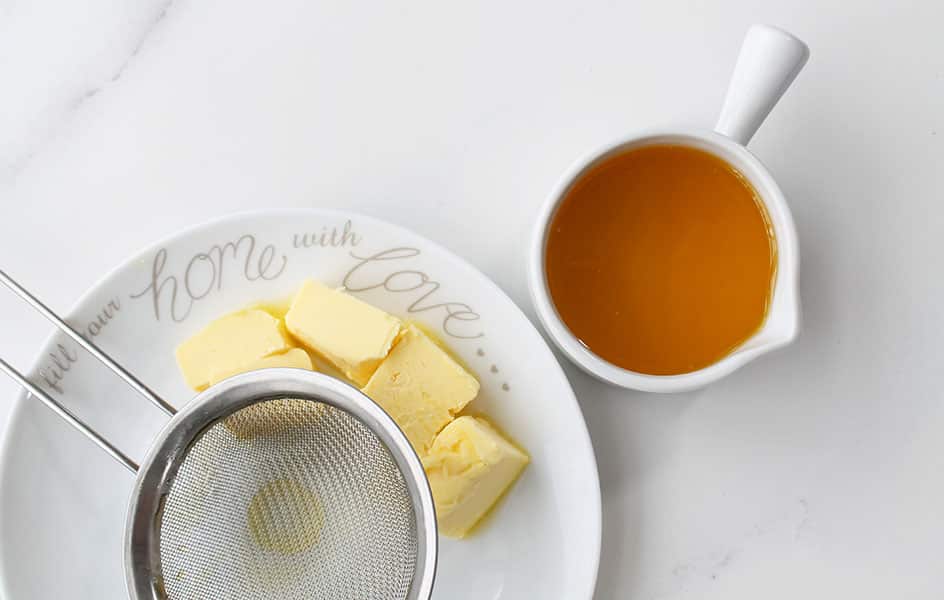
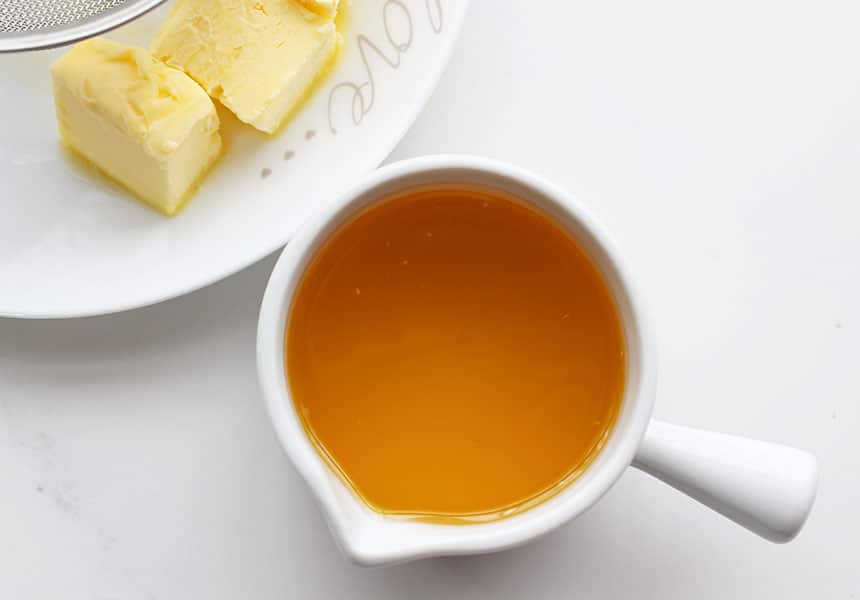
This recipe uses one cup of butter to produce about ¾ cup of clarified butter. You can always double or triple this recipe to make more at a time if you prefer.
Ingredients used
Butter: Salted or Unsalted butter can be used to make clarified butter
or ghee.
Note however that when salted butter is used, the salty flavour is concentrated when the butter has been reduced, salted butter also tends to create more foam, making it difficult to observe the colour change.
How to make clarified butter or Ghee
The whole process of making clarified butter or ghee takes under 15 minutes. Here I give you step by step instructions with pictures. This is to help guide you on what you should expect at each stage of the recipe
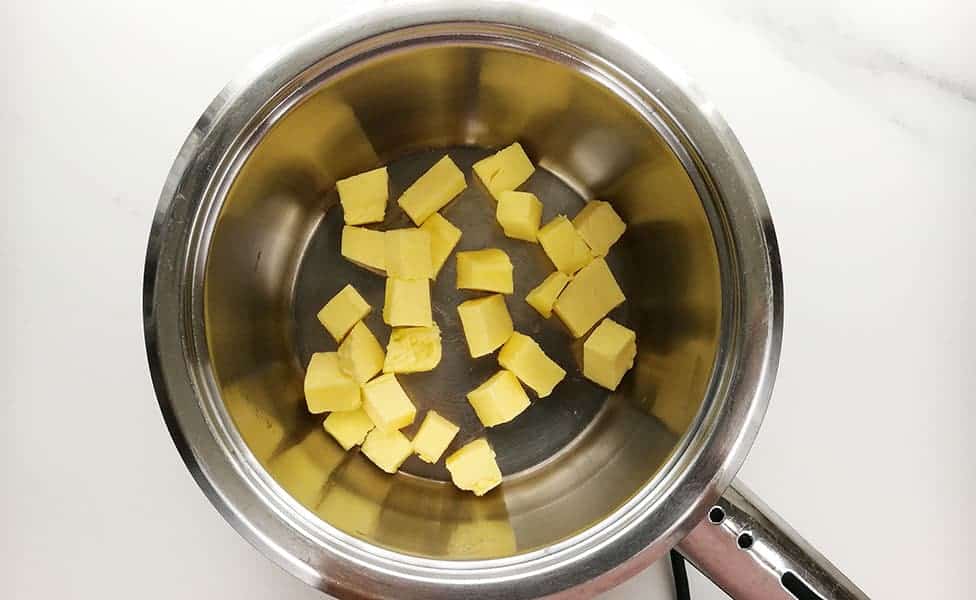
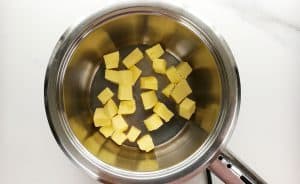
Step 1 - Melt the butter:
Start by heating the butter in a heavy-based pot on very low heat.
Step 2 solids start to separate-6 to 7 minutes
As the butter melts it starts to splatter and foam begins to rise to the surface. The splattering means that the water in the butter is evaporating. Continue to simmer the butter until the splattering subsides, about 6-7 minutes.
Do not stir the butter during the entire cooking process. You can lightly skim the surface to remove some of the foam. This will also help you to monitor the colour of the butter more carefully as it turns in colour.

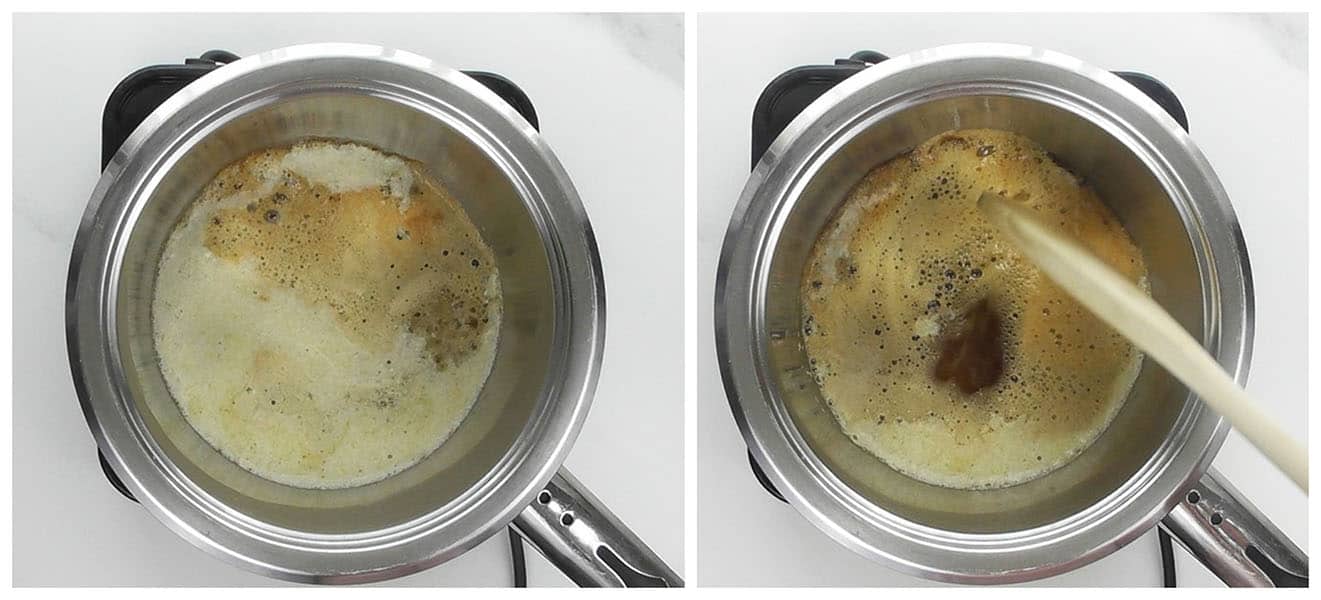
Step 3 - The colour of the foam changes to make ghee or clarified butter
Stage 3 a - Clarified butter
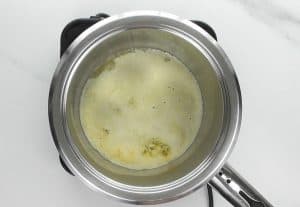
Keep the heat on low as within a minute, the colour of the foam changes to a golden yellow like this (clarified butter stage). When you gently part the foam you will notice the liquid beneath the foam turn a clear yellow.
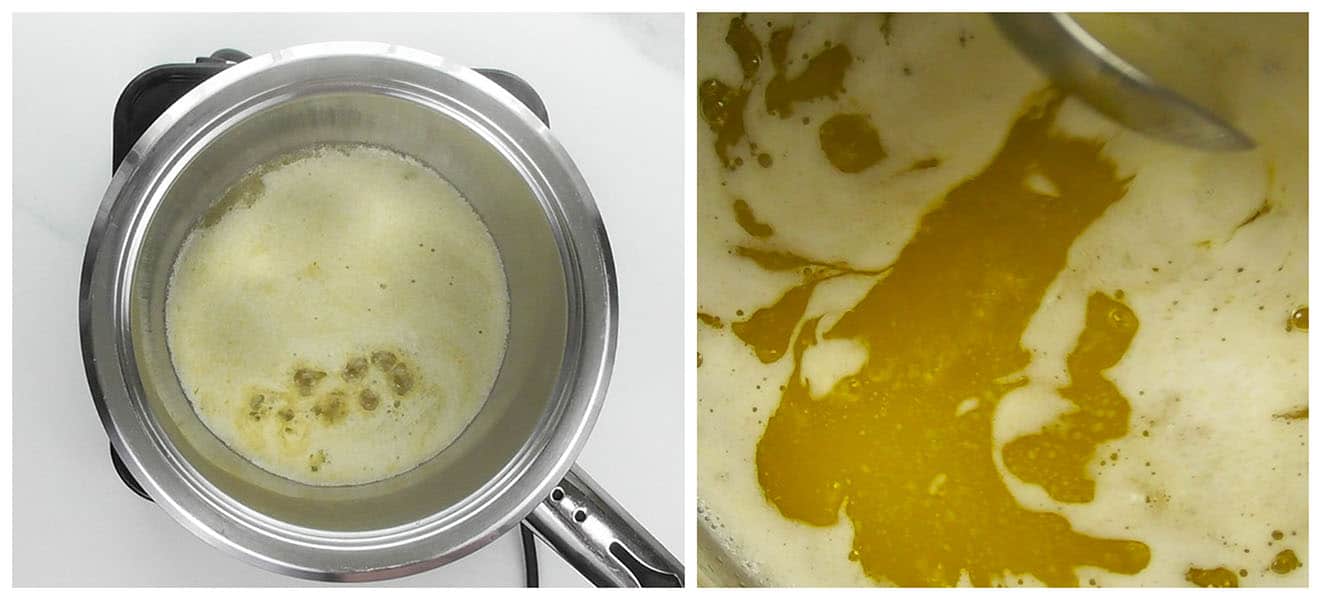
This is the stage where you need to be extra careful. The milk solids have sunk to the bottom of the pan and can easily begin to brown. For clarified butter, you do not want the butter solids to brown at all.
You can either strain it now to make clarified butter OR
Stage 3 b - Ghee
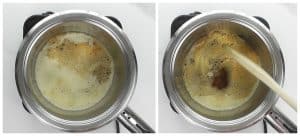
If you want to make ghee, then continue to simmer on low heat for another 2 minutes and just until the foam changes to a light brown colour (ghee stage). Lightly part the foam with a spoon and you will notice the melted butter is a clear darker brown. Little bits of milk solids will sink to the bottom of the pot and caramelize
Step 4 - Remove from the heat at the stage you prefer
Remove it from the stove as soon as the foam turns a golden yellow (clarified butter stage) or light nutty brown colour (ghee stage)
Allow it to cool for about 5 minutes before straining
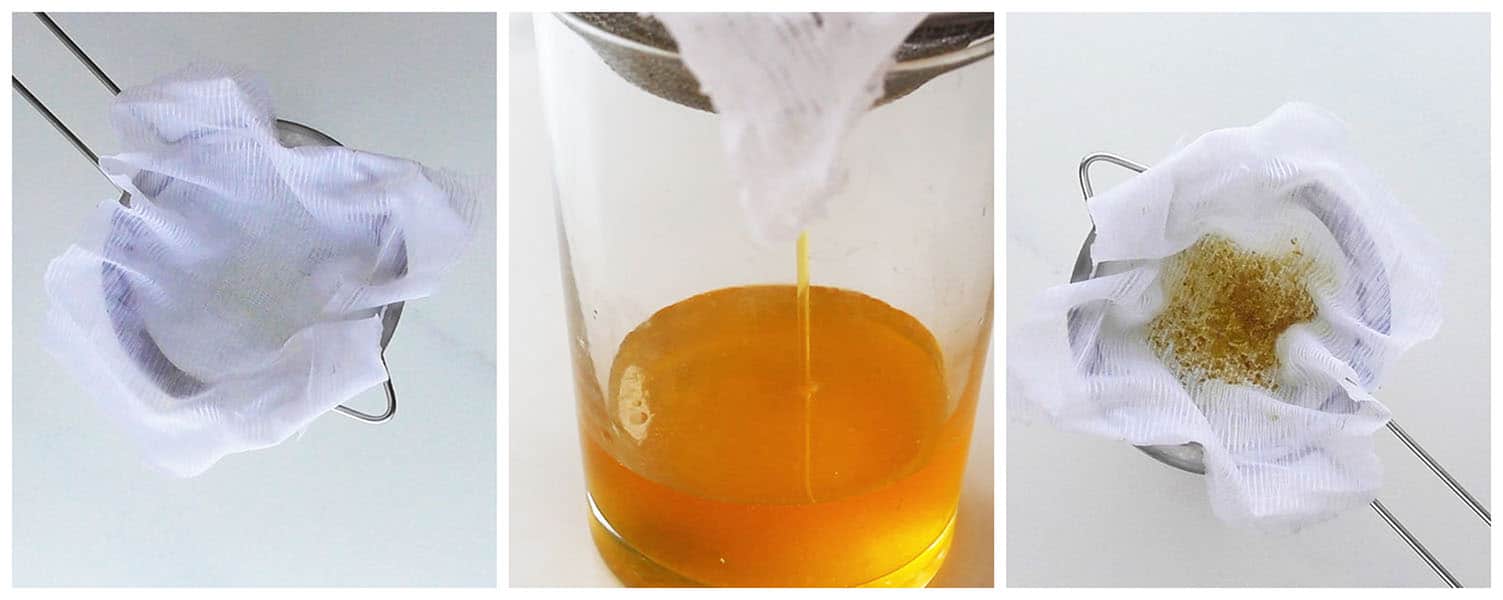
Step 5 - strain
Line a strainer with cheesecloth, or a paper towel and set the strainer over a heatproof container or glass measuring jug. Gently pour the liquid through the lined strainer and into the jug.
You will notice some of the milk solids collecting in the cheesecloth and some settled at the bottom of the pot.
Step 6- Storage
If you are not using immediately, then transfer your strained ghee / clarified butter to a dry glass jar and store at room temperature for up to 3 months or refrigerate for up to I year.
The clarified butter will naturally solidify at room temperature or when refrigerated. When heated for use it will return to its golden brown liquid.
Frequently asked questions and tips
How do I tell when the ghee or clarified butter is ready to be strained?
- The crackling subsides. This means most the water has evaporated.
- The cooked butter beneath the foam becomes a clear golden yellow liquid. This means the butter is clarified.
- The milk solids separate and settle in the bottom of the pan, and are light brown in colour. This means that the butter can be strained and used as ghee
How can I use the foam settled at the top of the butter?
The foam can be gently skimmed from the surface as the butter cooks. It can be kept in a container and stirred into stews, sauce or mixed into pasta.
How can I use the milk solids which have settled at the bottom of the pot?
Don't toss the milk solids down the sink, instead use them to add a rich buttery deliciousness to your food. Here are a few ways in which milk solids can be used
- Knead some of the milk solids into your bread or pita dough for amazing flavour
- Stir into mashed potatoes, soup or rice.
- Mix a teaspoon of milk solids with 1 clove of minced garlic. Heat on low till the garlic sizzles. Spread this on toasted baguette or bread for a quick snack
What is the difference between ghee and clarified butter?
Ghee is cooked just a few minutes longer than clarified butter. It is cooked until the milk solids caramelize and turn a darker brown colour. The longer cooking time of ghee creates a delicious roasted nutty flavour.
In what recipes can ghee or clarified butter be used?
Clarified butter can be used to replace oil or butter in any cooking recipe
However, it is not advisable to use in baking cakes or cookies unless the recipe specifically calls for it. Baking relies on the milk solids and water content for flavour and texture. Clarifying butter removes these contents making it unsuitable for baking.
Here are a few great recipes in which you can replace the oil or butter with clarified butter or ghee. This will create an irresistibly delicious rich and buttery flavour in any dish in which it has been used.
- Use instead of oil in these Homemade Corn Tortillas, or Easy Homemade Flour Tortilla Recipe
- Clarified butter or ghee tastes amazing used when making garlic butter. Try it when making the topping for this 3 Ingredient Spicy Garlic Flatbread or the filling for my Easy Garlic Rolls
- Give it a try when cooking your mushrooms or frying an egg in a recipe like my Cheese Mushroom and Egg Breakfast Pita
Can this recipe be doubled or tripled?
Absolutely, just note however the cooking time will be longer than 10 minutes when using more butter than that specified in this recipe.
Enjoy ♥
If you like this recipe, be sure to check out my other amazing easy recipes
Still hungry for more?
Follow on Facebook, Pinterest, and Instagram or Subscribe for the latest recipe updates.
How to make Clarified butter or Ghee
Watch how to make the recipe
- Melt the butter: Start by heating the butter in a heavy-based pot on very low heat.

- Solids start to separate-6 to 7 minutes As the butter melts it starts to splatter and foam begins to rise to the surface. The splattering means that the water in the butter is evaporating. Continue to simmer the butter until the splattering subsides, about 6-7 minutes.

- Do not stir the butter during the entire cooking process. You can lightly skim the surface to remove some of the foam. This will also help you to monitor the colour of the butter more carefully as it turns in colour.
- The colour of the foam changes to make clarified butter (stage 1) or ghee (stage 2)
- Stage 1 - Clarified butter: Keep the heat on low as within a minute, the colour of the foam changes to a golden yellow like this (clarified butter stage). When you gently part the foam you will notice the liquid beneath the foam turn a clear yellow.

- This is the stage where you need to be extra careful. The milk solids have sunk to the bottom of the pan and can easily begin to brown. For clarified butter, you do not want the butter solids to brown at all.
- You can either strain it now to make clarified butter OR
- Stage 2 - Ghee: If you want to make ghee, then continue to simmer on low heat for another 2 minutes and just until the foam changes to a light brown colour (ghee stage). Lightly part the foam with a spoon and you will notice the melted butter is a clear darker brown. Little bits of milk solids will sink to the bottom of the pot and caramelize
- Remove from the heat at the stage you prefer
- Remove it from the stove as soon as the foam turns a golden yellow (clarified butter stage) or light nutty brown colour (ghee stage)
- Allow it to cool for about 5 minutes before straining
- Strain: Line a strainer with cheesecloth, or a paper towel and set the strainer over a heatproof container or glass measuring jug. Gently pour the liquid through the lined strainer and into the jug.

- You will notice some of the milk solids collecting in the cheesecloth and some settled at the bottom of the pot.
- Storage : If you are not using immediately, then transfer your strained ghee / clarified butter to a dry glass jar and store at room temperature for up to 3 months or refrigerate for up to I year.
- The clarified butter or ghee will naturally solidify at room temperature or when refrigerated. When heated for use it will return to its golden brown liquid.


Frequently asked questions and tips
How do I tell when the ghee or clarified butter is ready to be strained?
- The crackling subsides. This means most the water has evaporated.
- The cooked butter beneath the foam becomes a clear golden yellow liquid. This means the butter is clarified.
- The milk solids separate and settle in the bottom of the pan, and are light brown in colour. This means that the butter can be strained and used as ghee
How can I use the foam settled at the top of the butter?
- The foam can be gently skimmed from the surface as the butter cooks. It can be kept in a container and stirred into stews, sauce or mixed into pasta.
How can I use the milk solids which have settled at the bottom of the pot?
- Don't toss the milk solids down the sink, instead use them to add a rich buttery deliciousness to your food. Here are a few ways in which milk solids can be used
- Knead some of the milk solids into your bread or pita dough for amazing flavour
- Stir into mashed potatoes, soup or rice.
- Mix a teaspoon of milk solids with 1 clove of minced garlic. Heat on low till the garlic sizzles. Spread this on toasted baguette or bread for a quick snack
What is the difference bet ghee and clarified butter?
- Ghee is cooked just a few minutes longer than clarified butter. It is cooked until the milk solids caramelize and turn a darker brown colour. The longer cooking time of ghee creates a delicious roasted nutty flavour.
In what recipes can ghee or clarified butter be used?
- Clarified butter can be used to replace oil or butter in any cooking recipe
- However, it is not advisable to use in baking cakes or cookies unless the recipe specifically calls for it. Baking relies on the milk solids and water content for flavour and texture. Clarifying butter removes these contents making it unsuitable for baking.
- Here are a few great recipes in which you can replace the oil or butter with clarified butter or ghee. This will create an irresistibly delicious rich and buttery flavour in any dish in which it has been used.
- Use instead of oil in these Homemade Corn Tortillas, or Easy Homemade Flour Tortilla Recipe
- Clarified butter or ghee tastes amazing used when making garlic butter. Try it when making the topping for this 3 Ingredient Spicy Garlic Flatbread or the filling for my Easy Garlic Rolls
- Give it a try when cooking your mushrooms or frying an egg in a recipe like my Cheese Mushroom and Egg Breakfast Pita
Can this recipe be doubled or tripled?
- Absolutely, just note however the cooking time will be longer than 10 minutes when using more butter than that specified in this recipe.


Dona says
This was great, my husband puts it into his coffee in the morning. And puts it on all of his meat meals.
The Gardening Foodie says
I’m so glad you liked this recipe and that’s awesome your husband uses it in his coffee and on meat meals—such a great idea.
I appreciate you sharing that 😊