Whipping up this Easy Lemon Custard takes just four simple ingredients and doesn't even require eggs. Making the custard only takes 10 minutes and is full of a zesty, lemony flavor, with a delicately rich texture.
Plus, it's a real delight, whether you enjoy it as a creamy treat, use it as cake or pastry filling, or drizzle it over desserts.

Difference between Lemon custard and lemon curd
Keep in mind that this is not a lemon curd recipe. Custard has a smoother, pudding-like texture that's creamier and easier to pour. While lemon curd is tangy, and spreads more effortlessly.
PLEASE NOTE: Cornstarch in the US is the same thing as cornflour in the UK. It’s the pure starch extracted from corn kernels, and it has the form of a very fine white powder.
How to make Easy Lemon Custard
This is just the overview so you can see the process. When you are baking, you’ll want to use the full recipe at the bottom of the page.
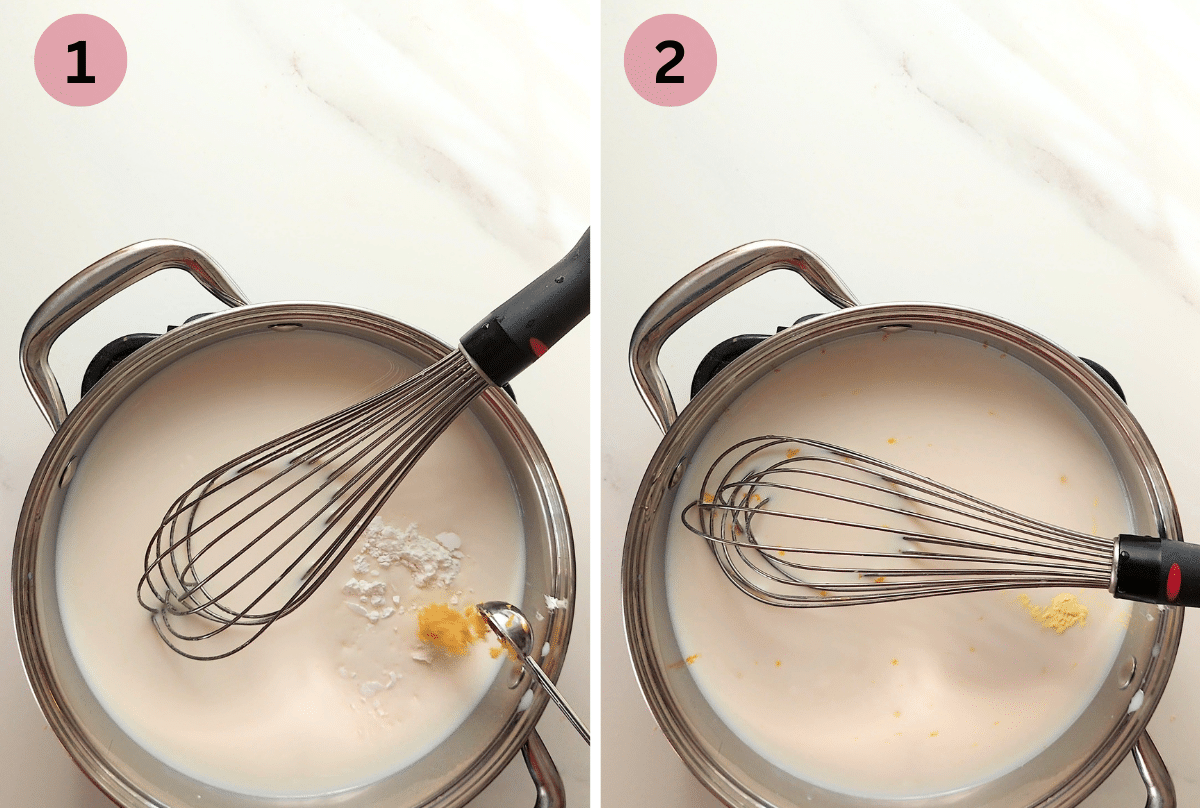
- In a pot, add whole milk, cornstarch (US) / cornflour (UK), white granulated sugar and lemon zest.
- Optional: A really tiny amount (about ⅛ of a teaspoon)Yellow food coloring - You can use any type of coloring – gel, liquid, powder or even a pinch of turmeric powder
- Place the saucepan over medium low heat.
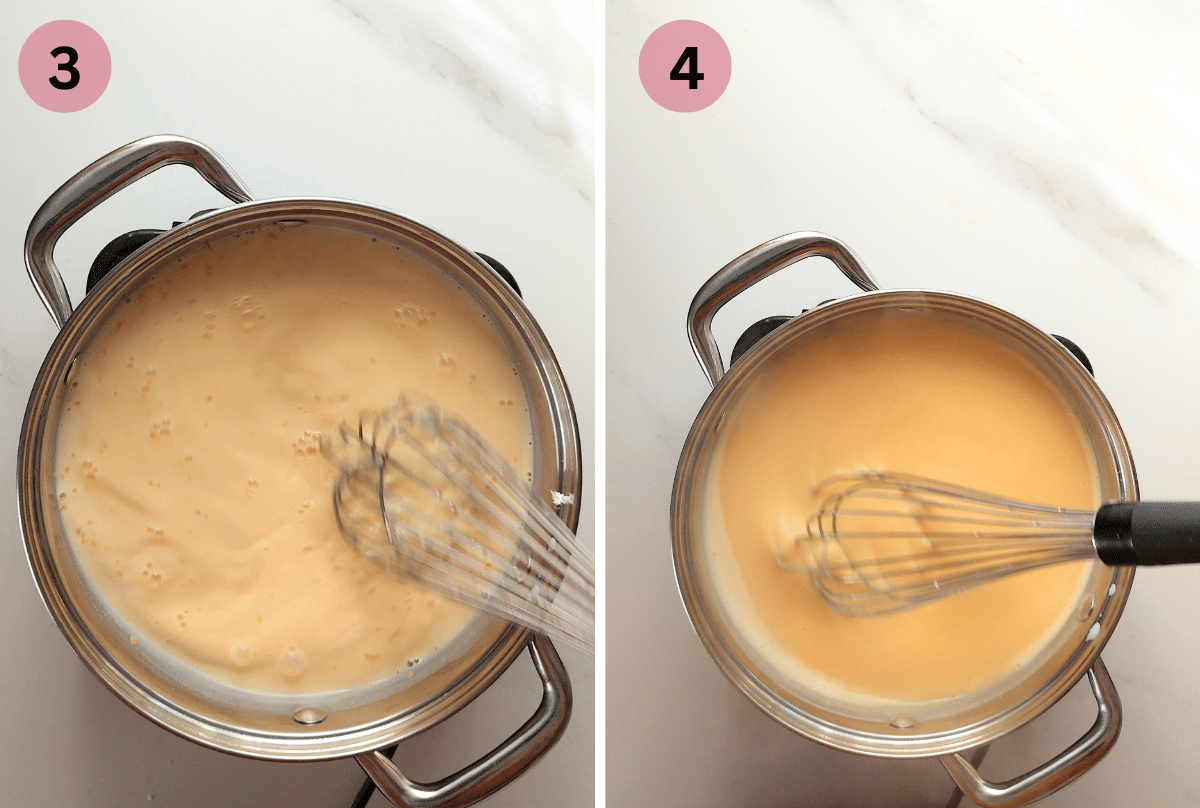
- Within 3-4 minutes you will notice, as you whisk, the mixture becomes thicker. Ensure that you whisk constantly to prevent the custard burning or sticking to the bottom of the pot.
- At this point, remove the pot from the stove but continue to whisk for at least another minute until the mixture is thick and creamy.
- The custard should be done when it has thickened to a creamy consistency.
Keep in mind that the mixture can continue to thicken a bit even after being removed from heat.
Tips for the best Lemon Custard
- Heat the custard over low heat: For best results, heat the custard over low heat to prevent burning on the bottom of your saucepan. It may be tempting to turn up the heat to speed up the thickening process, but this can lead to lumpy, charred results.
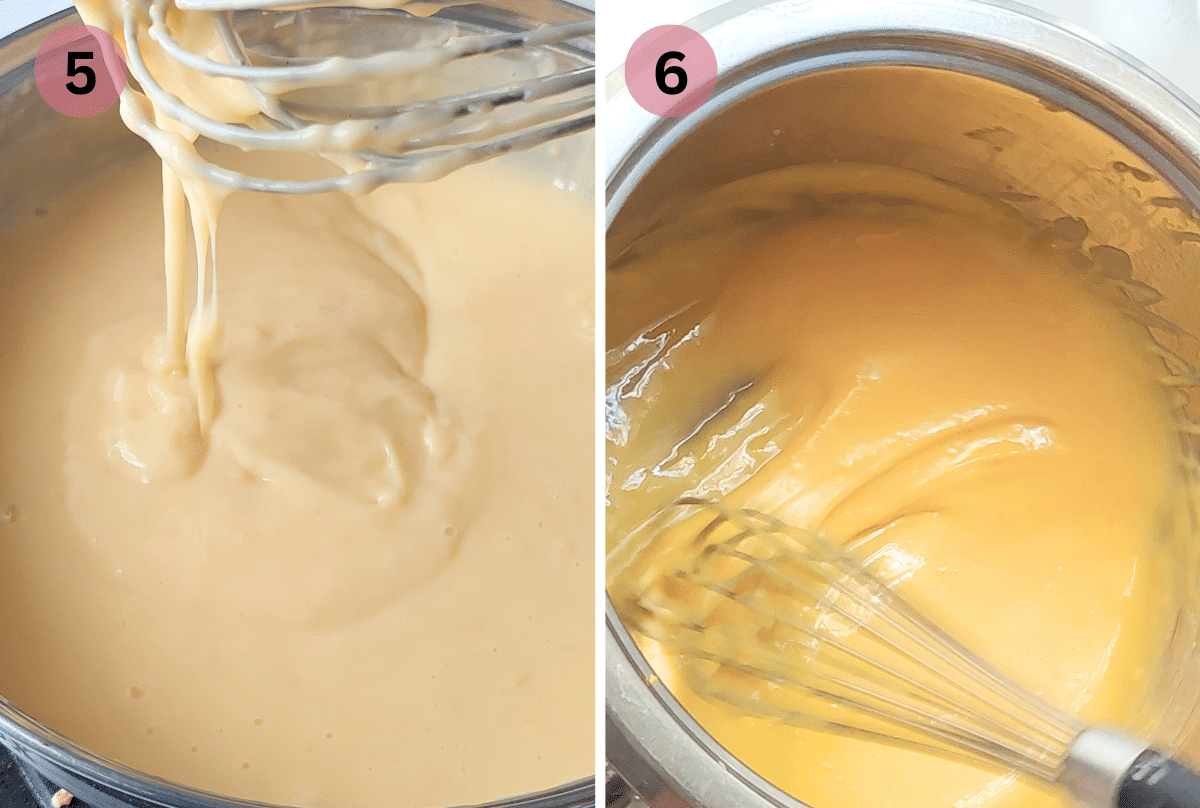
- To check if the custard is ready: Just dip a spoon into it, making sure it coats the back of the spoon. Then, swipe your finger across the back of the spoon – the custard should hold its shape and not immediately fill in the gap.
- Strain if Necessary: If you notice any lumps or bits of zest in the custard, you can strain it through a fine mesh strainer to achieve a smoother texture.
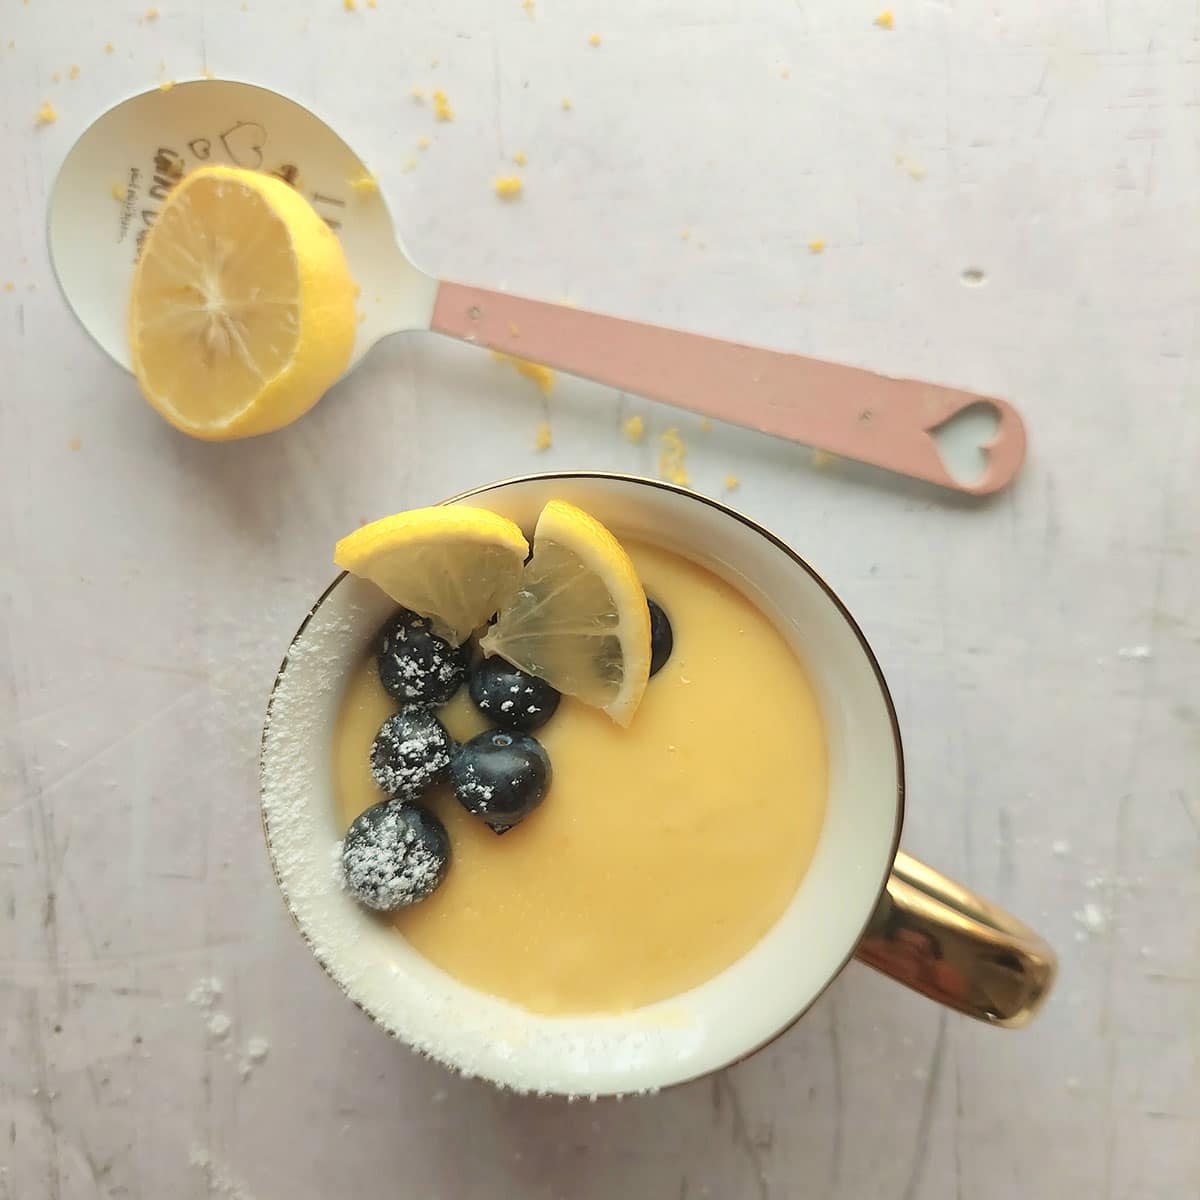
- Serve or Chill: Once the custard has cooled slightly, you can either serve it warm or transfer it to individual serving dishes.
If you prefer your custard chilled, cover it with plastic wrap, ensuring the wrap touches the surface of the custard to prevent a skin from forming. Refrigerate until thoroughly chilled.
How to fix custard that is too thick
If your custard turns out to be too thick and you want to thin it out, here's what you can do
Slowly pour warm milk (about a Tablespoon at a time) into the thick custard. Use a whisk or spoon to gently incorporate the milk into the custard. Stir continuously to avoid lumps.
After adding a bit of milk, you can check the custard's consistency. If it's still too thick, continue adding small amounts of milk and stirring until you reach the desired consistency.
Heat Gently: Keep the saucepan over low heat as you're adding milk and adjusting the consistency. This will help prevent any curdling or overheating.
Avoid Over-Thinning: Be careful not to add too much milk all at once, as it can lead to the custard becoming too liquidy. Add milk gradually and stop when you achieve the texture
Serving suggestions
- You can savor this custard as a creamy dessert topped with fruit or nuts.
- Use lemon custard as a layer in trifle, parfaits, or layered cakes. Its rich creaminess adds amazing flavor to these desserts.
- For a luxurious touch, you can sprinkle a thin layer of sugar over the custard and caramelize it with a kitchen torch to create a crispy top layer, similar to crème brûlée.
Storage
The custard can be stored in the refrigerator for up to 3 days. Store covered with plastic wrap, ensuring the wrap touches the surface of the custard This helps to prevent a rubbery layer from forming on the surface as the custard cools.
Enjoy ♡
Recipe
Easy Lemon Custard - 4 Ingredients, Egg Free
- ¾ cup whole milk (full fat)
- 1 ½ Tablespoon cornstarch US / cornflour (UK) (see note 1)
- 2 Tablespoons white granulated sugar
- 1-2 teaspoons lemon zest
Optional
- ⅛ teaspoon yellow food coloring (see note 2)
- In a pot, add whole milk, cornstarch (US) / cornflour (UK), white granulated sugar and lemon zest.
- Optional: Add yellow coloring if using
- Place the saucepan over medium low heat.
- Within 3-4 minutes you will notice, as you whisk, the mixture becomes thicker. Ensure that you whisk constantly to prevent the custard burning or sticking to the bottom of the pot.
- At this point, remove the pot from the stove but continue to whisk for at least another minute until the mixture is thick and creamy.
- The custard should be done when it has thickened to a creamy consistency.
- Keep in mind that the mixture can continue to thicken a bit even after being removed from heat.
- To check if the custard is ready: Just dip a spoon into it, making sure it coats the back of the spoon. Then, swipe your finger across the back of the spoon – the custard should hold its shape and not immediately fill in the gap.
- Strain if Necessary: If you notice any lumps or bits of zest in the custard, you can strain it through a fine mesh strainer to achieve a smoother texture.
- Serve or Chill: Once the custard has cooled slightly, you can either serve it warm or transfer it to individual serving dishes.
- If you prefer your custard chilled, cover it with plastic wrap, ensuring the wrap touches the surface of the custard to prevent a skin from forming. Refrigerate until thoroughly chilled.
Storage
- The custard can be stored in the refrigerator for up to 3 days. Store covered with plastic wrap, ensuring the wrap touches the surface of the custard This helps to prevent a rubbery layer from forming on the surface as the custard cools.
- Slowly pour warm milk (about a Tablespoon at a time) into the thick custard.
- Use a whisk or spoon to gently incorporate the milk into the custard. Stir continuously to avoid lumps.
- After adding a bit of milk, you can check the custard's consistency. If it's still too thick, continue adding small amounts of milk and stirring until you reach the desired consistency.
- Heat Gently: Keep the saucepan over low heat as you're adding milk and adjusting the consistency.
- This will help prevent any curdling or overheating.
- Avoid Over-Thinning: Be careful not to add too much milk all at once, as it can lead to the custard becoming too liquidy. Add milk gradually and stop when you achieve the texture
Want even more delicious recipes? Subscribe free to receive new post notifications emailed to you. Or follow along on Facebook, Pinterest, and Instagram. If you love sharing recipes please come and join my All about cooking and baking Facebook group or Subscribe to my YouTube channel


Linda Veilleux says
Love these easy recipes; I intend on making several
The Gardening Foodie says
Hello Linda, Thank you 😊
You're very welcome. Enjoy ☺️
Debbie says
This is quite yummy! I used lemon oil because I didn't have zest. When I am mixing cornstarch into a liquid, I mix it with the sugar first to make it blend more easily, and reduce the likelihood of having lumps.
The Gardening Foodie says
Hi Debbie, I’m so glad you enjoyed the custard! Using lemon oil in place of zest is a great swap. I also really liked your technique for mixing the cornstarch with sugar,it’s the perfect way to keep the texture smooth.
I truly appreciate you sharing what worked for you. Tips like that can be so helpful for others trying the recipe too!
Wishing you a lovely holiday season 🙂