
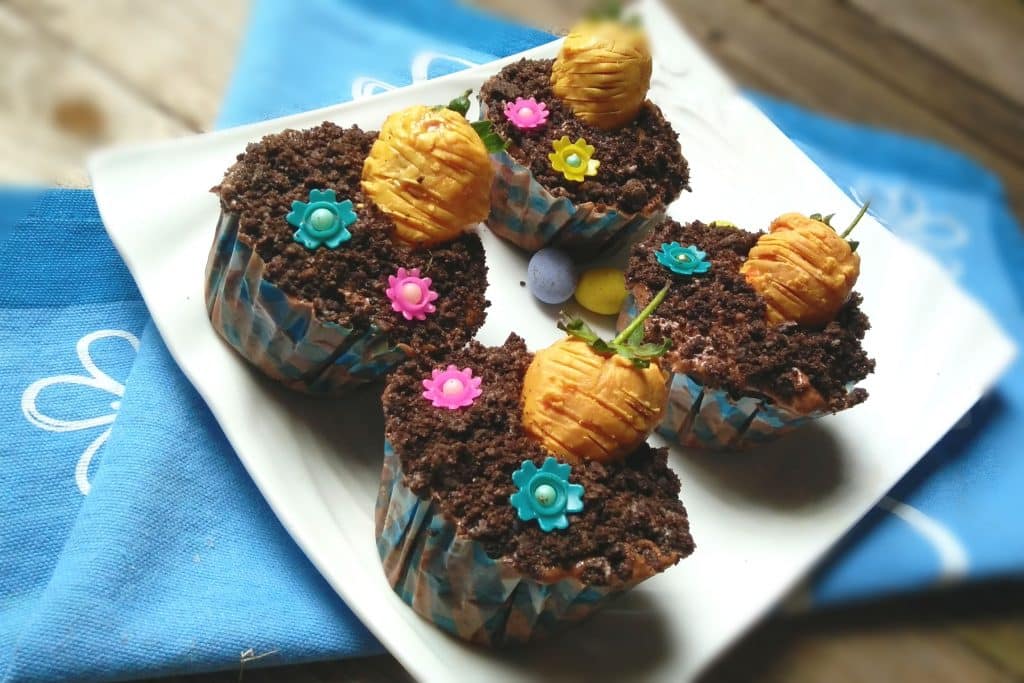
Carrot Patch Chocolate Cupcakes make cute little bakes, ideal for Easter or to celebrate the beautiful Spring season. So if you looking for a homemade treat to tuck into your basket, here you have it. I really had so much fun making these adorable little treats..... and even more fun eating it with my family.This is a really great opportunity to get the kids involved with the decorating of the cupcakes. It will really be fun to let them stick on little flowers and place the 'carrot' which is really a chocolate covered strawberry as a cute little finishing touch. Though, I already know what their favourite part will be....bashing the Oreo biscuits to create 'sand' for the top. So let them help create their own Carrot Patch Chocolate Cupcakes.
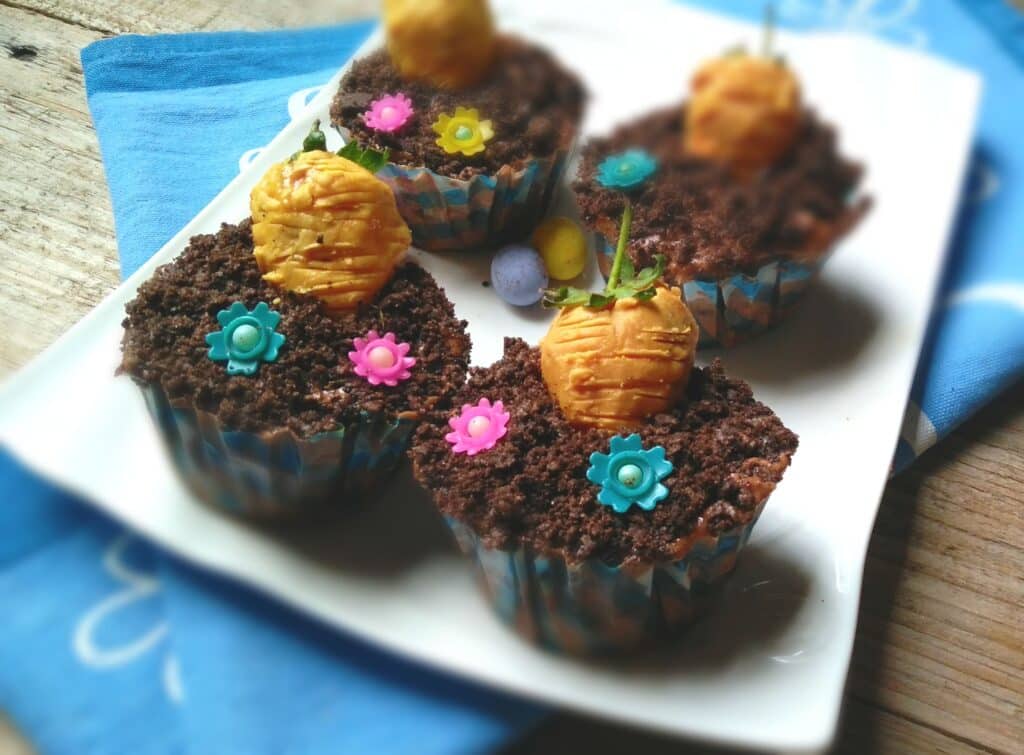
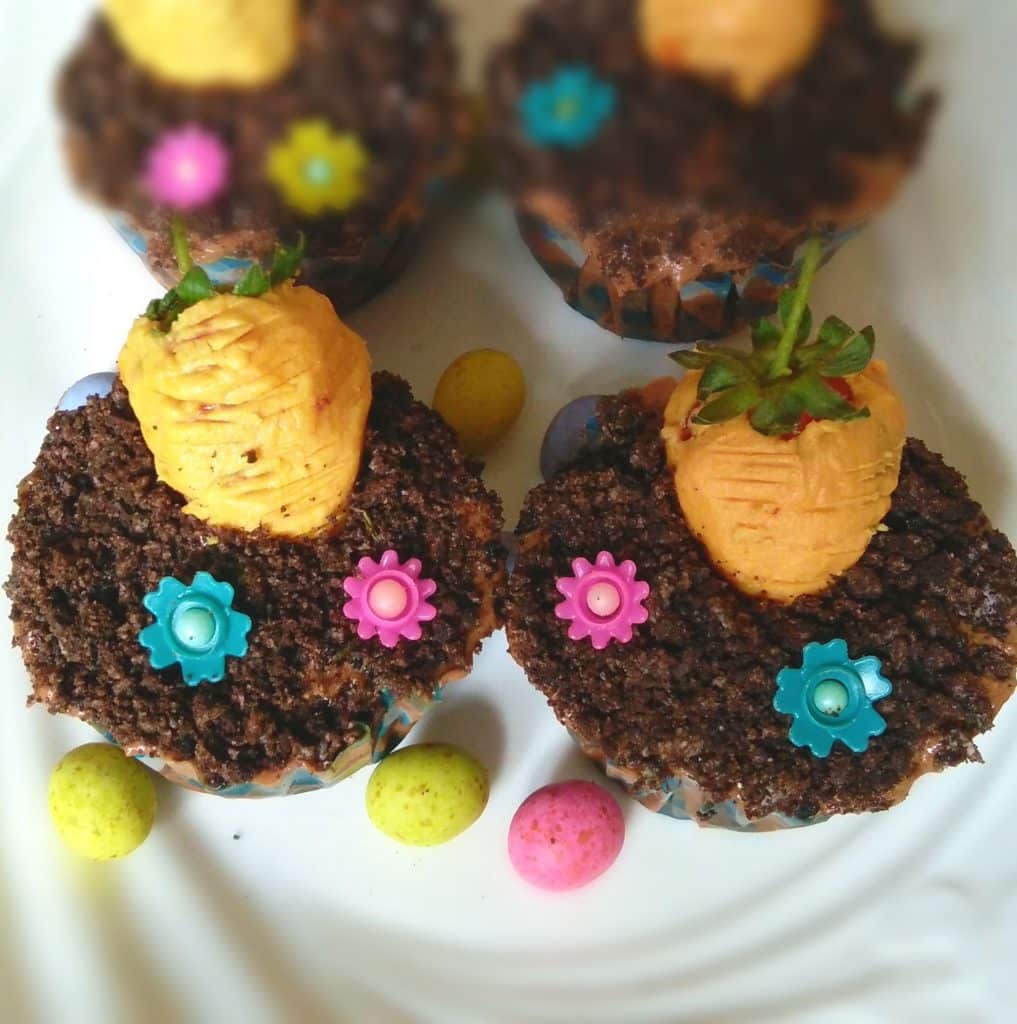
For these cupcakes, I use my favorite chocolate cake recipe. It is always so chocolatey and moist and always turns out perfect. It is topped with a delicious not too sweet frosting and sprinkled with crushed Oreo pieces. The 'carrot' is a strawberry which is dipped in white chocolate which is tinted with an orange coloring.
The chocolate cupcakes is a really simple recipe, but here are a few guidelines which you should follow when coloring white chocolate.
Colouring and working with white chocolate
- Most important, whenever you melt chocolate, make sure that the container and utensils you are using is dry. If any water comes into contact with the chocolate, it causes it to sieze and you will not be able to use it.
- Only use oil based, gel or powder colouring to tint the white chocolate. If you use your regular water based colouring , the chocolate will become hard and sieze.
- You can get oil based, gel or powder colouring tint at a store which specialises in baking and party products. Just let them know that you want to use it for tinting chocolate and they will be able to advise you on a good brand.
- Check and stir the chocolate every 20 seconds, if you are using the microwave. If you are using a double boiler,
 which is when you place your bowl of chocolate pieces over a pot of simmering water, just ensure that the water does not touch the bottom of the bowl.
So just follow these simple guidelines and you will have a perfect coating chocolate
How to create the chocolate carrots
Melt your white chocolate in the microwave or double boiler checking on it every 20 seconds to ensure it does not burn. Add your orange oil based, gel or powder tint to the chocolate, just a drop at a time, until you get your desired colouring. Just a reminder, please do not use a water based colouring, and make sure that all your utensils are dry.
Wash and dry the strawberries completely. If they are not dry the chocolate will not hold and will just fall off. Dip the strawberries in the tinted chocolate, do not cover the leaves. Allow to dry on wax paper and using a knife, make rough lines on the dry chocolate to create a 'carrot' like look.
Making the Carrot Patch Chocolate Cupcakes
After the cupcakes have been baked, leave to cool and make a round little dent with a knife, in which to place the 'carrot'. Using a palette knife, spread the chocolate icing over the cupcake and around the dent. Place the 'carrot' in the dent and sprinkle on the crushed Oreos. You can decorate it with little flowers as well if you like.
I hope you have lots of fun creating your own Carrot Patch Chocolate Cupcakes.
Enjoy ♥
Carrot Patch Chocolate Cupcakes

FOR THE CHOCOLATE CUPCAKES
- 125 ml canola or sunflower oil
- 200 ml / 200g white sugar
- 3 eggs
- 2 Tablespoons / 30ml smooth apricot jam
- 250 ml boiling water
- 10 ml / 2 teaspoons instant coffee granules
- 500 ml / 280g self raising flour
- 5 ml / 1 teaspoon bicarbonate of soda / baking soda
- 2 ml salt
- 45 ml / 3 Tablepoons cocoa powder
FOR THE CHOCOLATE BUTTERCREAM
- 100 g butter or margarine
- 500 ml / 280g sifted powdered / icing sugar
- 60 ml / 25g cocoa powder
- About 30ml milk
ORANGE TINTED CHOCOLATE
- 80 g White chocolate
- Orange gel powder or oil based tint
- 12 crushed Oreos
CHOCOLATE CUPCAKES
- Beat oil and sugar together. Add eggs one at a time, beating after each addition, until item fluffy and add the apricot jam.
- Add the coffee granules to the boiling water and allow to cool for 5 minutes.
- Sift the flour, bicarbonate of soda, salt and cocoa powder together, add to cream mixture.
- Add the coffee mixture and beat well.
- Spoon into cupcake cases, and bake at 180°C for 15 minutes until a skewer inserted comes out clean.
- Leave to cool completely on a cooling rack
CHOCOLATE BUTTERCREAM
- Cream the butter and powdered / icing sugar together. Mix the cocoa powder with hot water until smooth and add to icing
- Add just enough milk to create a smooth spreadable consistency
- Using a palette knife spread icing over cupcake
TINTING THE CHOCOLATE
- Melt your white chocolate in the microwave or double boiler checking on it every 20 seconds to ensure it does not burn. Add your orange oil based, gel or powder tint to the chocolate, just a drop at a time, until you get your desired colouring. Just a reminder, please do not use a water based colouring, and make sure that all your utensils are dry.
CHOCOLATE CARROTS
- Wash and dry the strawberries completely. If they are not dry the chocolate will not hold and will just fall off. Dip the strawberries in the tinted chocolate, do not cover the leaves. Allow to dry on wax paper and using a knife, make rough lines on the dry chocolate to create a 'carrot' like look.
ASSEMBLING THE CARROT PATCH CUPCAKES
- After the cupcakes have been baked, leave to cool and make a round little dent with a knife, in which to place the 'carrot'. Using a palete knife, spread the chocolate icing over the cupcake and around the dent. Place the 'carrot' in the dent and sprinkle on the cruhed Oreos.


Anne says
Such a cute idea! I love the use of the strawberries as carrots.
Kelsie | the itsy-bitsy kitchen says
Ashika, these cupcakes are just adorable! Those little carrots--I can't believe they're strawberries, they totally look like the real thing :). I want to come to your Easter celebration because I don't think my cupcakes would look nearly so perfect! Have a great week, my dear!
neil@neilshealthymeals.com says
Using a chocolate covered strawberry as a carrot is a brilliant idea, I'd have never thought of that!
As I've said before Ashika, you should be making and selling these!
The Gardening Foodie says
Thank you for the great compliment Neil, haha the only problem will be building up stock to sell, it gets eaten way too fast here ?
Kelly @ Kelly Lynns Sweets and Treats says
These are ADORABLE!! Almost too cute to eat. But they are chocolate so you know I’m going to eat them hehehehe 🙂
The Gardening Foodie says
Haha, Thank you Kelly, they are waaaaay to delicious to resist 🙂
Matt says
What a fun idea! The strawberries really do look like tiny little carrots and I bet they give a satisfying taste with the whole cupcake! What an awesome easter/springtime recipe! Has me thinking of warmer weather! Thanks for sharing! 🙂
The Gardening Foodie says
Thank you Matt, wishing warmer weather to your part of the world soon 🙂
Katherine | Love In My Oven says
You are a genius! I can't believe those carrots are strawberries. That is TOO cute - and I"m definitely stealing that idea 😉 These are terrific - so perfect for Easter!
The Gardening Foodie says
Haha..Thank you Katherine, I had so much fun making these, and they taste so good too 🙂
Maria | kitchenathoskins says
These are way too adorable Ashika!!! Strawberry carrots are so darn cute, what a brilliant idea:) I just showed these to my son and he wants to make them right away.
The Gardening Foodie says
Thank you Maria, I hope that you and your son get to try these cupcakes out too 🙂
annie@ciaochowbambina says
These are the CUTEST! I love those carrots! A perfect treat to have out for the bunny! 😉
The Gardening Foodie says
Haha, they were so fun to make...Thank you Annie 🙂
Leanne | Crumb Top Baking says
These are the cutest Ashika! Such a creative Easter treat!
The Gardening Foodie says
Thank you Leanne 🙂
2pots2cook says
So nice .... Thank you for the beauty ! Pinning and keeping !
The Gardening Foodie says
Thank you so much, and you are welcome 🙂
Emma - Bake Then Eat says
So cute, and some great tips for working with white chocolate.
The Gardening Foodie says
Thank you Emma 🙂