These soft homemade pita breads puff into beautiful pockets and cook right on the stovetop. They're light, fluffy, and perfect for stuffing with your favorite fillings. Made with everyday ingredients, they're easy to prepare and stay soft for up to 3 days.

Step by step photos
These visual instructions help you see the process. You can also find the full printable recipe with ingredient amounts and instructions at the end of the post.
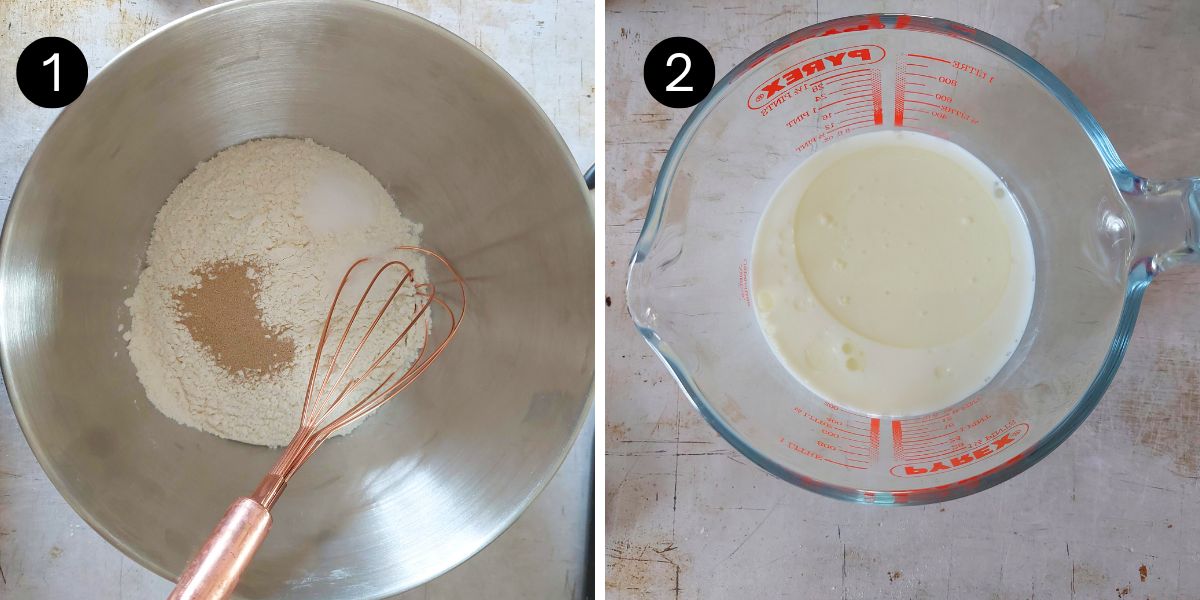
- Flour mixture: Whisk together the flour, sugar, salt, and instant yeast in a large bowl.
- Milk mixture: In a separate jug or small bowl, combine the warm water, warmed milk and oil.
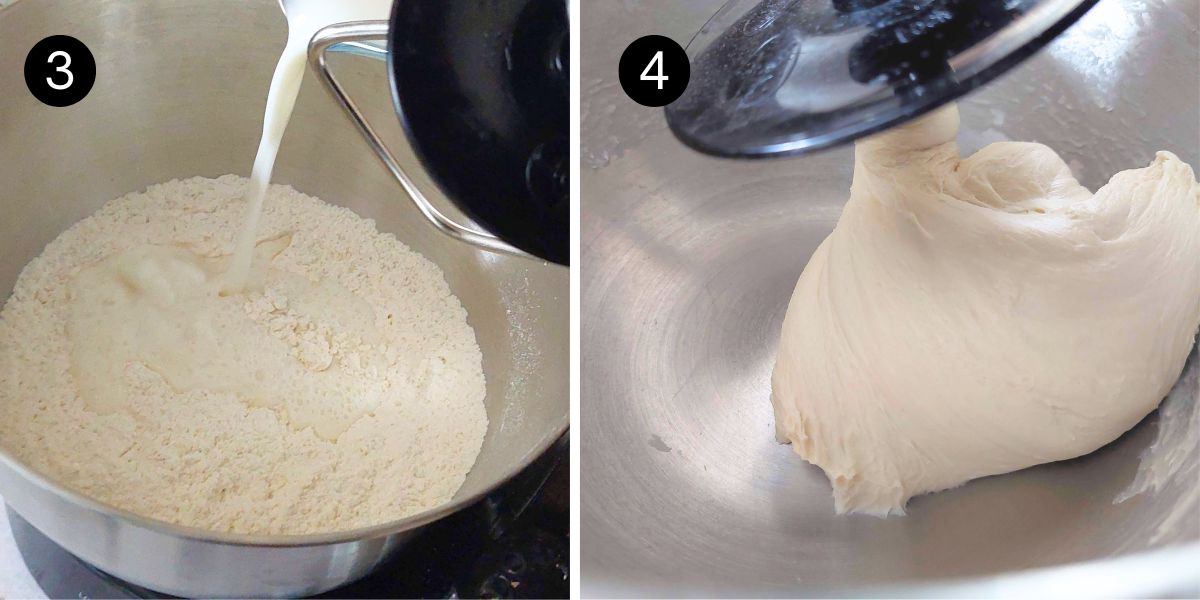
- Pour the warm milk mixture into the bowl with the flour mixture.
- Knead with a stand mixer fitted with the dough hook for 5 to 6 minutes, until the dough is smooth and elastic.
If kneading by hand, turn the dough onto a lightly floured surface and knead for 6 to 8 minutes, dusting with a little flour as needed until smooth and elastic.
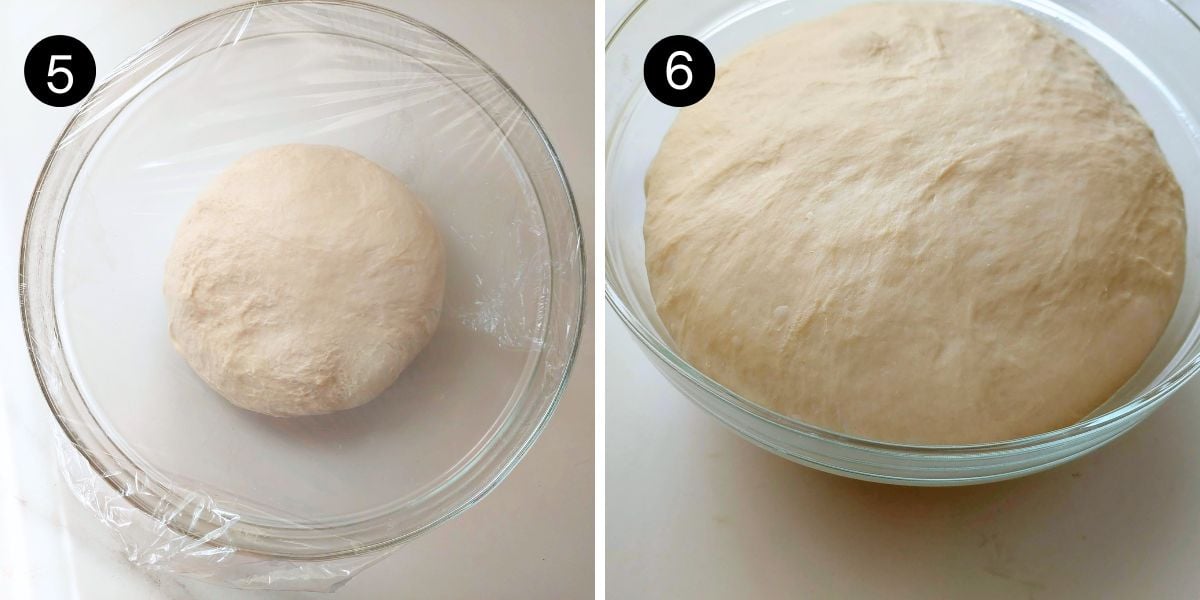
- Lightly oil a bowl, place the dough inside, cover with plastic wrap, and let rise for 45 to 60 minutes, or until doubled in size.
- After rising, the dough should have doubled in size.
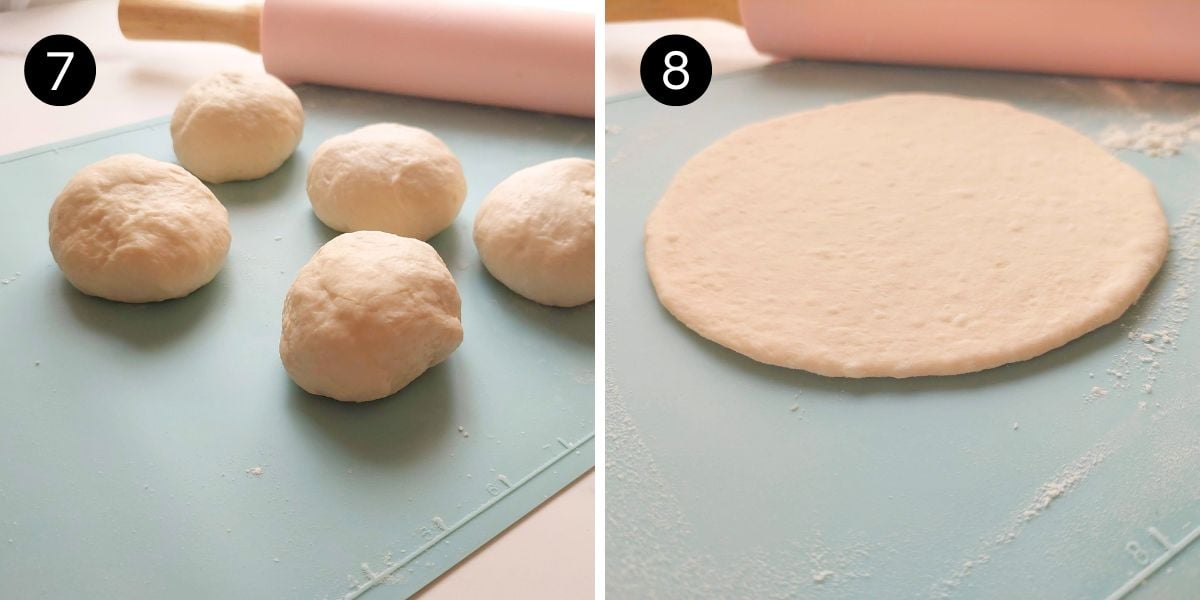
- Divide the dough into 6 equal pieces. Shape each piece into a smooth ball.
- Roll each ball into a 6-inch (15 cm) circle
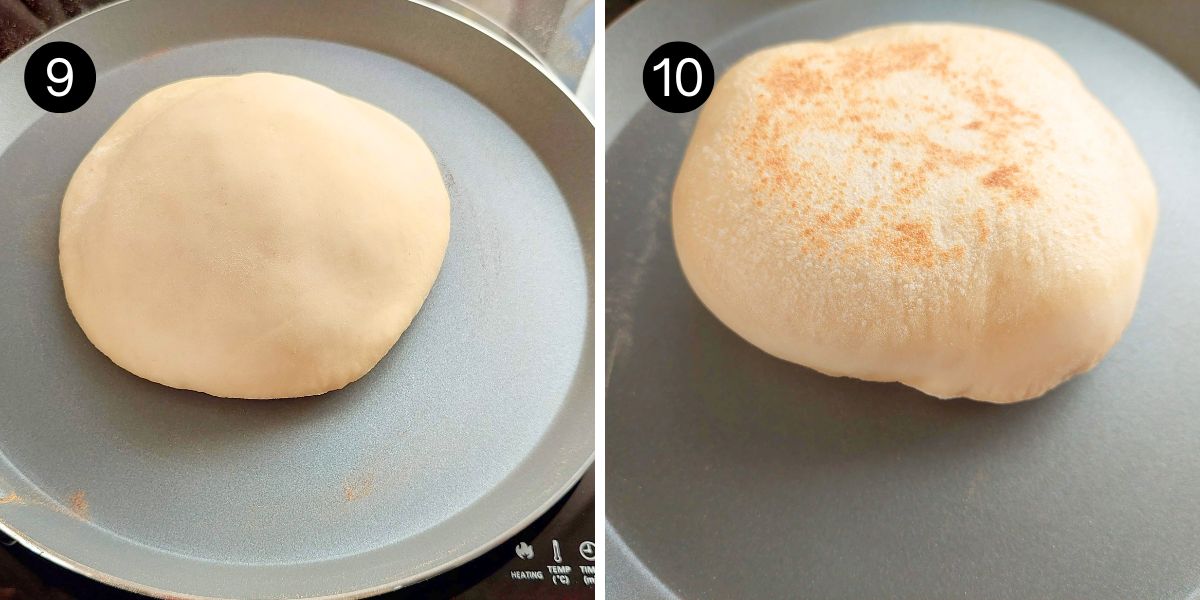
- Heat a large non-stick or cast-iron skillet over medium heat. Cook one pita for 1 to 2 minutes, until it begins to puff.
- Flip and cook for 1 to 2 minutes, until lightly browned. If needed, flip once more and cook for a few more seconds. Transfer to a plate and cover with a clean kitchen towel while cooking the remaining pitas.
Storage
- Room temperature: Store in an airtight container at room temperature for up to 3 days.
- Freeze: Freeze in a freezer safe bag or container for up to 2 months. Thaw at room temperature.
- To reheat: Warm in a dry skillet over medium heat for 20 to 30 seconds per side, or microwave for 10 to 15 seconds until soft.
Recipe tips
- Yeast: I used instant yeast (also labeled rapid-rise or fast-rising yeast). If using active dry yeast, stir it into the warm water and sugar from this recipe. Let it stand for 5 to 10 minutes, or until foamy. Then add the yeast mixture to the flour with the warm milk and oil, and continue with the recipe.
- Warm liquids: The water and milk should be between 100°F and 110°F (38°C to 43°C).
- Kneading by hand: The dough is soft and slightly sticky. Turn it onto a lightly floured surface and knead for 6 to 8 minutes, dusting with a little flour as needed until smooth and elastic.
- Roll evenly: Roll each piece into a 6-inch (15 cm) circle, keeping the thickness as even as possible for even cooking and puffing.
- Cook over medium heat: If the skillet is too hot, the pitas may brown before they have time to puff. Adjust the heat as needed.
- Keep them soft: Cover the cooked pitas with a clean kitchen towel while cooking the remaining pitas.
Recipe
Soft Pita Bread (Stovetop)
- 2½ cups (300 g) all purpose flour (plain flour)
- 1 teaspoon (6 g) salt
- 1 teaspoon (4 g) white granulated sugar
- 1 teaspoon (5 g) instant yeast (rapid rise)
- ½ cup (120 ml) warm water (100°F to 110°F / 38°C to 43°C)
- ½ cup (120 ml) warm milk (100°F to 110°F / 38°C to 43°C)
- 1 tablespoon (15 ml) vegetable or canola oil
- Flour mixture: In a large bowl, whisk together the flour, salt, sugar, and instant yeast.
- Milk mixture: In a measuring jug or small bowl, combine the warm water, warm milk, and oil.
- Pour the milk mixture into the flour mixture.
- Knead with a stand mixer fitted with the dough hook for 5 to 6 minutes, until the dough is smooth and elastic. If kneading by hand, turn the dough onto a lightly floured surface and knead for 6 to 8 minutes, dusting with a little flour as needed until smooth and elastic.
- Lightly oil a large bowl. Place the dough in the bowl, cover with plastic wrap or a clean kitchen towel, and let rise in a warm place for 45 to 60 minutes, or until doubled in size.
- Turn the dough onto a lightly floured surface and divide into 6 equal pieces. Shape each piece into smooth balls.
- Roll each ball into a 6-inch (15 cm) circle, keeping the thickness as even as possible.
- Heat a nonstick skillet over medium heat. Cook one pita for 1 to 2 minutes, until it begins to puff.
- Flip and cook for 1 to 2 minutes, until lightly browned. If needed, flip once more and cook for a few more seconds. Transfer to a plate and cover with a clean kitchen towel while cooking the remaining pitas.
- Transfer to a plate and cover with a clean kitchen towel while cooking the remaining pitas.
Storage
- Store cooled pita bread in an airtight container at room temperature for up to 3 days. Reheat in a dry skillet or microwave until soft.
Hungry for more?
Sign up for my free newsletter to get emails about new recipes .And don't forget to follow me on YouTube, Facebook, Pinterest, and Instagram for all the latest deliciousness.


linda says
can you use gluten free in these
The Gardening Foodie says
Hi Linda, sorry I have not tried this recipe with gluten free flour, so not sure how it will turn out.