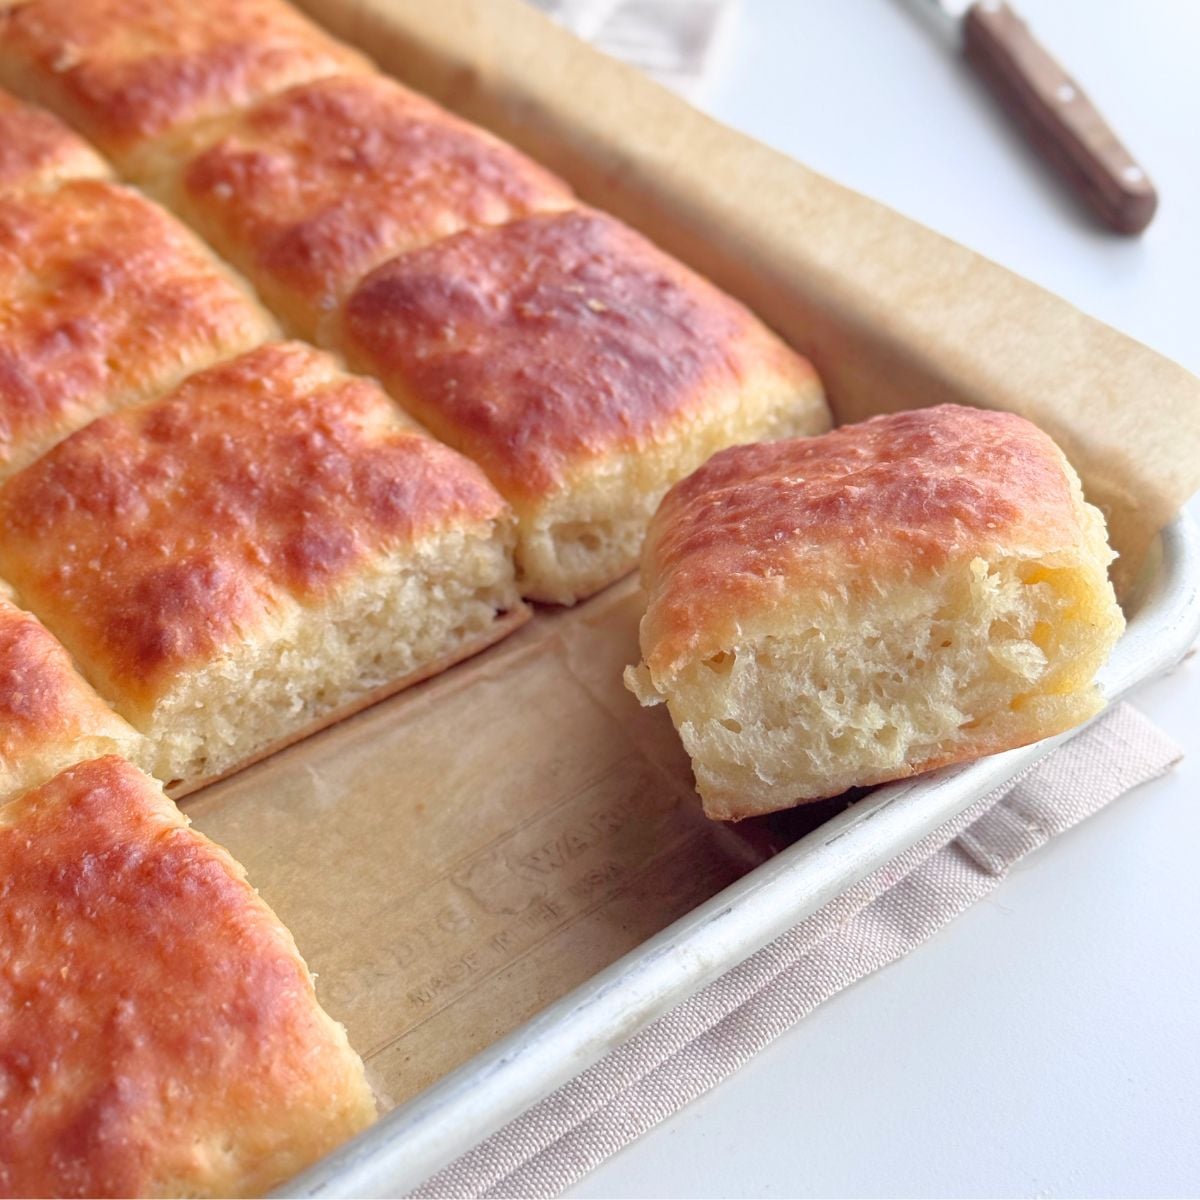
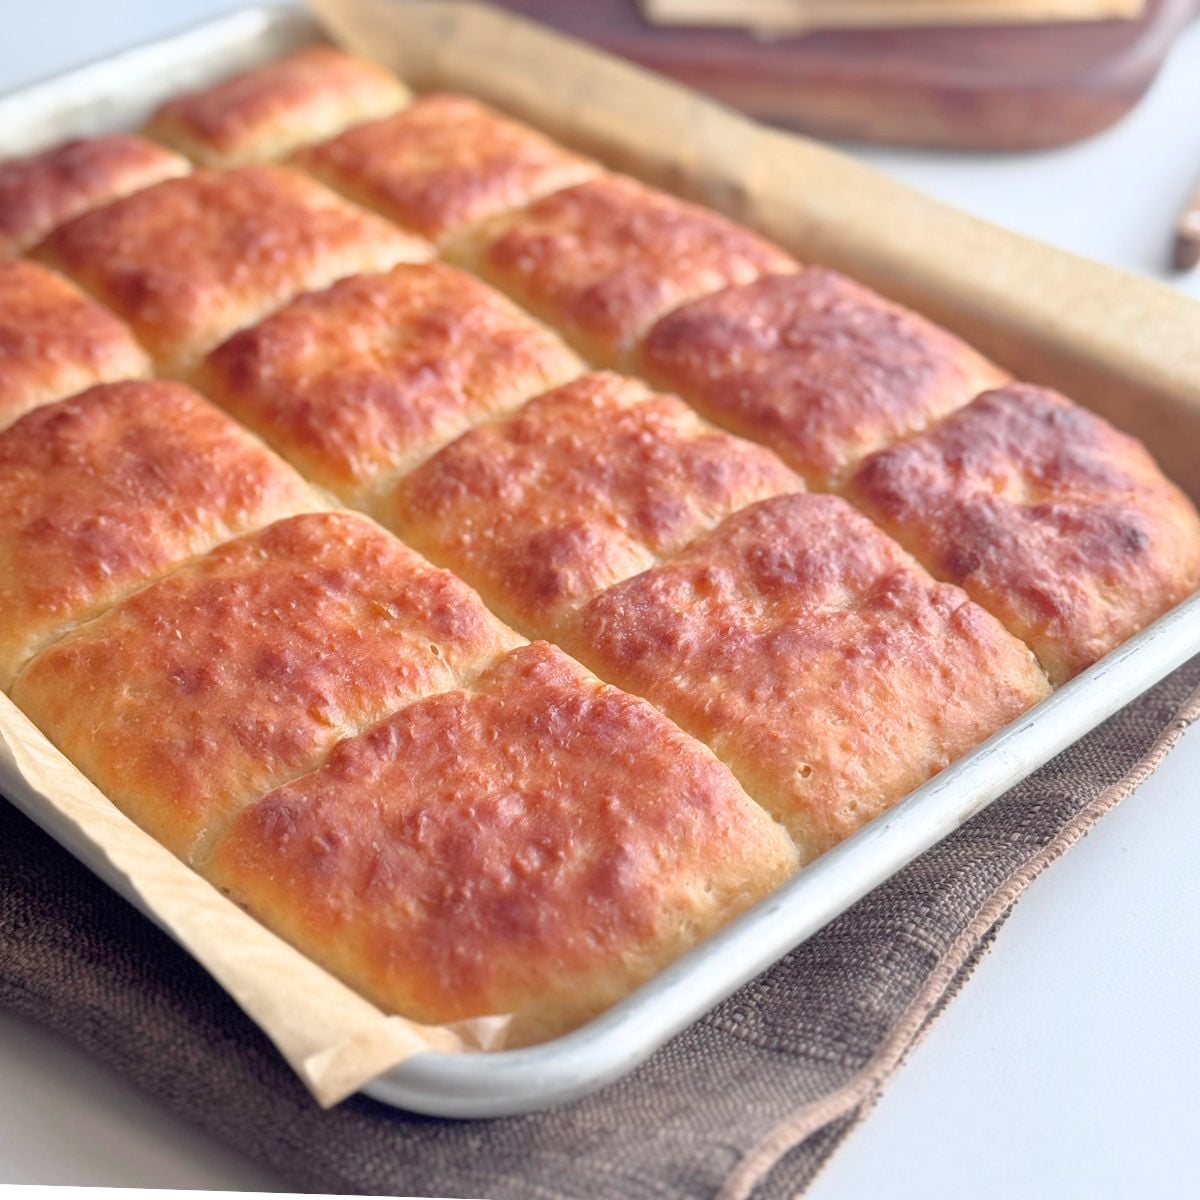
These no-knead buttermilk pull-apart rolls are soft, fluffy, and baked together in one pan. No kneading, no shaping each roll by hand. Just press the dough into the pan, cut into squares, and bake.
Step by step photos
These visual instructions help you see the process. You can also find the full printable recipe with ingredient amounts and instructions at the end of the post.
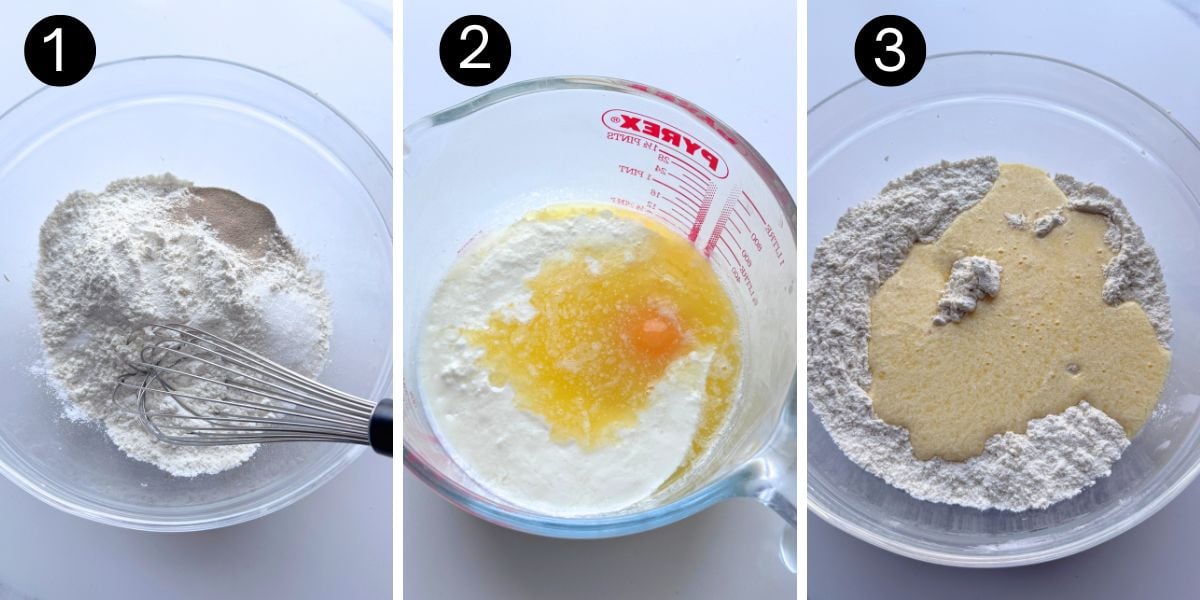
- Flour mixture: Whisk together the flour, instant yeast, salt, and sugar in a large bowl.
- Buttermilk mixture: In a separate jug, whisk together the warm buttermilk, warm milk, melted butter, and egg.
- Pour the buttermilk mixture into the flour mixture.
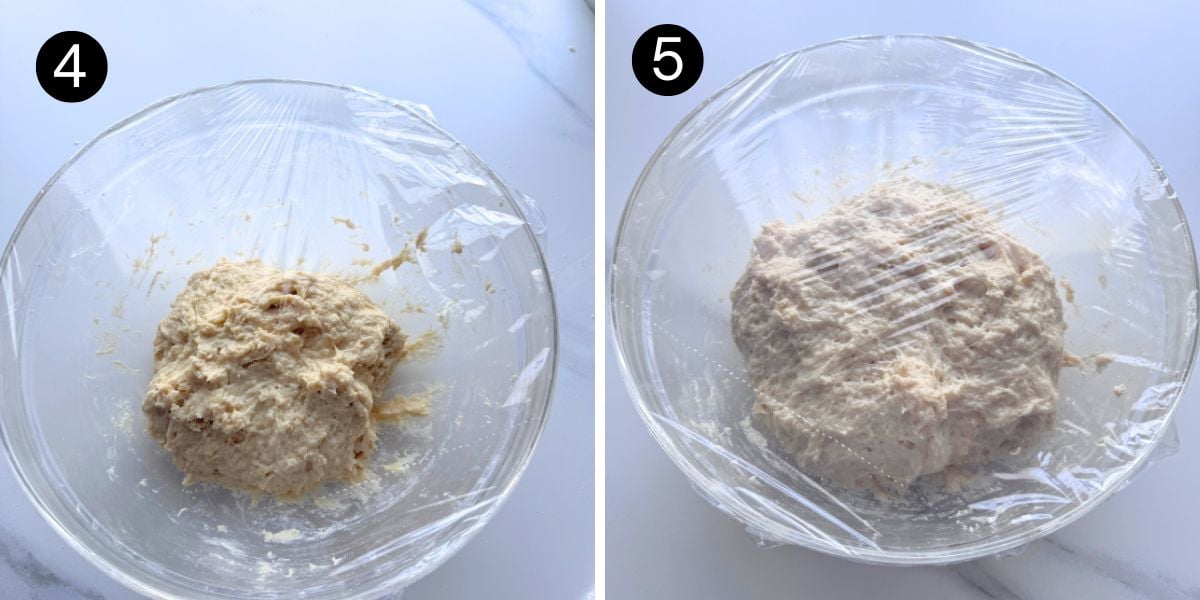
- Stir with a spatula or dough whisk until a soft sticky dough forms. Cover the bowl and leave the dough to rise for 50-60 minutes.
- The dough should look puffed up and about doubled in size.
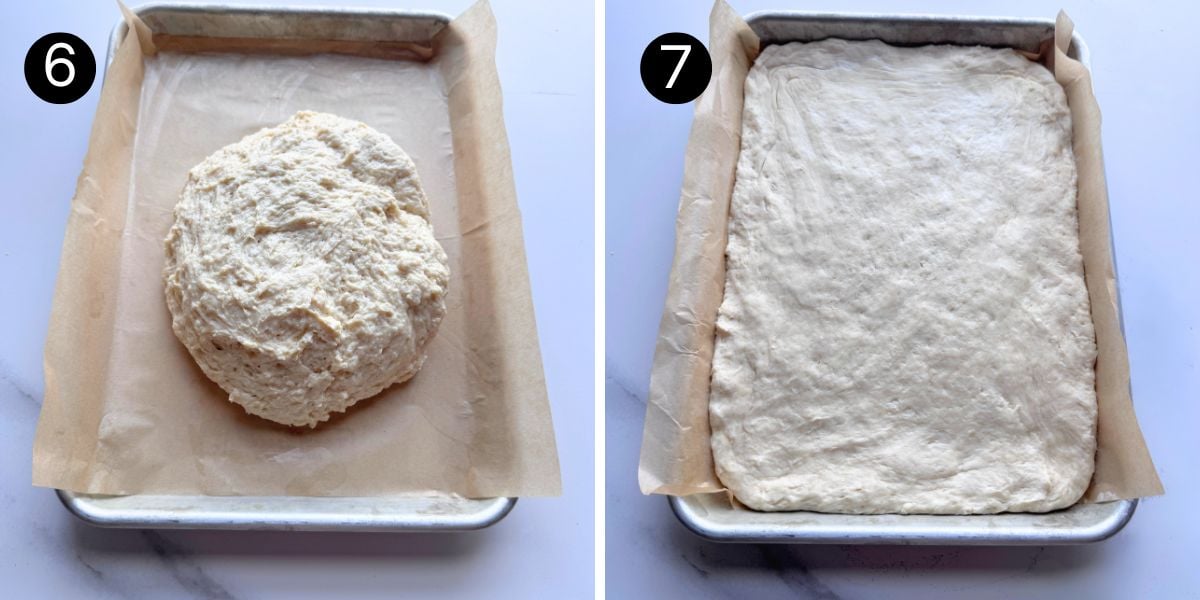
- Line a quarter sheet pan or 9 x 13-inch (23 x 33 cm) baking pan with parchment paper. Turn out the risen dough into a pan
- Gently press the dough out until it fills the base of the pan.
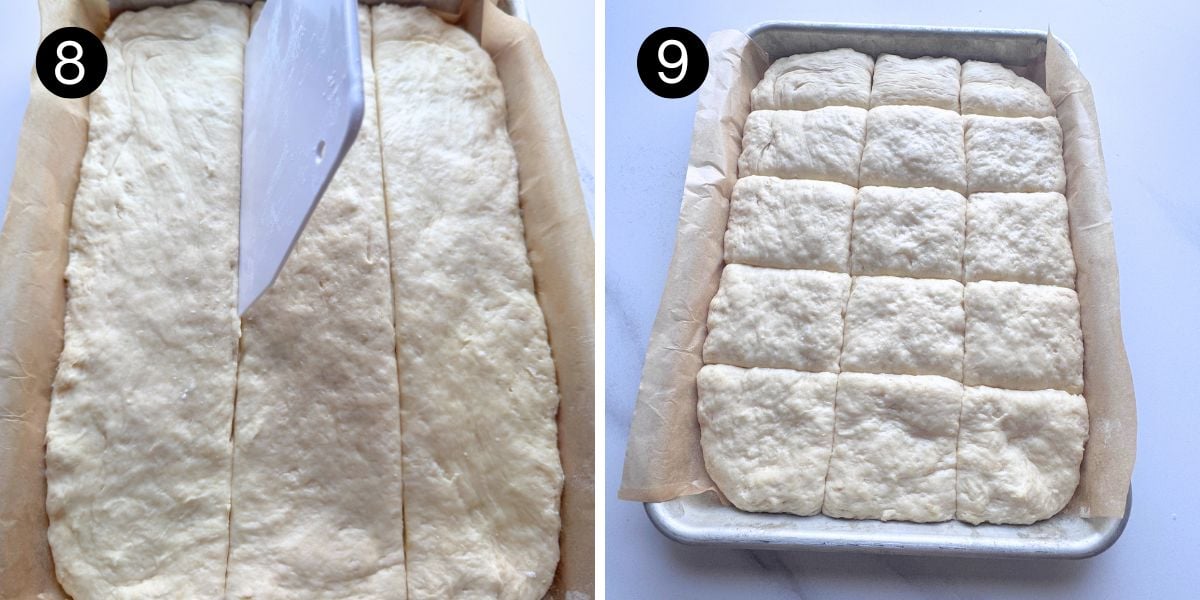
- Use a floured bench scraper or sharp knife to press/cut across the short side into 3 strips.
- Cut 5 rows in the other direction to make 15 squares. Do not lift or separate the pieces after cutting. Let rise 30-40 minutes until puffy before baking.
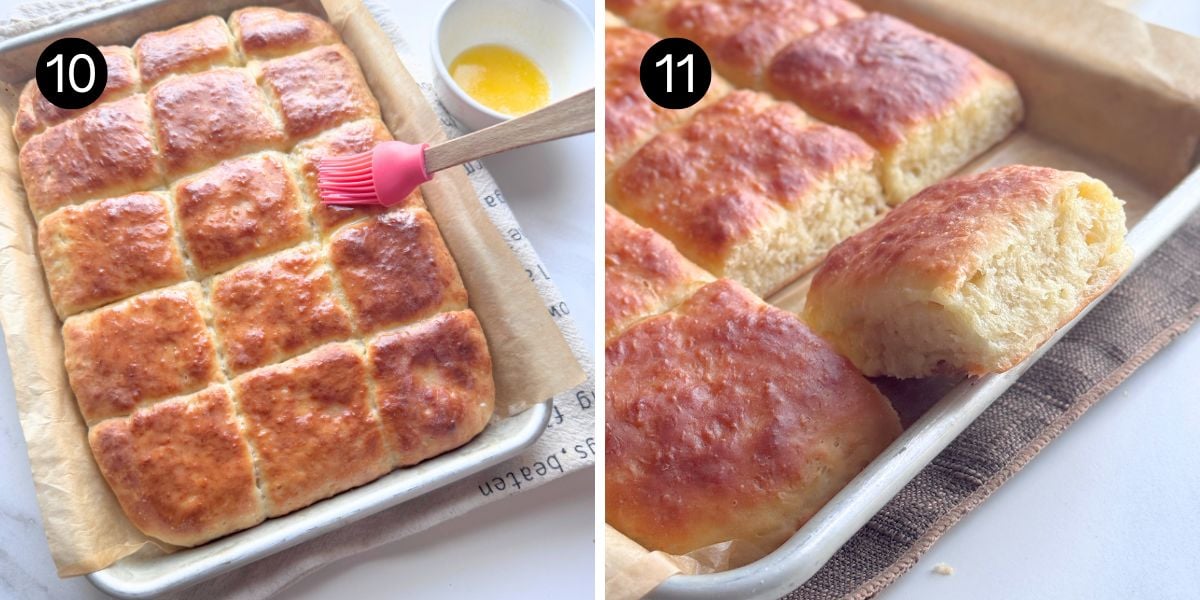
- Bake for 20 -25 minutes, remove from the oven, then brush the warm rolls with melted butter.
- Let the rolls cool in the pan for about 5 minutes before pulling apart.
Storage
- These rolls are best enjoyed the day they are made, while still soft and fresh.
- If you do have leftovers, store them in an airtight container at room temperature for up to 2 days. Warm for a few seconds in the microwave or a few minutes in the oven before enjoying.
Make ahead options
To make the dough ahead, mix the dough, cover the bowl tightly, and refrigerate for up to 12 hours. When ready to continue, let the dough rest at room temperature for 30–45 minutes, then gently turn it into the prepared pan. Press, cut, rise, and bake as directed.
Buttermilk substitutes
This recipe uses ¾ cup (180 ml) buttermilk and ¼ cup (60 ml) warm milk. The extra milk stays in the recipe, even if you use a substitute for the buttermilk.
Milk and lemon juice or vinegar
- To replace the buttermilk, mix ¾ cup (180 ml) milk with 2 teaspoons lemon juice or white vinegar.
- Let it stand for 5 minutes, then use it in place of the buttermilk.
- Continue with the recipe as written, including the extra ¼ cup (60 ml) warm milk.
Yogurt
- To replace the buttermilk, mix ½ cup (120 g) plain yogurt with ¼ cup (60 ml) milk until smooth and pourable.
- Use this mixture in place of the buttermilk. Continue with the recipe as written, including the extra ¼ cup (60 ml) warm milk.
- If using thick Greek yogurt, add a little extra milk until the mixture is pourable. The dough may be slightly thicker, but the rolls will still work.
Real buttermilk gives the rolls the softest texture and best flavor, but these substitutes can be used if you do not have buttermilk. The rolls may have a slightly milder flavor than when made with real buttermilk.
Choosing the right pan
A 9 x 13-inch (23 x 33 cm) baking pan or quarter sheet pan works best for these rolls. Press the dough to about 8 x 12 inches (21 x 30 cm), or almost to the inner edges of your pan. Each roll will be roughly 2¾ x 2½ inches (7 x 6 cm), depending on your pan.
- If your pan is slightly smaller, the rolls will sit closer together and may bake a little taller. They may need a few extra minutes in the oven.
- If your pan is larger, do not spread the dough to fill the whole pan. Keep the dough around 8 x 12 inches (21 x 30 cm) and cut it into 15 squares so the rolls stay close together and bake into pull-apart rolls.
Recipe tips
- Do not punch down the dough. After the first rise, gently turn the dough into the prepared pan.
- Use lightly floured or oiled hands. The dough is soft and sticky. A light dusting of flour, or a thin coating of oil on your hands, makes it easier to press the dough into the pan.
- Cut straight down. Use a lightly oiled or floured bench scraper or sharp knife to press straight down into the dough. Lift straight up instead of dragging, so the squares stay neat.
- Do not lift or separate the pieces. After cutting, leave the dough in place so the rolls rise and bake together.
- Let the second rise go by look. The rolls should look puffy and the cut lines should soften before baking. If your kitchen is cool, this may take a little longer.
- Cover with foil if needed. If the tops brown too quickly, loosely cover the pan with foil and continue baking until the rolls are baked through.
- Brush with butter while warm. Brush the rolls as soon as they come out of the oven to keep the tops soft and buttery.
Recipe
No-Knead Buttermilk Pull-Apart Rolls (No Shaping)
Watch how to make the recipe
Dough
- 3 cups (360 g) all-purpose flour (plain flour)
- 2¼ teaspoons (8 g) instant yeast
- 1 teaspoon (6 g) salt
- 2 tablespoons (25 g) white granulated sugar
- ¾ cup (180 ml) warm buttermilk
- ¼ cup (60 ml) warm milk
- 1 large egg (room temperature) room temperature
- 3 tablespoons (45 g) butter, melted
Butter Topping
- 2 tablespoons 30 g butter, melted
- Flour mixture: In a large bowl, stir together the flour, yeast, salt, and sugar.
- Buttermilk mixture: In another bowl or measuring jug, whisk together the warm buttermilk, warm milk, melted butter, and egg. The buttermilk and milk should be just lukewarm, about 100–105°F (38–40°C). If the buttermilk looks slightly separated after warming, just whisk it before using.
- Pour the buttermilk mixture into the flour mixture.
- Stir with a spatula or dough whisk until a soft, sticky dough forms. The dough will look very soft and sticky at this stage. This is normal.
- Cover the bowl and let the dough rise for 50–60 minutes, or until doubled in size.
- Line a quarter sheet pan or 9 x 13-inch (23 x 33 cm) baking pan with parchment paper.
- Lightly oil or flour your hands. Gently turn the risen dough into the prepared pan. Do not punch it down.
- Gently press the dough out until it almost fills the base of the pan, about 8 x 12 inches (21 x 30 cm), or almost to the inner edges.
- Use a floured bench scraper or sharp knife to press/cut across the short side into 3 strips.
- Cut 5 rows in the other direction to make 15 squares. Once cut into 15 pieces, each roll will be roughly 2¾ x 2½ inches (7 x 6 cm), depending on your pan.Do not lift or separate the pieces after cutting. Leave them in place so they rise and bake together.
- Cover loosely and let the rolls rise for 30–45 minutes, or until puffy and the cut lines have softened.
- Adjust the oven rack to the middle position and preheat the oven to 340°F (170°C).
- Bake for 20–24 minutes, or until the rolls are golden brown and baked through. If the tops brown too quickly, loosely cover with foil and continue baking.
- Brush the warm rolls with melted butter as soon as they come out of the oven.
- Let the rolls cool in the pan for about 5 minutes before pulling apart and serving.
- The dough should be very soft and slightly sticky after mixing. Avoid adding too much extra flour, or the rolls may lose their fluffy texture.
- A bench scraper works best for cutting the dough because it presses straight down without dragging. A sharp knife can also be used.
- See post above for
- step-by-step photos,
- pan size ,
- recipe tips,
- buttermilk substitutes, and
- make-ahead options
Hungry for more?
Sign up for my free newsletter to get emails about new recipes .And don't forget to follow me on YouTube, Facebook, Pinterest, and Instagram for all the latest deliciousness.


Leave a Reply