Wouldn't it be great propagating your own strawberries? Here I show you just how easy it really is.
Strawberries make a great addition to your garden. This is one of my favourite garden plants from its beautiful fan-shaped leaves and stunning pink or white flowers to its aromatic and juicy fruit.
There are two ways in which I grow my strawberry plants.
Growing strawberries by runners
The first and the easiest method is by runners. This is the best method and guarantees 100% success in getting a new strawberry plant, but you have to get or have an established plant before doing this.
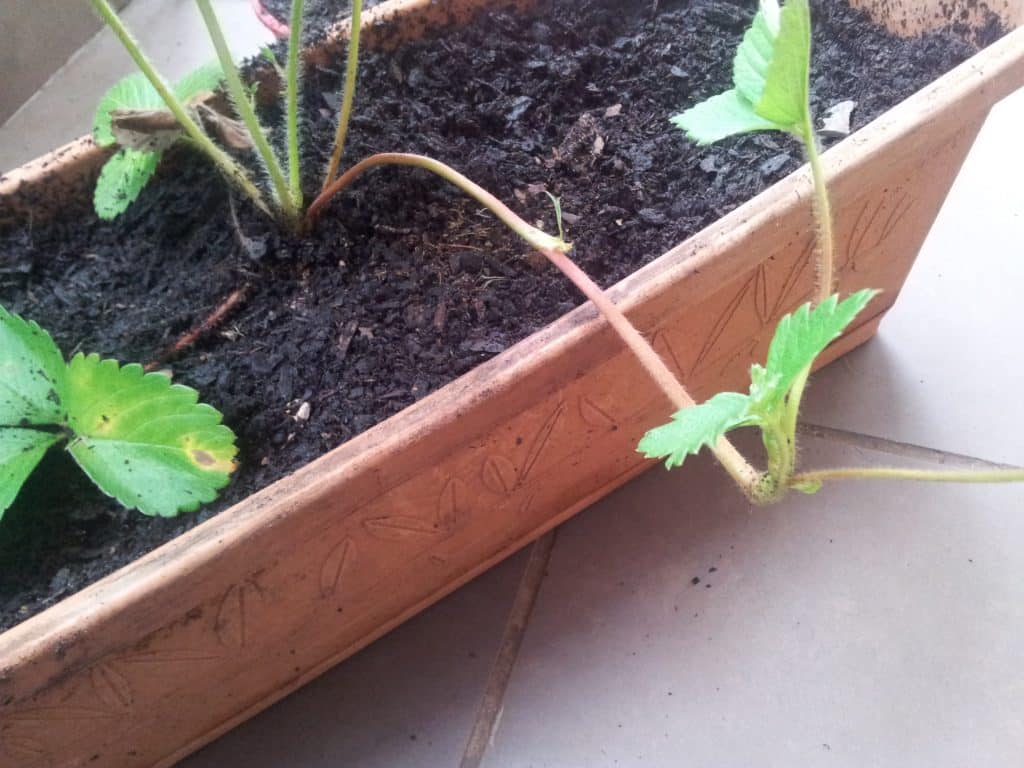
Strawberry plants give off several runners. These are the horizontal stems attached to the plant which has a new plant emerging at the end. These runners will develop roots to contact the soil and form a beautiful new plant.
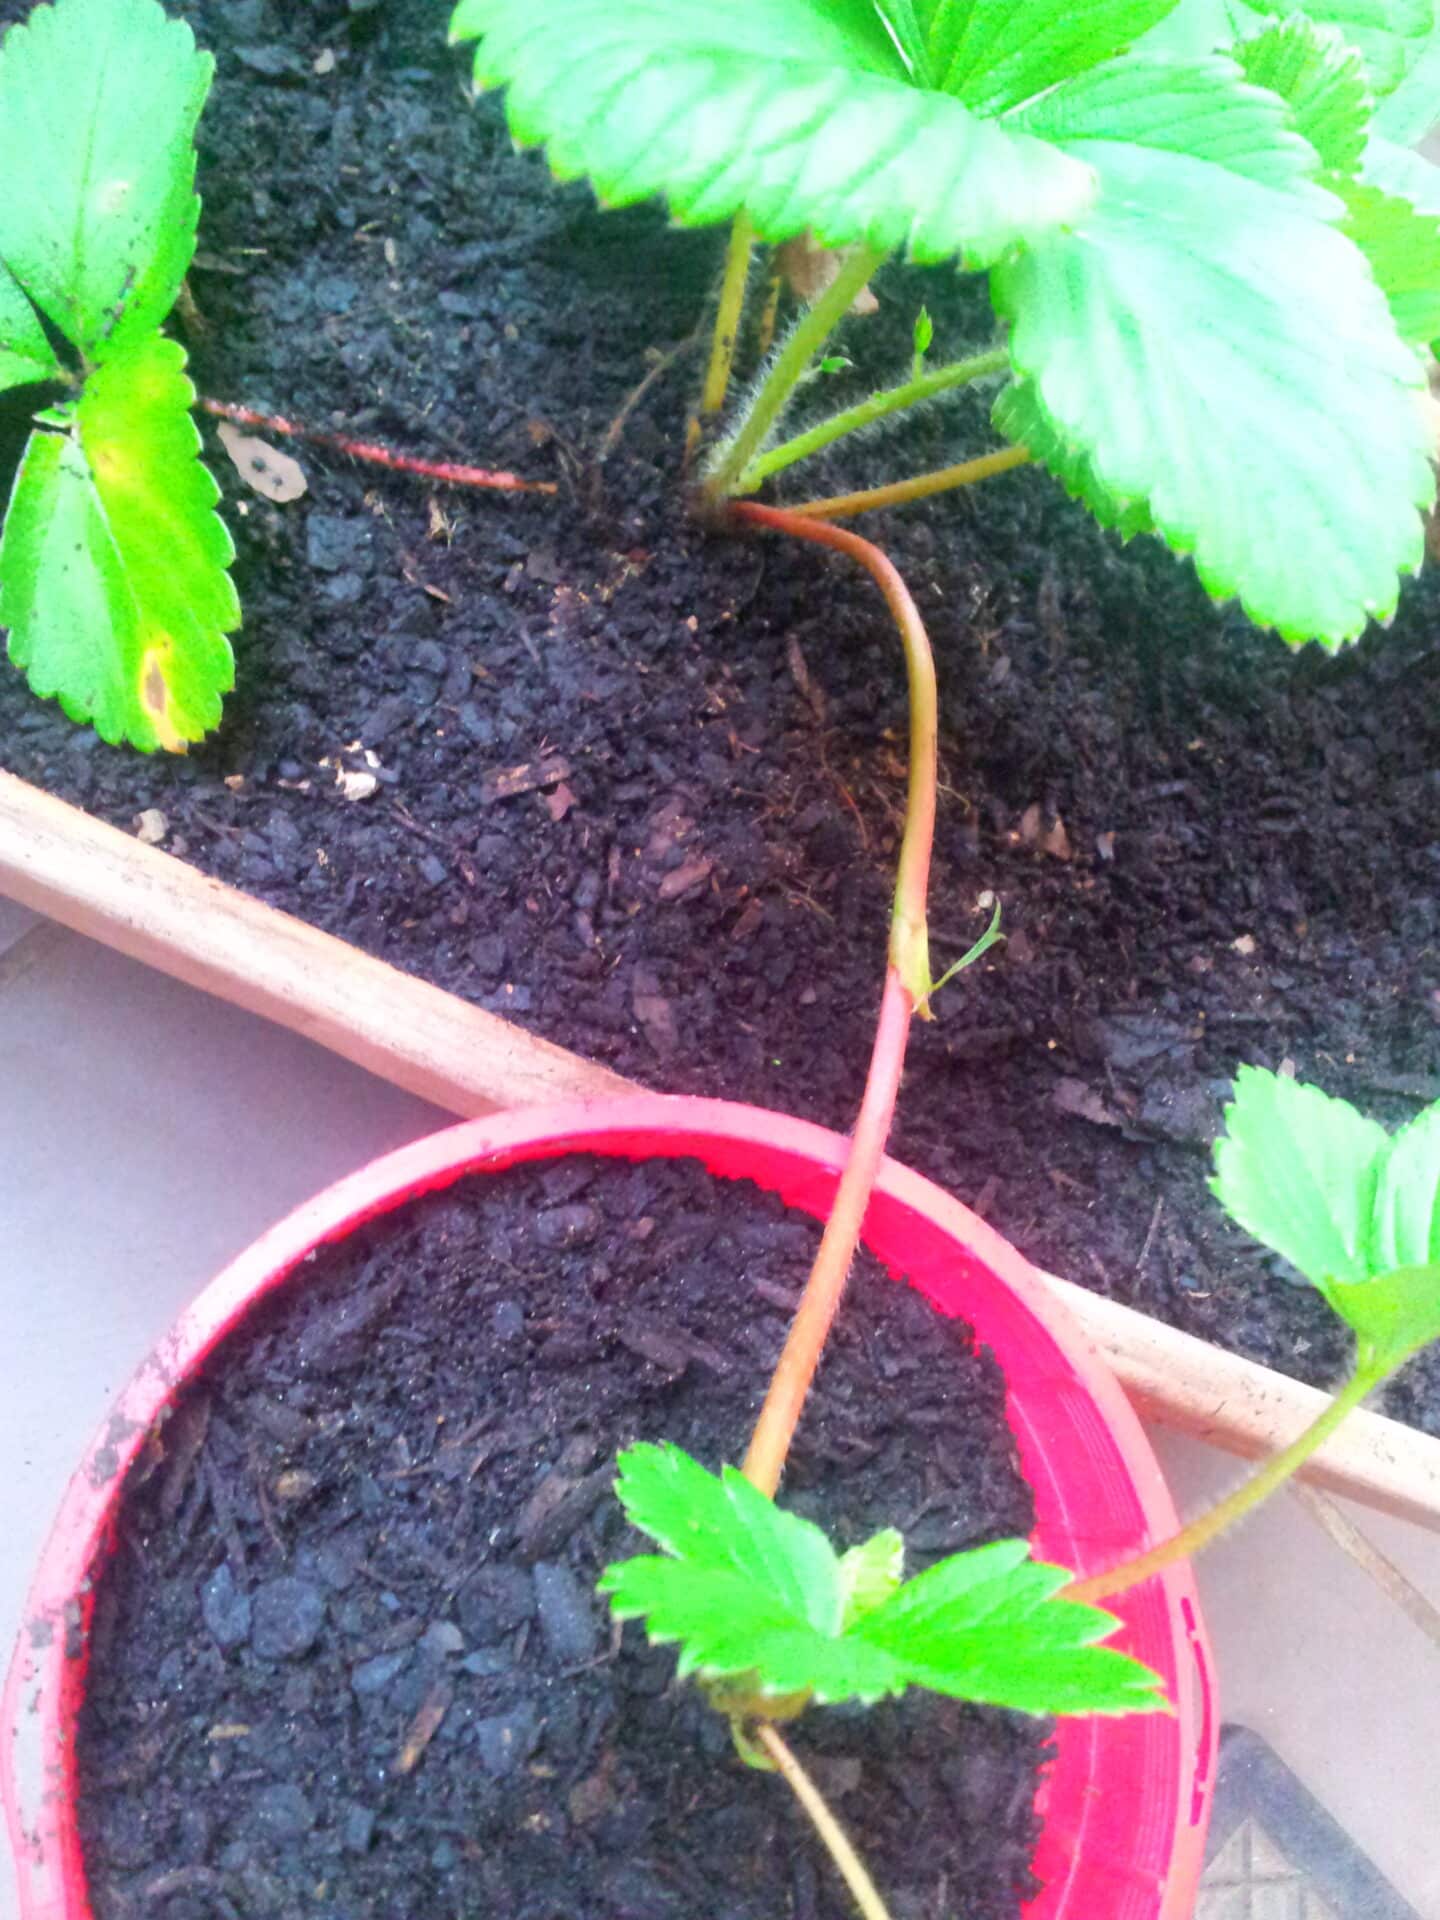
All that you have to do is place the end of the runner, with the leaves attached, into a new pot filled with potting soil and compost.
Keep the two pots together for a few days, while the new plant develops its own roots. Always make sure that soil is kept moist in both pots.
Do not overwater as this causes the roots to rot and try not to get water on the leaves of the plant. This can cause a fungal disease on the leaves. Rather a water at the base of your plant.
The runner stem is cut once the new plant has developed roots. Continue to grow more plants in this way and you will have as many strawberry plants as you want.
Growing strawberries by seed
Next is by seed. You could get seeds from your garden centre. I find it difficult to get strawberry seeds in garden centers in my area so I use the seeds collected from either store-bought or my home-grown strawberries.
Some of the seeds from store-bought strawberries might not be viable and might not germinate. Many gardeners remove the seeds individually from the outer side of the strawberry,
I go the easy route and plant little slices of the strawberry into the soil, with the seeds still attached to it.
Here is how it is done
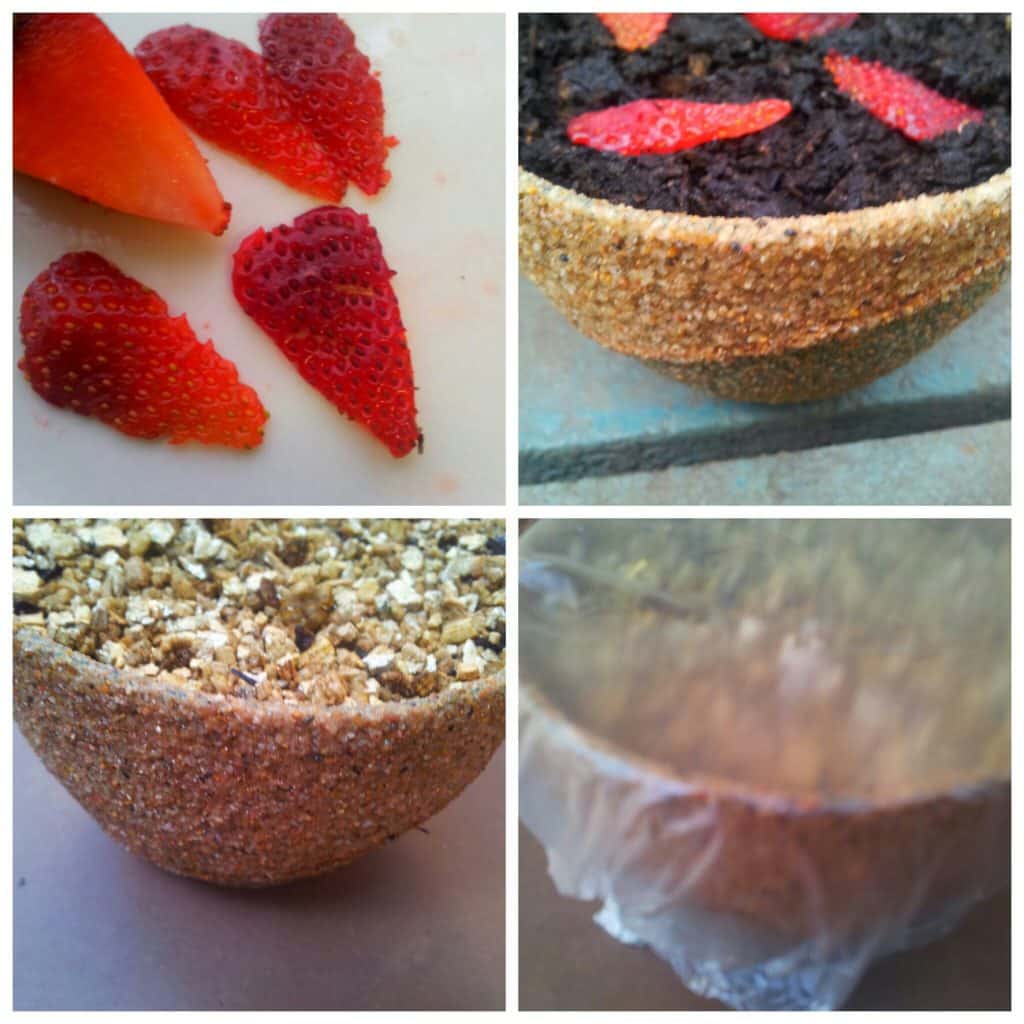 ✿ Cut slices off the strawberry with the seeds still attached.
✿ Fill a small pot or a seed starting flat tray with potting soil. Spray the soil with water to moisten it. Lay the slices flat on the soil in the pot or seed starting tray.
✿ Cover the slices with a thin layer of soil or vermiculite. Spray with a water bottle to moisten.
✿ Cover the pot with plastic wrap and place it in a warm area to germinate.
✿ Germination takes 2 to 8 weeks. Uncover the pot for about an hour, every second day. This is to allow air circulation and prevent the development of mould forming. Use a bottle with a spray nozzle to lightly spray the soil before covering it with the plastic wrap again. Do not place the pot in direct sunlight. Please be patient. Check daily for signs of sprouting, and remove the plastic wrap as soon as they appear.
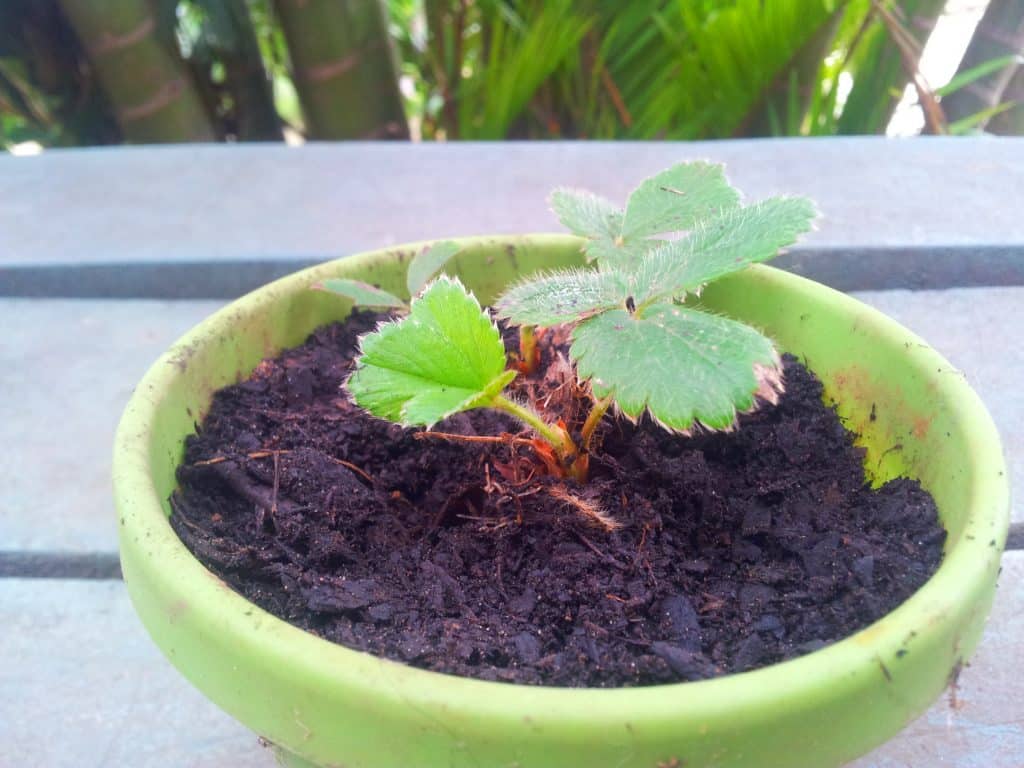
✿ In about 10 to 12 weeks you should have a few strawberry plants sprouting in the pot. once your plants have their 3 true leaves, they can be transplanted into their permanent place.
✿ Strawberries prefer a well-drained sandy loamy soil with organic fertilizer dug into it. Make sure that the soil is moist but not soggy.
✿Mulch with dry grass, straw or black plastic around the plant to keep it from drying out.
See, it's really simple. I would love to know which way you chose to grow your strawberries and which was the most successful.



James says
Thanks for sharing so useful information.
Nothing like growing your own fruits and veggies.
All the best and happy growing!!
Matthew Baez says
I didn't try to grow the strawberry plant at home yet. Thanks for sharing step by step instruction on this. I'll surely try this.
The Gardening Foodie says
Thank you Matthew...you are absolutely welcome 🙂
Mandy Morris says
Thanks so much for this information. It's great!
The Gardening Foodie says
Hi Mandy, Thank you and you are welcome 🙂
Connetta says
You give me confidence that I can do this..
Francisca says
Thanks for sharing.
Please within the 2-8weeks before seed germination starts, is there any need to water the set up again? Or do I just leave the plastic wrap in place
The Gardening Foodie says
Hi Francisca, You are welcome 🙂
To answer your question: I have updated the post to include the following information regarding the germination time:
Germination takes 2 to 8 weeks. Uncover the pot for about an hour, every second day. This is to allow air circulation and prevent the development of mould forming. Use a bottle with a spray nozzle to lightly spray the soil before covering it with the plastic wrap again. Do not place the pot in direct sunlight. Please be patient. Check daily for signs of sprouting, and remove the plastic wrap as soon as they appear.
Happy gardening 🙂
Francisca says
Great! Thanks a lot.