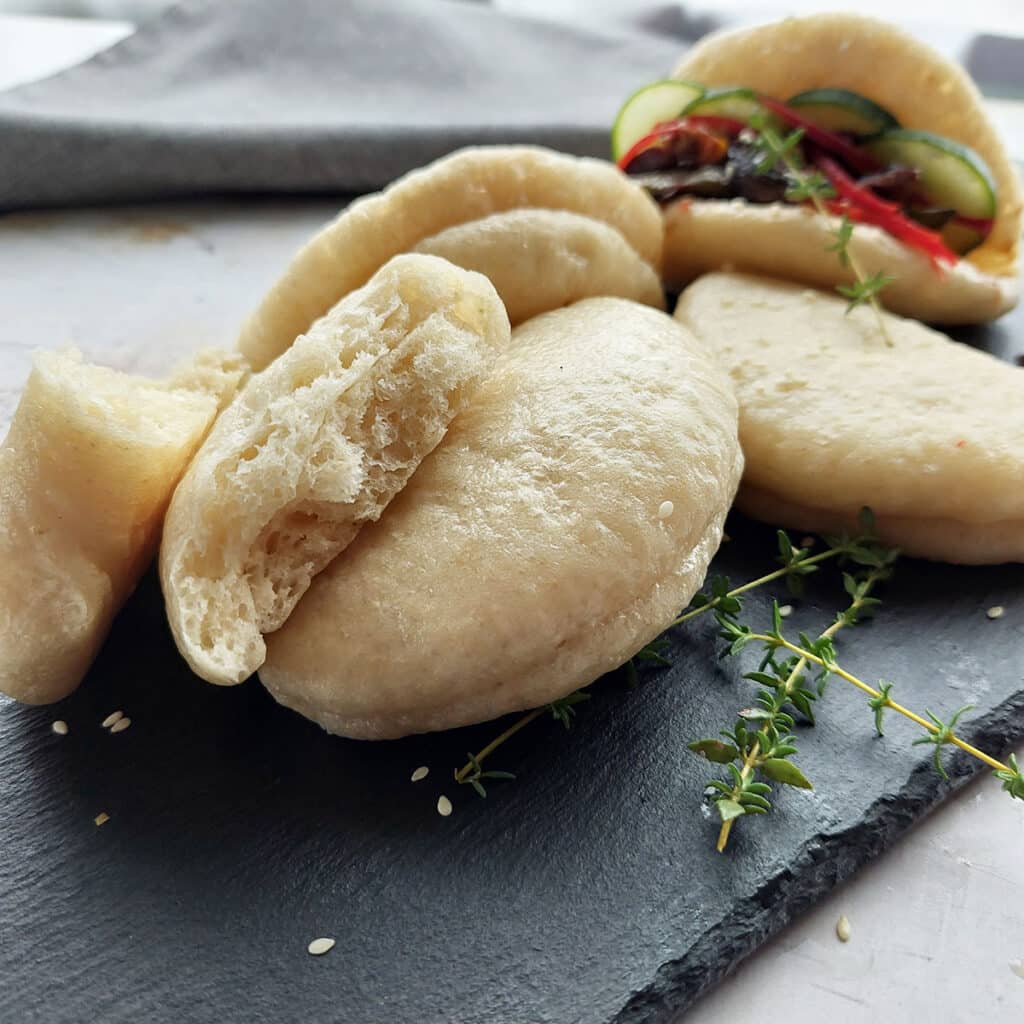
These No knead steamed buns (also known as Bao buns) are light, fluffy breads filled with your favorite meat, chicken or veggies.
Super easy to make, using 5 basic ingredients, these tender buns make the perfect alternative to sandwich bread.
This recipe has 2 great advantages. First its a no knead. Perfect if you not in the mood of hauling out your mixer or kneading by hand.
And second, it is not cooked in a traditional bamboo or metal steamer. Just grab a large wide skillet or pot, a plate and a shallow bowl. And you've got yourself a homemade steamer 🙂
I've included step by step pictures to help you through the process of the recipe as well as how to make a homemade steamer setup.
So what exactly are Steamed buns
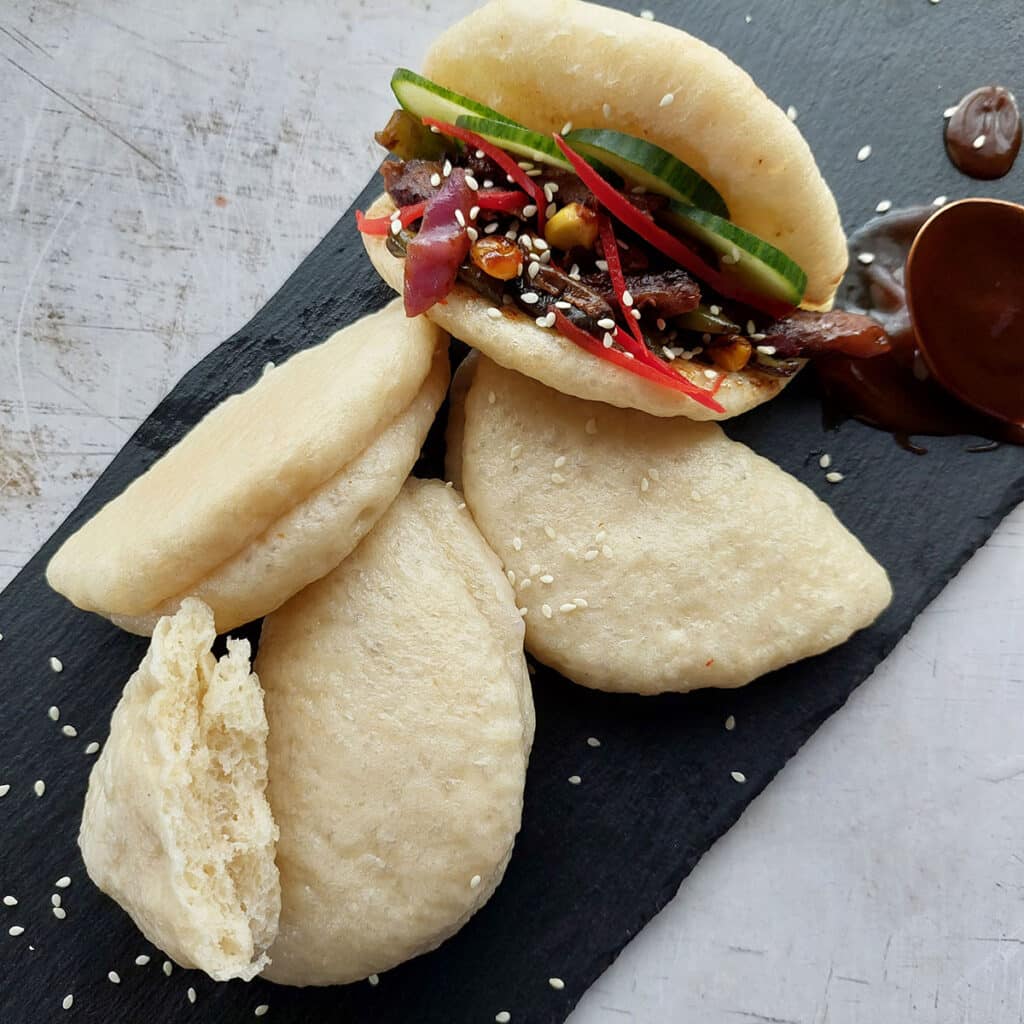
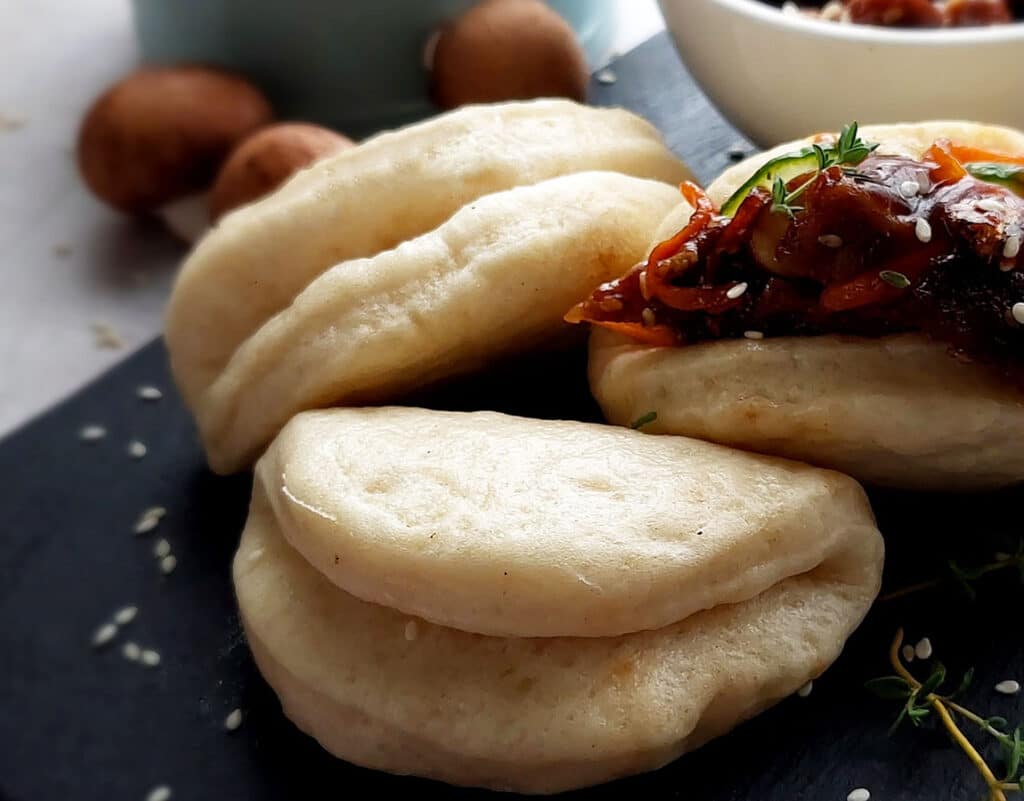
Steamed buns are clam shaped little breads perfectly versatile for any type of filling.
Fill with a crispy salad, fried mushroom or shredded meat of your choice. They make an amazing light snack or delicious lunch treat.
What you need
Note: Scroll to the recipe card at the bottom for the ingredients quantities and full detailed method!
- All purpose or cake flour: You can use all purpose or cake flour. I prefer and use cake flour as it produces softer results.
- Instant dry yeast: This type of yeast does not need to be dissolved in water. It is added directly to the flour.
If you are using active dry yeast then be sure to mix it in a little of the warm water first before combining into your dry ingredients.
- Sugar: White granulated sugar works perfectly fine in this recipe.
- Salt
- Warm water: The water needs to be warm to activate the yeast. Not too hot, boiling, or too cold. If you have a thermometer, it should read 100° and 115°F (37-46°C)
Step by step instructions
Note: Scroll to the recipe card at the bottom for the ingredients quantities and full detailed method!
Make the dough
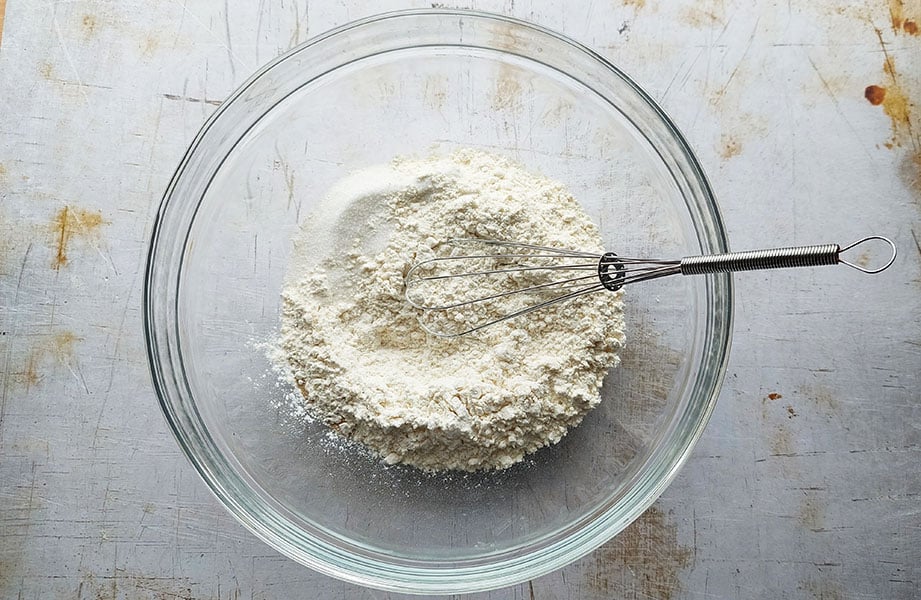
Step 1:Whisk together 2 cups of flour, 1 teaspoon of instant dry yeast, and a ¼ teaspoon of salt in a medium bowl.
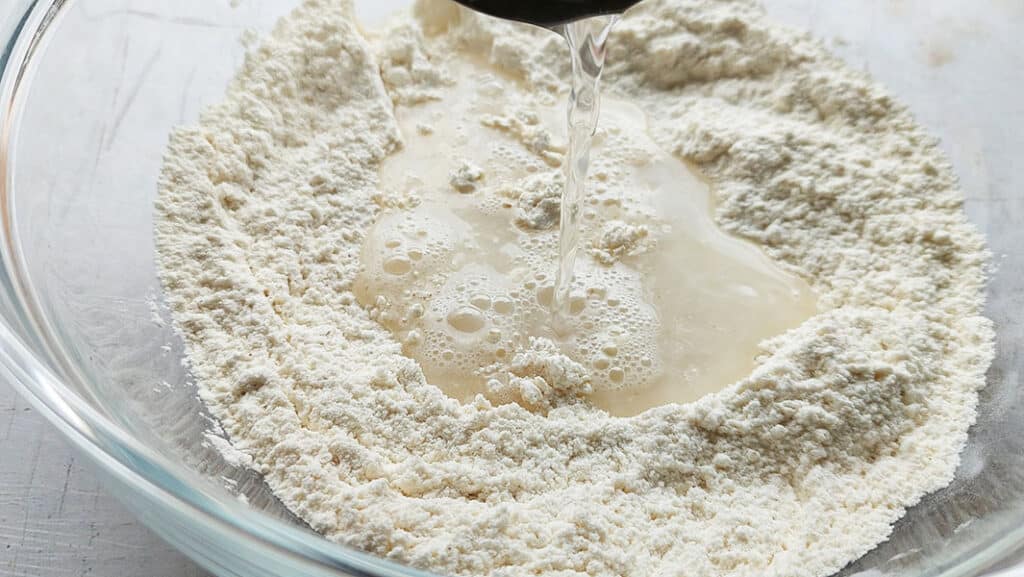
Step 2: Stir in ¾ cup of warm water. Mix with a rubber spatula, to form a soft dough. The dough will be slightly sticky and that is okay.
Step 3: Place the dough in another medium sized bowl which has been lightly brushed with oil.
Allow dough to rise (1 hour)
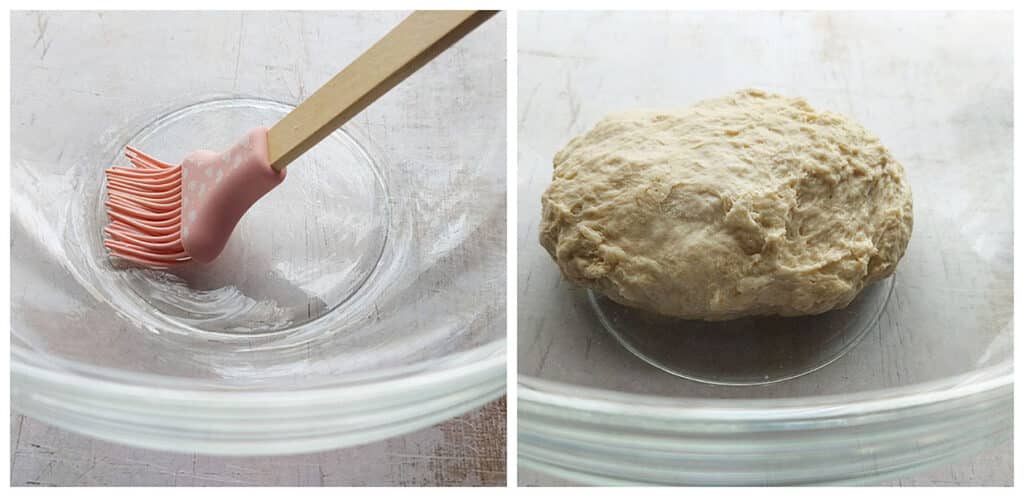
Step 4: Cover the bowl with a cloth or plastic wrap. Leave to rise at room temperature for 1 hour until it has doubled in size.
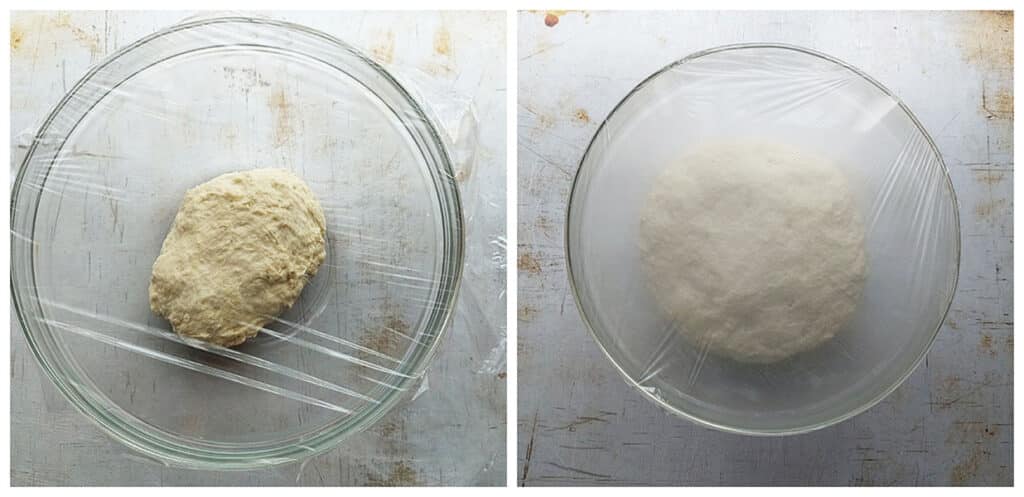
Step 5: After the dough has risen, turn it out onto a lightly floured board. Knead the dough for about a minute, to get rid of any air bubbles.
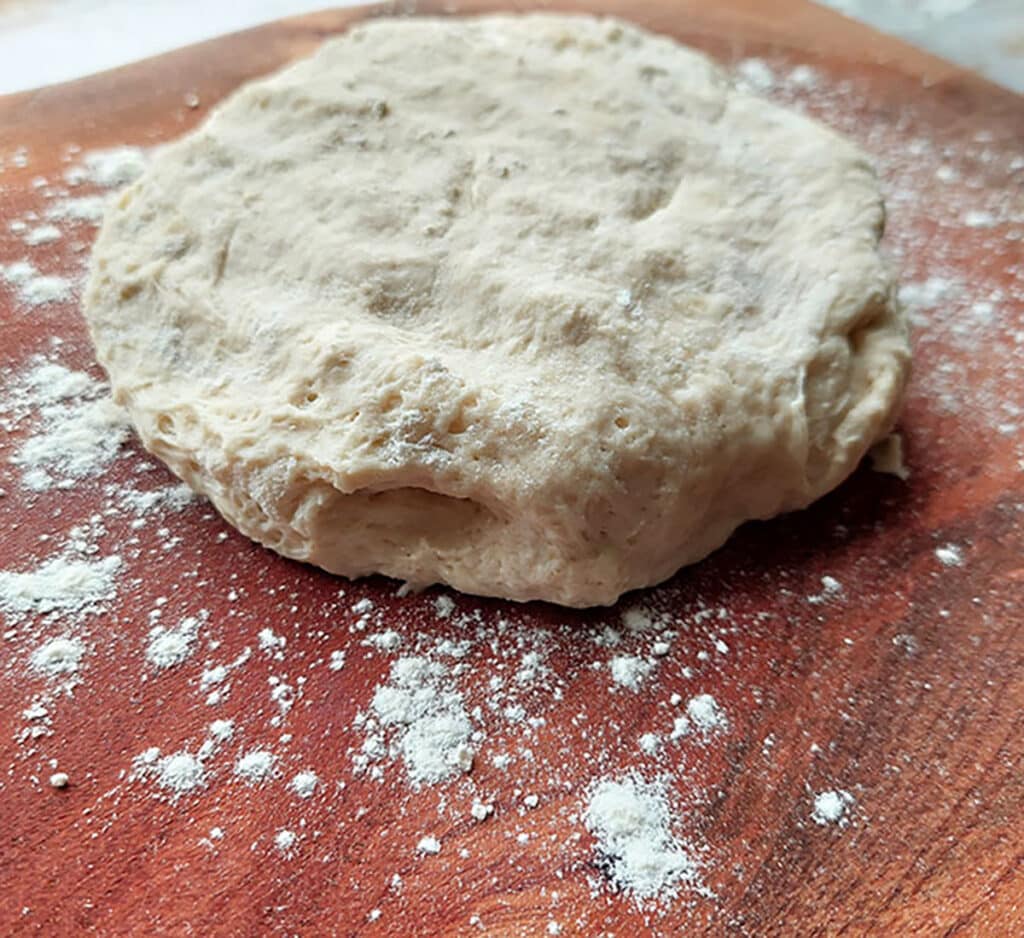
Roll and shape the dough
Step 6: Portion the dough out into 8 to 10 pieces and roll each portion into a ball.

Step 7: Roll out each ball into a 4 inch (10cm) wide and 5 inch(11cm) long oval shape.
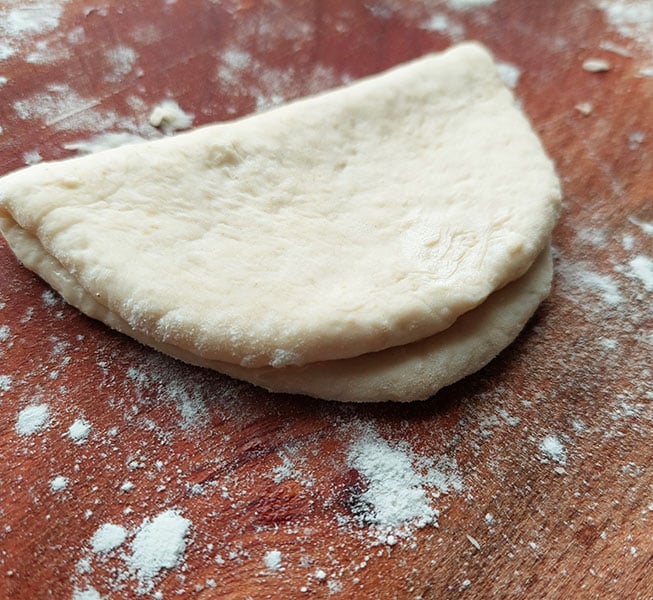
Lightly brush the top of the rolled out dough. This will prevent sticking, making the bun easier to open up once steamed.
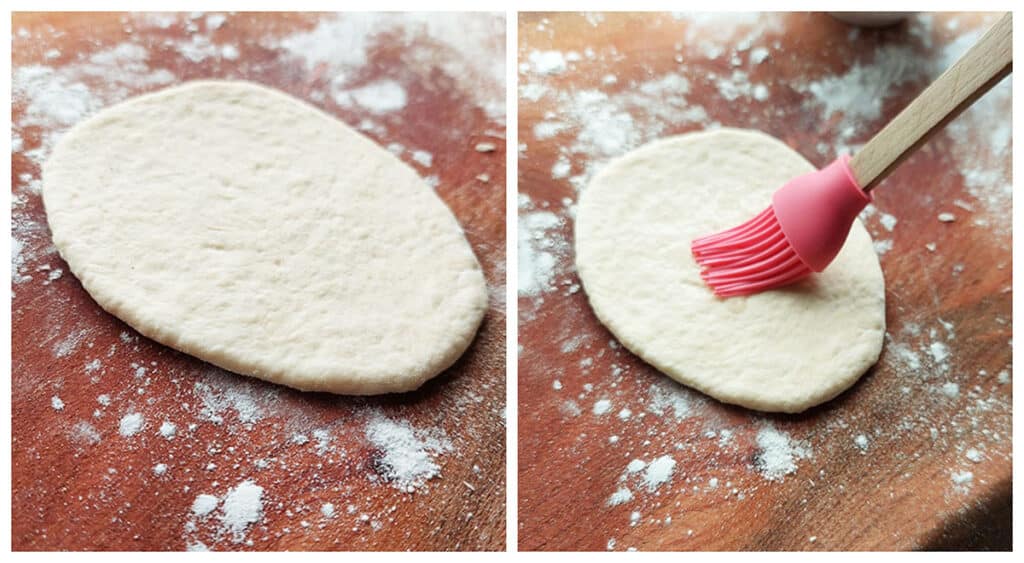
Step 8: Fold the dough in half, with the oiled part on the inside.
Allow shaped dough to rise (20 minutes)
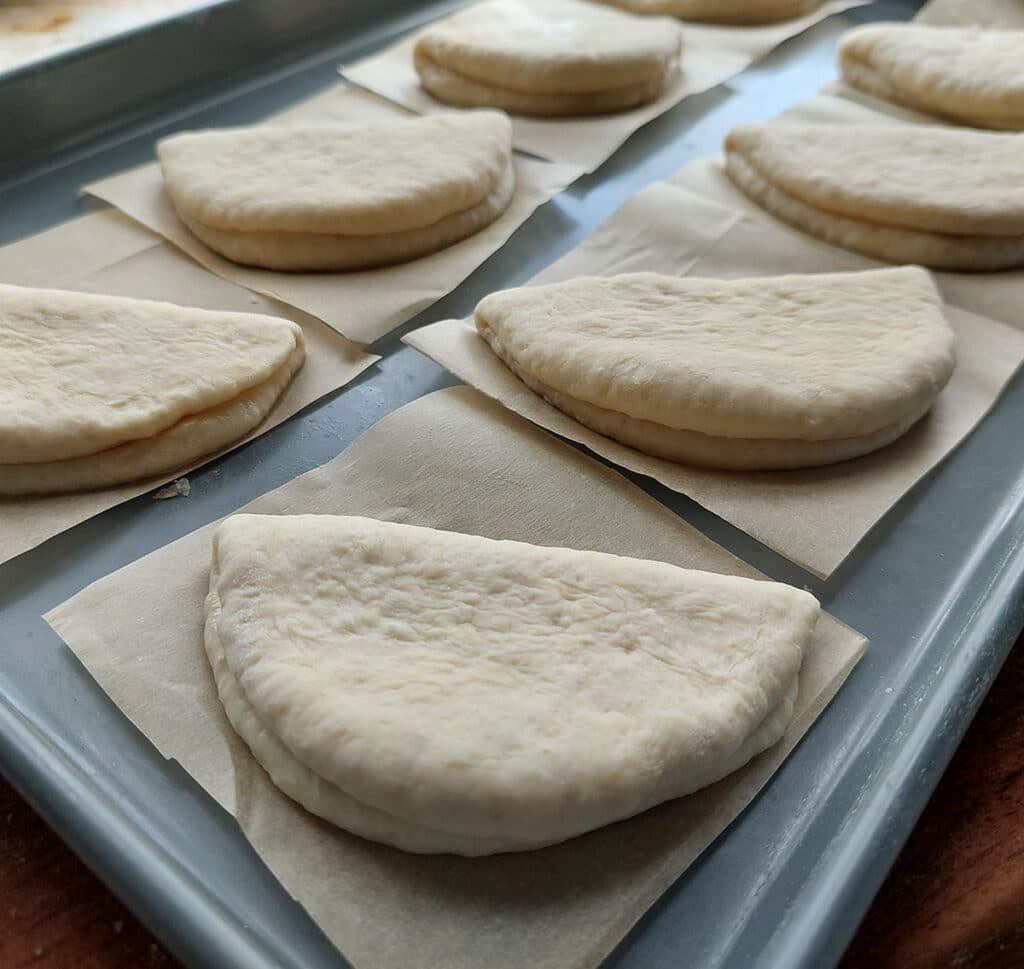
Step 9: Place the shaped buns on cut out pieces of parchment paper and allow to rise again for 20 minutes. This rise will ensure the buns have a soft texture once steamed.
Prepare your steamer
Prepare your steamer while the buns are rising.
You can use your metal or traditional steamer for these buns. If you do not have a steamer, here are instructions to assemble a homemade steamer
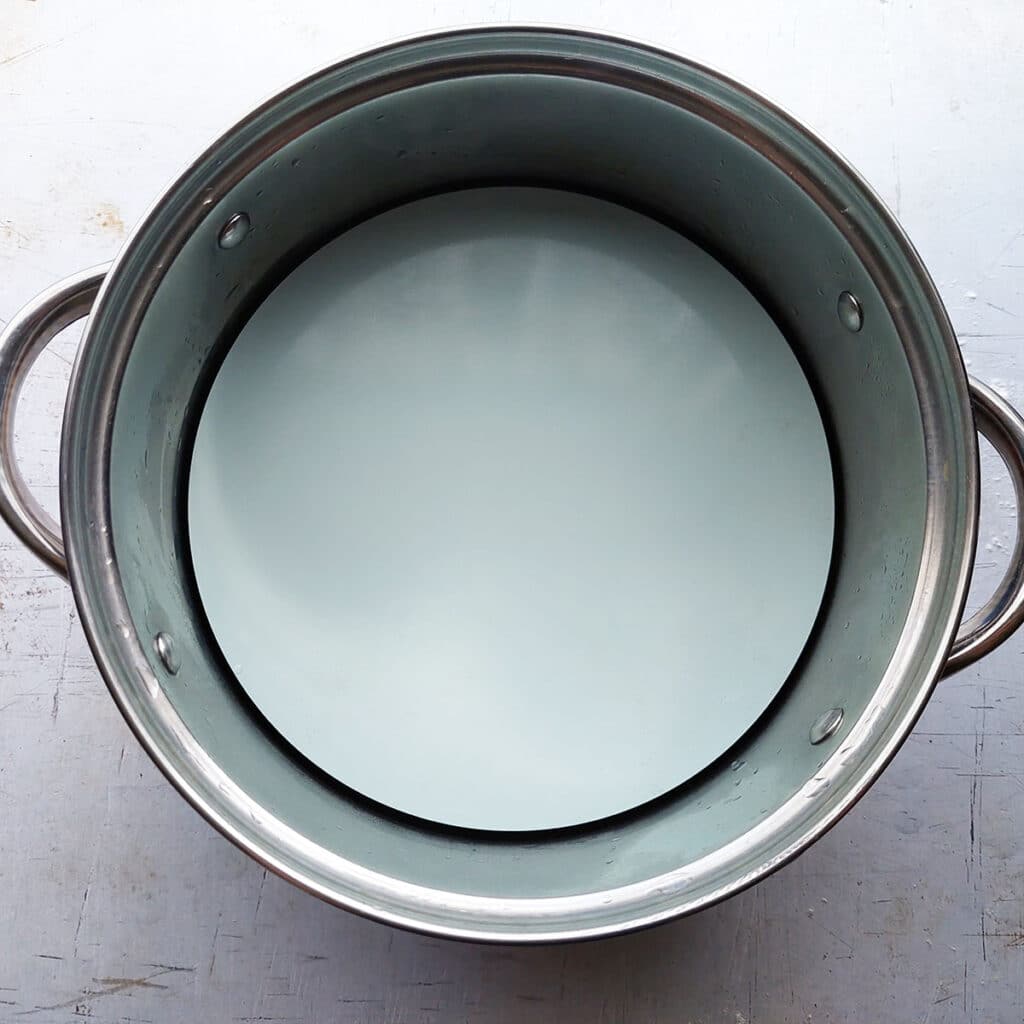
Step 10: Add water to a deep pot or wide skillet.
Place a small bowl into the pot. The bowl should not be covered by the water.

Step 11: Next place a plate over the bowl (I used the removable base of a cake pan)
The water in pot must not touch the bottom of the plate.
Tie the lid of the pot with a kitchen towel to cover the steamer. The kitchen towel will absorb the water from the steam and prevent it from dripping on to the buns.

Steam the shaped buns
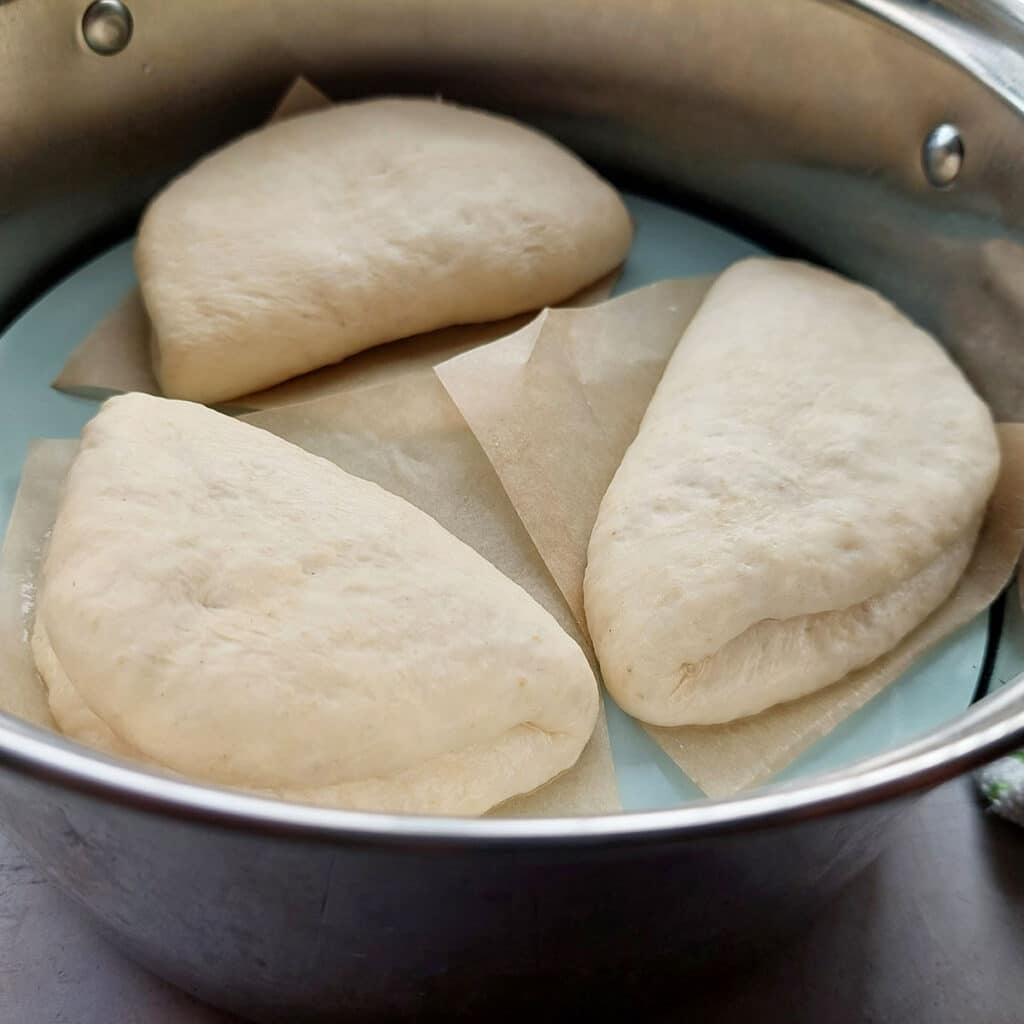
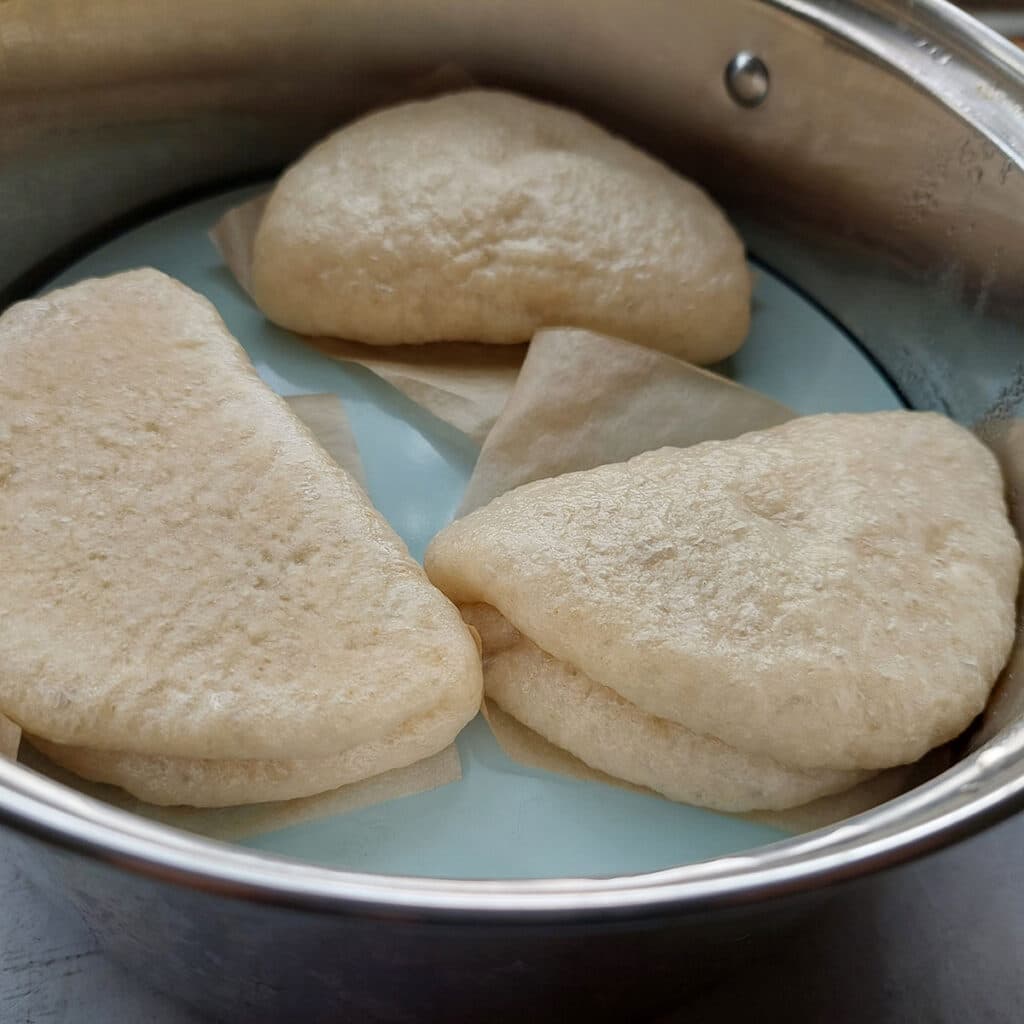
Step 12: Pick up the buns with the parchment paper still under it and place into the steamer.
Do not overcrowd the steamer. The buns expand while steaming. Allow room of at least 2 cm between each bun in the steamer.
Cover the steamer with the towel wrapped lid.Place the steamer on the stove over medium heat.
Turn on the heat only once you place the steamer on the stove. This will ensure that the temperature in steamer rises gradually.
Cook the buns covered over medium heat. As soon as you see the steam coming out of the pot, turn the stove down to medium low heat.
Set the timer now for 8 minutes: Start timing the cooking now and steam the buns for 8 minutes.
Turn off the stove: After 8 minutes, turn off the stove BUT LEAVE THE LID ON THE POT FOR A FURTHER 5 MINUTES.
Buns deflate when exposed to sudden temperature change: If you remove the lid immediately after cooking, you risk the buns deflating due to the sudden change in temperature.
Step 13: After 5 minutes, the buns are ready to be removed from the steamer.
You can fill and eat them immediately or refrigerate or freeze for later.
Serving Suggestions
These amazing little breads are a blank canvas for any filling you love.
Delicious combinations:
- Crispy iceberg lettuce, cucumber slices, feta, hummus, mushroom lightly cooked in garlic butter
- Fill with bacon and egg for a yum breakfast treat
- Fried chicken or pulled pork
Storing
In the fridge: Store for up to 4 days in an airtight container.
Reheat in the microwave for a few seconds. Alternately reheat in the steamer for about 2 minutes for a softer result.
In the freezer: Allow the cooked buns to cool completely before placing in a freezer safe bag or container. Freeze for up to 3 months.
Reheat frozen steamed buns:
In the microwave: Allow to defrost before warming in the microwave for about 1 to 2 minutes.
In the steamer: Place steamed buns directly from frozen into the steamer. Steam for about 2 to 3 minutes until fully warmed through.
Tips and frequently asked questions
Do not overcrowd the steamer. The number of buns placed in the steamer will depend on the size and capacity of your steamer.
The buns expand while steaming. Whatever the size or capacity of the steamer, remember to allow room of at least 1 inch (2 cm) between each bun.
Refrigerate shaped dough: While one batch steams, refrigerate the remaining shaped dough until ready to steam. Refrigerating slows down the rising process preventing an overly yeasty taste.
Avoid the buns from deflating after steaming: the buns need time to rest after steaming. If you remove the lid immediately after cooking, you risk the buns deflating due to the sudden change in temperature.
Enjoy ♥
Want even more delicious recipes? Subscribe free to receive new post notifications emailed to you. Or follow along on Facebook, Pinterest, and Instagram. If you love sharing recipes please come and join my All about cooking and baking Facebook group or Subscribe to my YouTube channel
No Knead Steamed Buns

- 2 cups (250 g) cake or all purpose flour
- 1 teaspoon (3 g) instant dry yeast
- 1 teaspoon (4 g) white granulated sugar
- ¼ teaspoon salt
- ¾ cup (177 ml) lukewarm water
- Whisk together flour, yeast,salt and sugar in a medium bowl
- Stir in the warm water and mix with a rubber spatula to form a soft dough. The dough will be slightly sticky and that is okay.
- Place the dough in another bowl which has been lightly brushed with oil. Cover the bowl and leave the dough to rise for 1 hour or until double in size.
- After the dough has risen, turn it out onto a lightly floured board. Knead the dough for about a minute, to get rid of any air bubbles.
Roll and shape the dough
- Portion the dough out into 8 to 10 pieces and roll each portion into a ball.
- Roll out each ball into a 4 inch (10cm) wide and 5 inch(11cm) long oval shape.
- Lightly brush the top of the rolled out dough. This will prevent sticking, making the bun easier to open up once steamed.
- Fold the dough in half, with the oiled part on the inside.
Allow shaped dough to rise (20 minutes)
- Place the shaped buns on cut out pieces of parchment paper and allow to rise again for 20 minutes. This rise will ensure the buns have a soft texture once steamed.
Steam the buns
- Pick up the buns with the parchment paper still under it and place into the steamer.
- Do not overcrowd the steamer. The buns expand while steaming. Allow room of at least 1 inch (2 cm) between each bun in the steamer.
- Cover the steamer with the towel wrapped lid. Place the steamer on the stove over medium heat.
- Turn on the heat only once you place the steamer on the stove. This will ensure that the temperature in steamer rises gradually.
- Cook the buns covered over medium heat. As soon as you see the steam coming out of the pot, turn the stove down to medium low heat.
- Set the timer now for 8 minutes: Start timing the cooking now and steam the buns for 8 minutes.
- Turn off the stove: After 8 minutes, turn off the stove BUT LEAVE THE LID ON THE POT FOR A FURTHER 5 MINUTES.
- Buns deflate when exposed to sudden temperature change: If you remove the lid immediately after cooking, you risk the buns deflating due to the sudden change in temperature.
- After 5 minutes, the buns are ready to be removed from the steamer.
- You can fill and eat them immediately or refrigerate or freeze for later.
- You can use all purpose or cake flour. I prefer and use cake flour as it produces softer results.
- Always read the label on the yeast package confirming whether it is active dry yeast or instant/fast acting yeast. Follow the instructions above according to the type of yeast you have. You just need to change the order of the steps. The bread comes out exactly the same!
- Active dry yeast needs to be activated in the liquid before adding to the dry ingredients.
- I always use fast-acting instant dry yeast in my bread recipes. This type of yeast is added directly to the flour and does not need to be dissolved in water first. It is really convenient and easy to work with.
- The water should be warm NOT hot. If you have a thermometer, it should read between 110°-120° F (43°-48°C).
- Add water to a deep pot or wide skillet.
- Place a small bowl into the pot. The bowl should not be covered by the water.
- Next place a plate over the bowl (I used the removable base of a cake pan)
- The water in pot must not touch the bottom of the plate.
- Tie the lid of the pot with a kitchen towel to cover the steamer. The kitchen towel will absorb the water from the steam and prevent it from dripping on to the buns.
- In the fridge: Store for up to 4 days in an airtight container.
- In the freezer: Allow the cooked buns to cool completely before placing in a freezer safe bag or container. Freeze for up to 3 months.


Laurie says
These came out so perfectly fluffy and soft, since I don't have a steamer, this was perfect for me!
The Gardening Foodie says
Hi Laurie, thank you, I am so happy to hear that you loved this recipe too 🙂
Alicia says
This was SO incredibly easy and absolutely delicious. I filled it with leftover stir-fry and added some fresh sprouts. I also froze a few leftover buns and re-steamed from frozen for a few minutes a few days later - perfect!!! Thank you for a great recipe 🙂