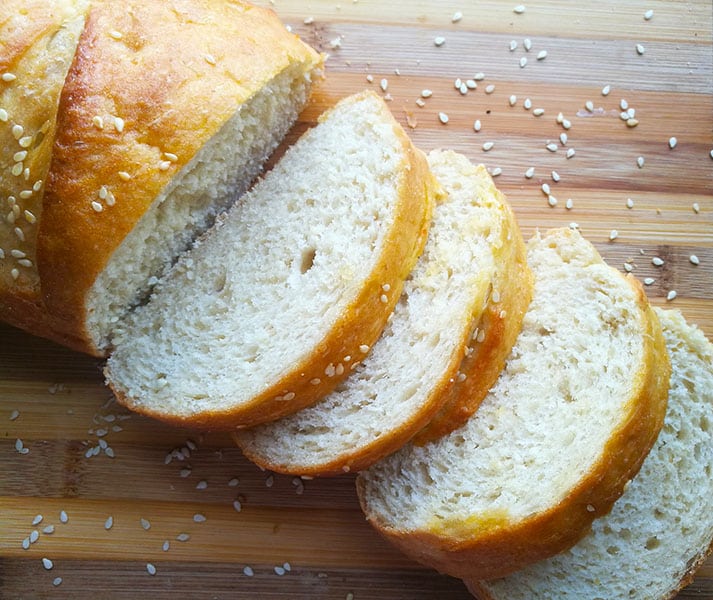
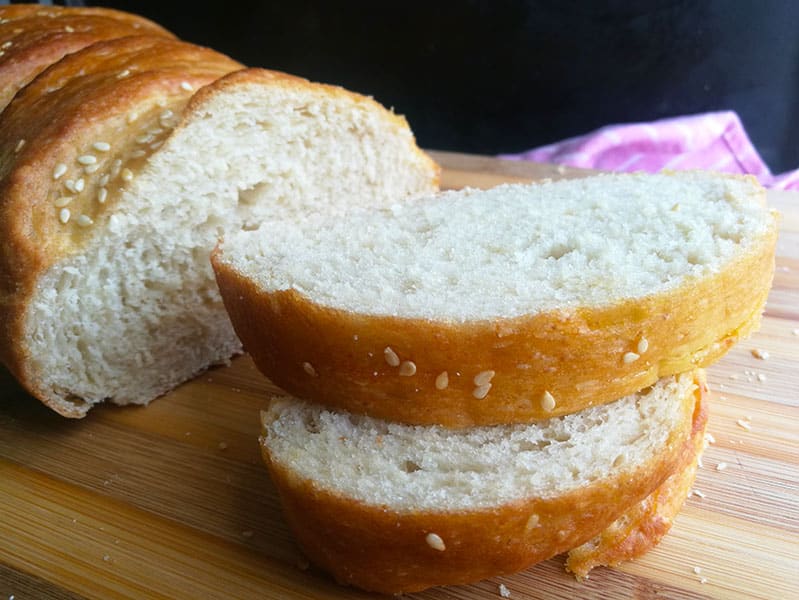
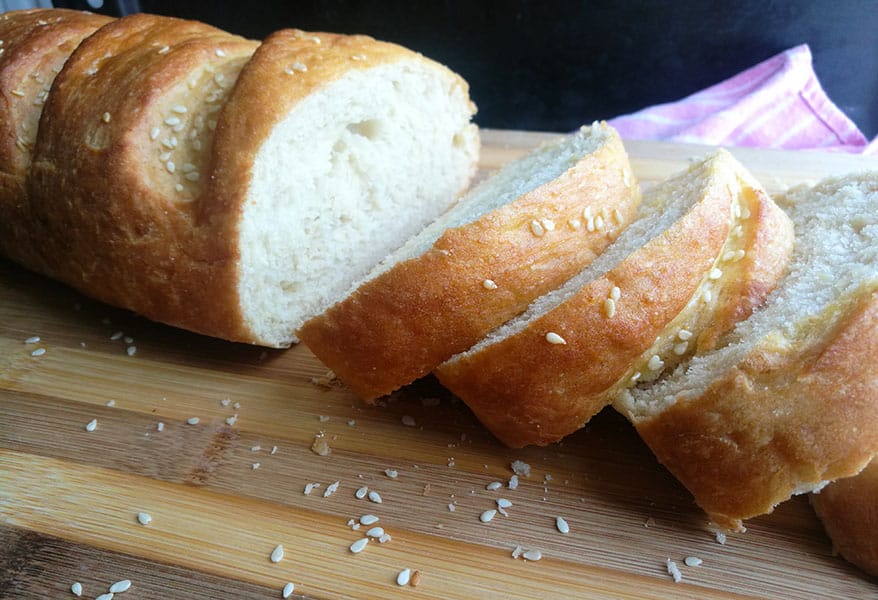
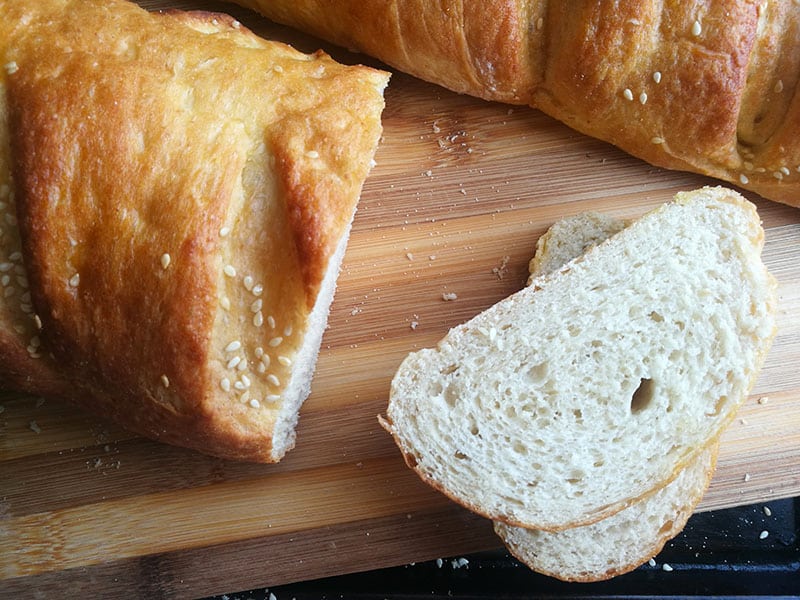
This Easy No Knead French Bread is a super light and fluffy loaf. Really delicious and simple to make, this is easily one of my favorite bread recipes.
I really love baking my own bread. From the comforting smell of it baking to the delicious taste. The flavour of Homemade bread just cannot be beaten.
If you are working with yeast or making bread for the first time, then this is a great recipe for you to try. It is an easy, straight forward bread recipe, one that will make truly proud of your baked bread.
Although this recipe has yeast as an ingredient, there is no kneading required. The ingredients are simply mixed together to form a soft dough. It is so easy, it actually just takes 5 minutes to mix the ingredients together.
ADD HERBS AND SPICE TO YOUR BREAD
Use this recipe as a canvas to add other flavors to your bread. For this recipe, I simply brushed plain butter over the baked bread making it a basic loaf. On other occasions,
I added either Italian herbs, cheese, crushed chillies or garlic butter to the bread.
These add a lot of wonderful different flavor and texture to the bread and it will be great for you to give these a try as well when you bake this bread.
Making the no knead French Bread
This recipe makes two large loaves of French bread. You can either freeze one of the loaves for later if you choose or half the recipe to make just one loaf.
I always use fast-acting instant dry yeast in my bread recipes. The yeast is added directly to the flour and does not need to be dissolved in water first. It is really convenient and easy to work with.
To make the bread, start by combining the flour, yeast, salt and sugar in a large bowl.
In a separate bowl, mix the warm water and melted butter together and pour into the flour mixture. Using your hands, just mix until well combined. You can add up to an extra cup of flour if while you are mixing you feel that the dough is too sticky.
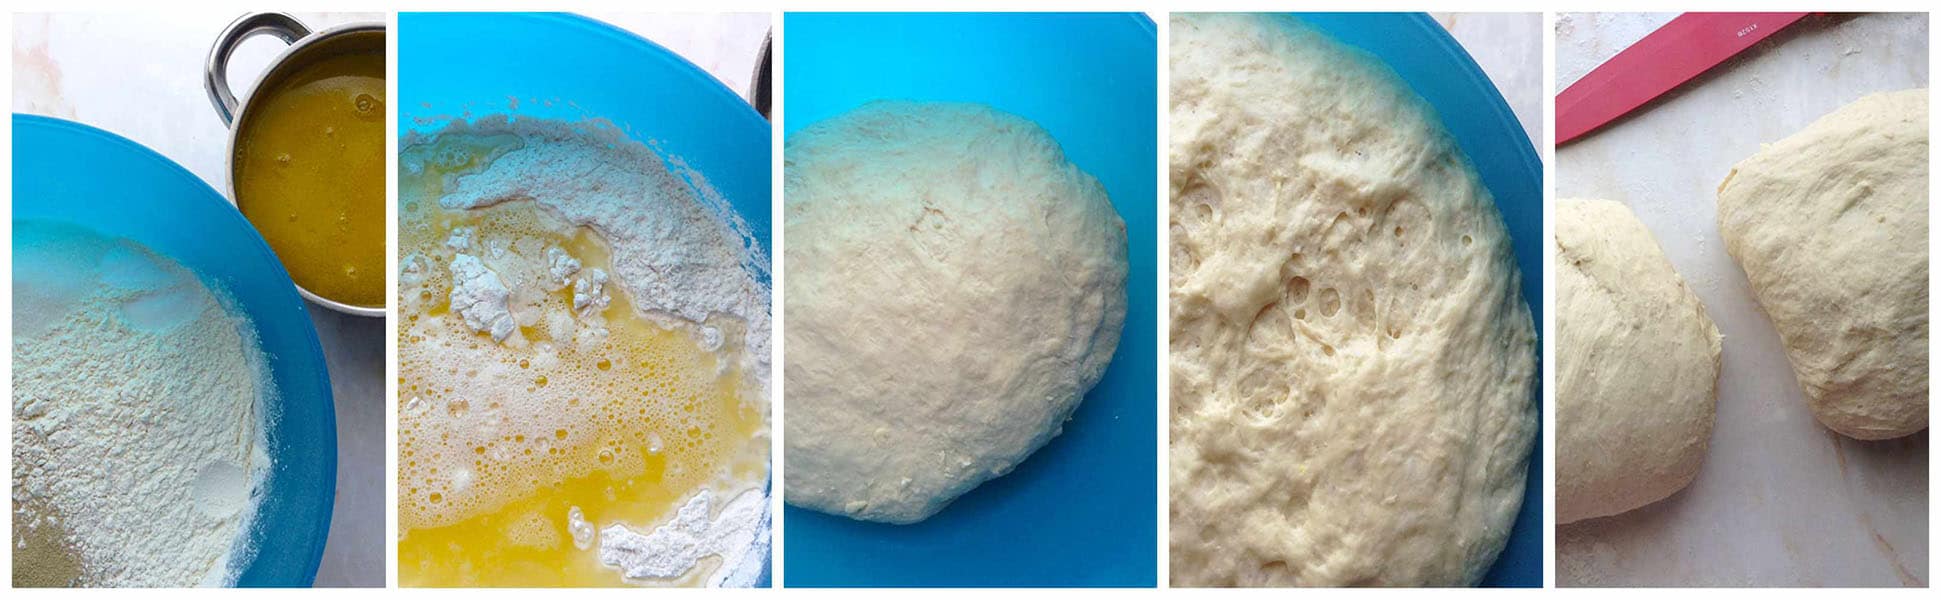
Coat the bowl with a little oil and leave the dough in the oiled bowl for 45 minutes to 1 hour until double in size. Keep the bowl in a warm, draft-free area of your kitchen.
After an hour, knock down the dough and turn out onto a lightly floured surface. Divide the dough in half.
Roll out each portion of dough and shape or press out the dough into about a 9 inch / 23cm long rectangular shape.
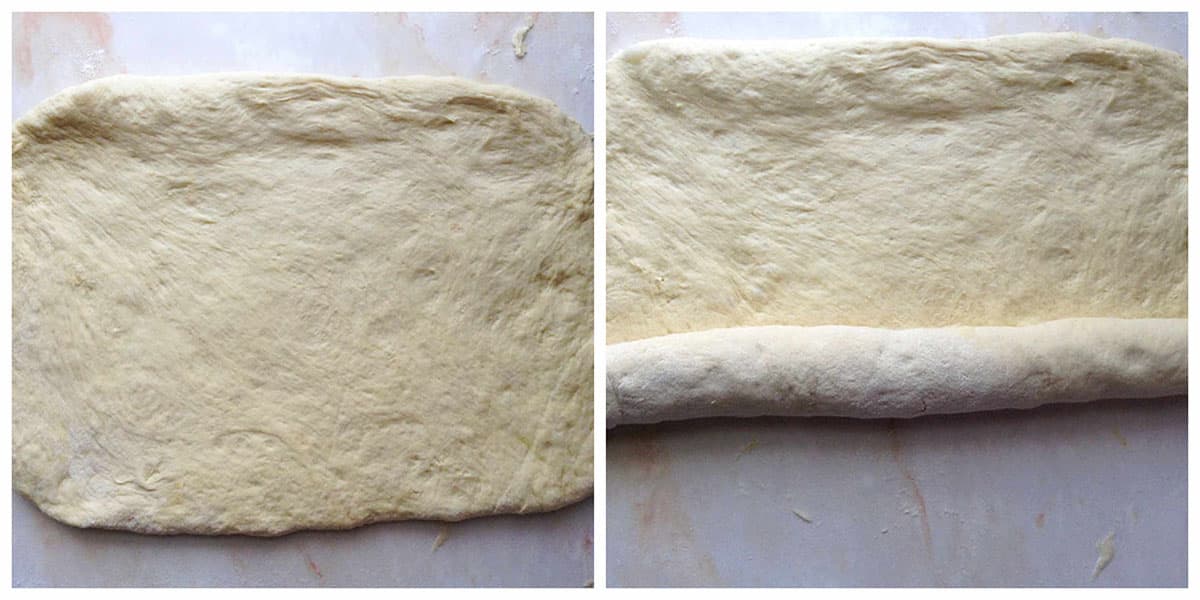
Starting with the long edge of the dough roll tightly into a loaf shape. Seal the edges by pinching and pressing it together. Place the rolled up loaves, seam side down onto a greased or lined baking sheet. Brush the unbaked loaves with 1 tablespoon of melted butter.
Using a very sharp knife, make diagonal slits across the tops of each loaf. Leave the shaped loaves to rise again for about 20 minutes Preheat your oven to 356°F / 180°C and bake the bread for 15-20 minutes, until golden brown on top.
Remove loaves from the oven and brush the baked loaves with a tablespoon of melted butter.
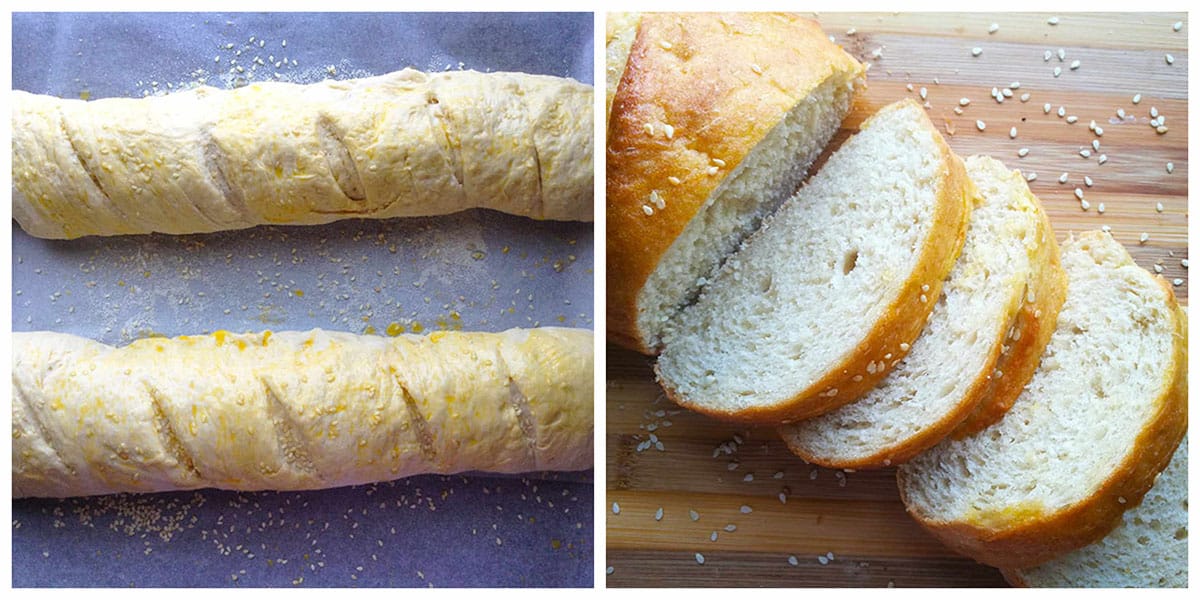
Then cover with a kitchen towel. This will trap the steam and keep the bread soft. Allow the bread to cool slightly before slicing.
I know that it is tempting but avoid slicing the bread as soon as you remove it from the oven because it will be doughy. Allowing it to cool for at least 5 to 10 minutes ensures that you get neat slices of bread.
You can freeze the other loaf if you prefer and allow about 2 hours to defrost before either warming in the microwave or toasting the slices on a pan or toaster.
So skip the bakery bought bread today and give this easy no knead French bread a try. I know that you are really going to love this one too.
Enjoy ♥
Easy No Knead French Bread
- 6 cups / 720g all purpose / cake flour
- 2 Tablespoons / 20g instant / fast acting dry yeast
- 2 Tablespoons / 25g sugar
- 2 teaspoons salt
- 2 ½ cups / 625ml warm water not boiling hot just warm to the touch
- 2 Tablespoons / 30g melted butter for mixing into the dough
- 2 Tablespoons / 30g melted butter for brushing onto shaped unbaked dough and baked loaves
- Combine the flour, yeast, salt and sugar in a large bowl.
- In a separate bowl, mix the warm water and 2 Tablespoons / 30g of the melted butter together and pour into the flour mixture. Using your hands, just mix until well combined. You can add up to an extra cup / 120g of flour if while you are mixing you feel that the dough is too sticky.
- Coat the bowl with a little oil and leave the dough in the oiled bowl for 45 minutes to 1 hour until double in size.Keep the bowl in a warm, draft free area of your kitchen.
- After an hour knock down the dough and turn out onto a lightly floured surface. Divide the dough in half.
- Roll out each portion of dough and shape or press out the dough into about a 9 inch / 23cm long rectangular shape.
- Starting with the long edge of the dough roll tightly into a loaf shape. Seal the edges by pinching and pressing it together. Place the rolled up loaves , seam side down onto a greased or lined baking sheet . Brush the unbaked loaves with 1 tablespoon of melted butter.
- Using a very sharp knife, make diagonal slits across the tops of each loaf. Leave the shaped loaves to rise again for about 20 minutes Preheat your oven to 356°F / 180°C and bake the bread for 15-20 minutes, until golden brown on top.
- Remove loaves from the oven and brush the baked loaves with 1 tablespoon of melted butter. Then cover with a kitchen towel. This will trap the steam and keep the bread soft.
- Allow the bread to cool slightly before slicing. I know that it is tempting but avoid slicing the bread as soon as you remove it from the oven because it will be doughy. Allowing it to cool for at least 5 to 10 minutes ensures that you get neat slices of bread.
- You can freeze the other loaf if you prefer and allow about 2 hours to defrost before either warming in the microwave or toasting the slices on a pan or toaster.


2pots2cook says
Thank you so much; I am so into all sorts of breads; keeper it is ! Enjoy the day !
Grace says
Thank you for sharing!
Kelsie | the itsy-bitsy kitchen says
Wow. This looks SO GOOD and I can't believe you don't have to knead the dough! Have a great weekend, Ashika!
Katherine | Love In My Oven says
It's so light and fluffy looking, and it seems like so much less work than kneading! A must-try!
Ron says
Nice loaf and great recipe, especially for those who don't like to knead. Me, I love kneading bread, it's my stress reliever. I've never tried a roll such as you're using, but I do use the slap and fold kneading method. I'll have to give this a try.
dodi says
I made this recipe this afternoon since it is -40* and the only 'bread' in the house was tortillas. I love baking when it is frigid temps out and your recipe was a hit! Made beautiful loaves and so fast! The house smells wonderful! Can't wait to try more of your recipes. Thank you ever so much!
The Gardening Foodie says
Wow -40°, that is freezing. Baking really is the absolute best in cold weather and thank you for trying out this recipe. I am so glad that you liked it and will be trying out my other recipes too 🙂
J Rose says
This is the kind of review I like to read. . . when one has actually cooked the recipe! Thanks.
Selvi says
Hi,
just made these loaves,
was superb.
Thank you
The Gardening Foodie says
Thank you Selvi, you are welcome, I am so glad that you loved the recipe too 🙂
Joslyn says
I'm a bit confused, is all purpose flour used in this recipe or cake flour? Or, is it a combination of both?
The Gardening Foodie says
Hi Joslyn 🙂 You can use all-purpose flour OR cake flour. It is not a combination of both. Many countries do not have cake flour, but all-purpose or plain is available. So you can use whichever you have.
Tammy says
My mom made a loaf for us the other day! So so so good!
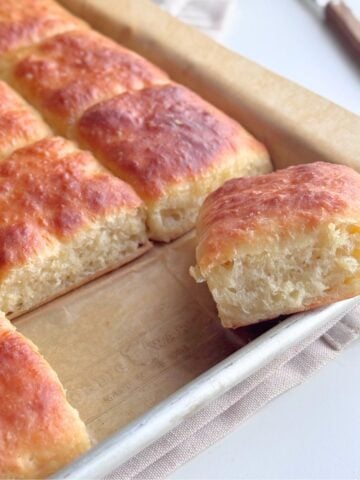
I’d like to make rolls with it...have you tried that?
The Gardening Foodie says
Hi Tammy 🙂 Thank you for giving this recipe a try and I am really glad that you loved it too 🙂
I haven't made rolls with this recipe, but it should work just as well. I do have some great rolls recipes on my blog as well if you like to try.
Go ahead and click on these links to see these recipes or just search for rolls on my blog search bar. They are super easy to make and I am sure that you will love it too : Cheese and Garlic Herb Rolls
Sweet Milk Rolls
I would love to know how they turn out if you give it a try 🙂
Tammy says
Thanks! I’ll look at them and let you know which ones I decide to build
The Gardening Foodie says
Hi Tammy 🙂 You are welcome.
I am looking forward to know how they turn out 🙂
Via says
Which flour did you use for this recipe Cake Flour or All Purpose Flour?
The Gardening Foodie says
Hi Via, I used cake flour for this recipe 🙂
Via says
Thanks so much, I sent my husband out to find bread flour and he came home with two boxes of cake flour…so I’m trying to find a good bread recipe using cake flour…this sounds like a great recipe and the comments are all good. Thanks again for getting back to me so soon…❤️
The Gardening Foodie says
Hi Via... you are welcome 😃.
I would love to know how the recipe turns out for you too
Happy baking 😃
Nancy says
Have made this bread few times. Last time I used 2 cups wheat flour and 4 cups all purpose flour. It was a huge hit. How would you keep it crusty on the outside?
The Gardening Foodie says
Hi Nancy, I am glad that you are loving this recipe too:)
To answer your question: This is how I keep my homemade bread crusty, at least for an extra day: Turn off the oven as soon as the bread is baked. Remove the bread from pan and place it directly on the oven rack in the middle of the oven. Open the oven door just a bit and leave the bread in the oven to cool.
As the steam evaporates it mixes with the warm dry air in the oven, and not cold outer air. This warm air helps to keep the crust crisp as the bread cools.
I hope that this helps answer your question:)
Jennifer says
Hi! Just baked this and it was great. But it took at least 45-60 min to bake, not the 15-20 and still wasn’t exceptionally golden.. just wondering if you think I did something wrong?
The Gardening Foodie says
Hi Jennifer, thank you 🙂
To answer your question: The main reason that your bread took a longer time to bake and not properly browned could have something to do with your oven temperature. Place a free standing oven themometer inside your oven to get the correct temperature. I had a similar issue with my older oven where you set the temperature according to the recipe, but the oven does not reach that specified temperature. Using a free standing oven thermometer helped solve this problem. Fortunately I did get a newer oven, but do still check the temperature with my free standing thermometer just to be 100% sure.
If you prefer a shiny golden crust, add a beaten egg into your melted butter, then use this mixture to brush over your unbaked bread.
I hope this helps.
Happy baking 🙂
Colleen LaFountaine says
Do I mix the yeast with water first?
The Gardening Foodie says
Hi, Colleen, this recipe uses instant dry yeast and is added directly to the flour.
If you have active dry yeast, then that has to mixed with the water and left to foam for 5 minutes before adding to the flour.
I hope this helps answer your question 🙂
Happy baking 🙂
Candice says
Luv making no knead bread
Can I bake this is a loaf tin?
The Gardening Foodie says
Hi Candice, sure, the bread can be baked with or without a loaf tin.
Follow the procedure of shaping the loaf in this recipe, then place the shaped dough in a loaf tin.
This recipe makes two loaves.
I would suggest you divide the dough and bake them in 2 separate 8½ inch x 5 inch (21cm x 13cm) loaf pans.
I hope this helps answer your question 🙂
Happy baking 🙂
Linda Cees says
Easy and delicious recipe for a novice like me! I'll definitely make this again! I think I'll try the egg and butter wash to get the shiny top next time. Thanks for sharing with us.
The Gardening Foodie says
Hi Linda, Thank you for giving my recipe a try and you are very welcome 🙂 I'm so happy that you enjoyed it too:
Oh yes, definitely, give it a go with the egg and butter wash the next time for that an amazing shine.
Happy baking 🙂
Karen says
Just made this bread today. Couldn't be more pleased with the texture and flavor. Very yummy. I did need to bake it longer than the 15-20 minutes suggested. Without another ten minutes, the loaves would not have browned. Next time I will try baking at a bit higher temp to see if that works. If anyone has ideas about baking heat or time, please let me know.
Thanks again for a fabulous recipe and such success in the kitchen!!
KB
Susan says
I would like to try this bread with a gluten free flour, such as cup-for-cup. Have you tried this method? Thanks.
The Gardening Foodie says
Hi Susan 😊 I haven’t tested this recipe with gluten-free flour yet. Bread relies heavily on gluten for structure and rise, so even with yeast, gluten-free flours behave quite differently and can affect the rise and texture.