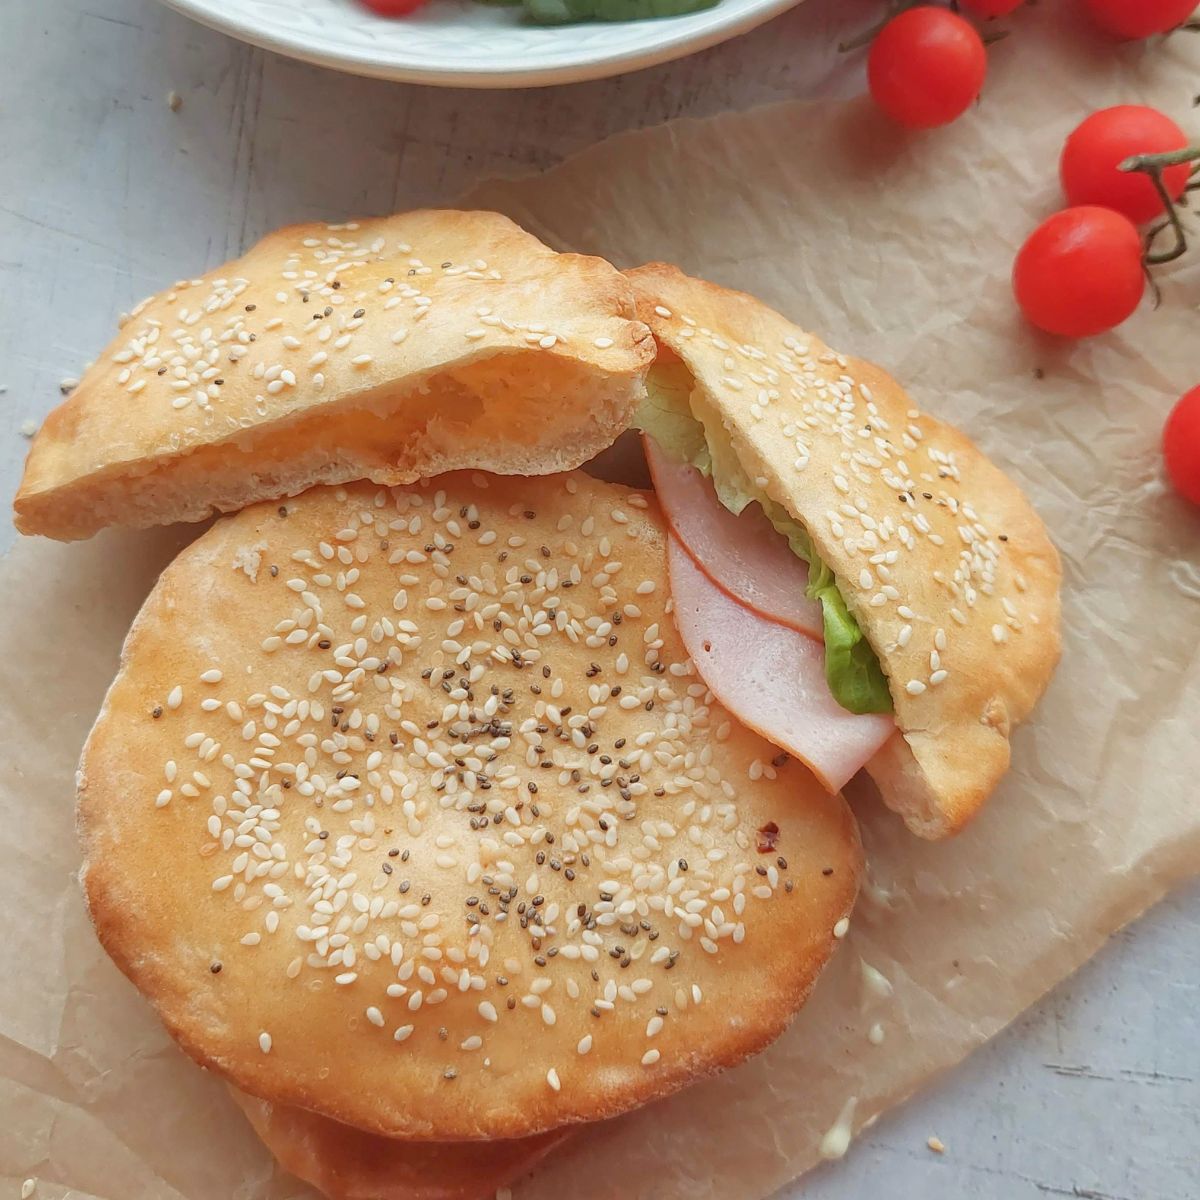
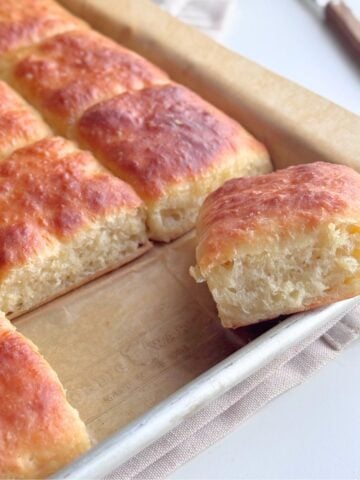
These soft 2 ingredient pita breads are made without yeast or rise time. Cook them on the stovetop or bake them in the oven for homemade pita with perfect pockets.

Step by step photos
These visual instructions help you see the process. You can also find the full printable recipe with ingredient amounts and instructions at the end of the post.
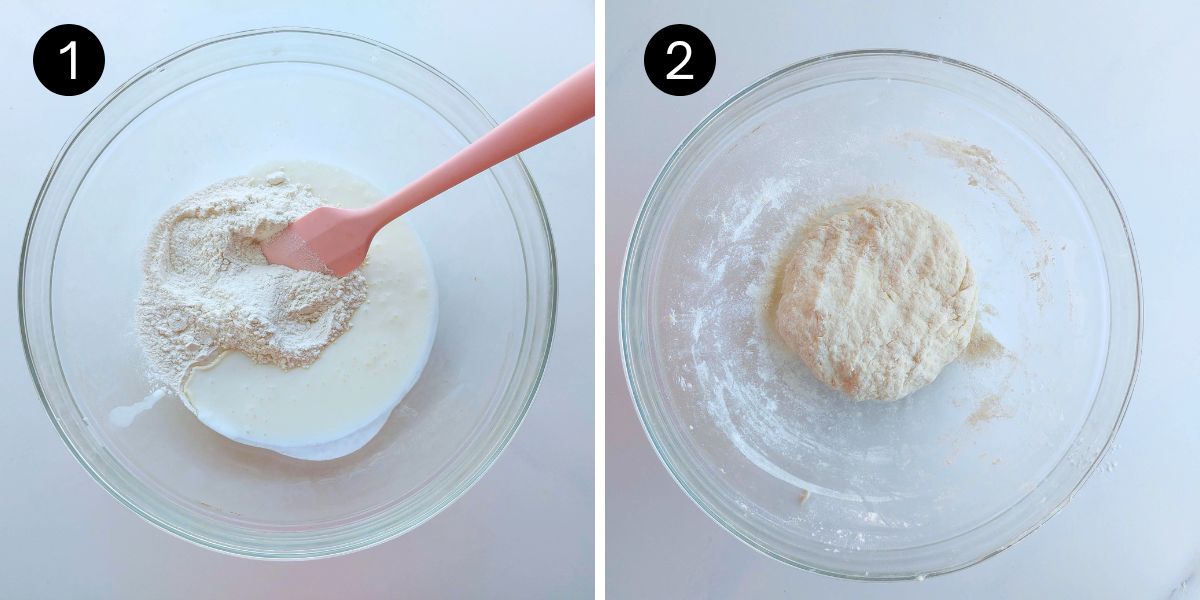
- Add the flour and buttermilk or yogurt to a large bowl
- Mix to form a soft dough
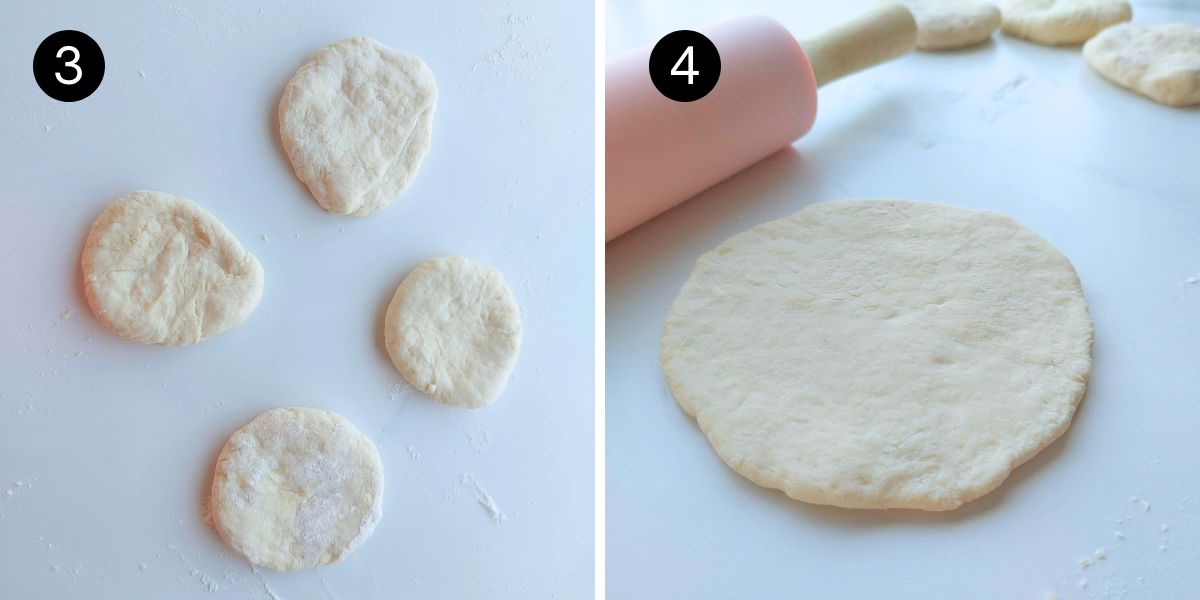
- Divide the dough into 4 even pieces
- Roll each piece into a circle about 6 inches (15 cm) in diameter and ¼ inch (6 mm) thick.
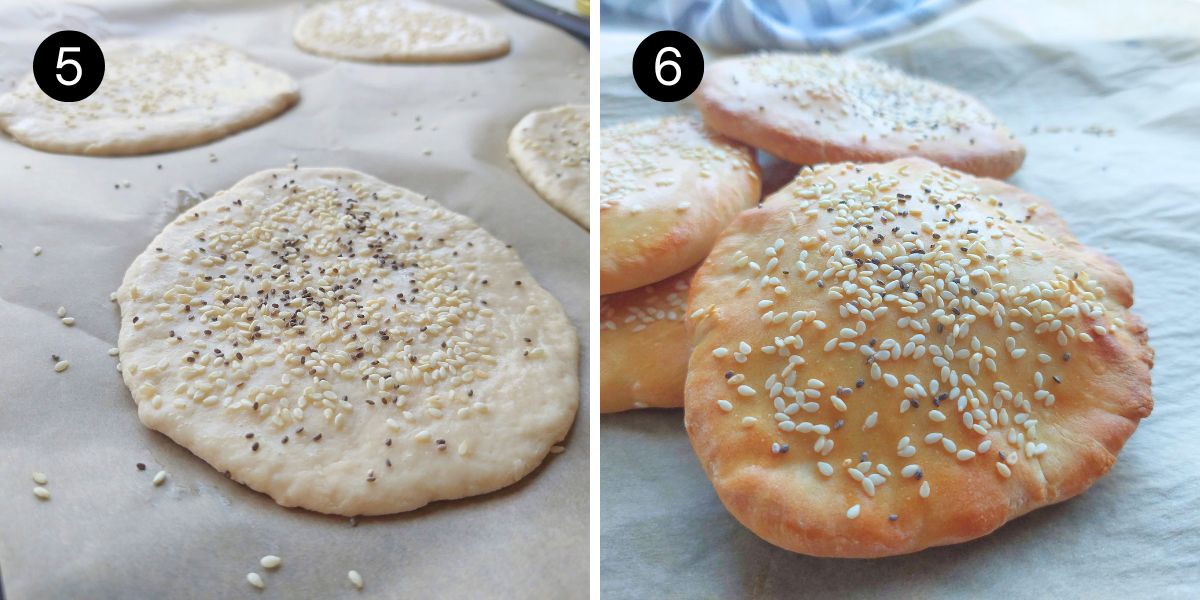
- Bake plain or brush with beaten egg and sprinkle with sesame or poppy seeds before baking.
- Bake for 8 to 10 minutes, or until lightly browned.
Stovetop method
Heat a lightly oiled skillet over medium heat. Cook one pita at a time for 2 to 3 minutes per side until lightly browned. Keep covered with a clean towel to stay soft.
Recipe tips
- This recipe uses self-rising flour. If you don't have any, mix together 1½ cups all-purpose flour, 2¼ teaspoons baking powder, and ¼ teaspoon salt. Use the same amount of buttermilk or yogurt.
- Roll evenly: Roll each pita to about ¼ inch (6 mm) thick so they cook evenly and puff.
- Cook over medium heat: If using the stovetop method, medium heat helps the pitas cook evenly without burning.
- Keep them soft: Cover the cooked pitas with a clean towel until ready to serve.
Storage
Store the cooled pitas in an airtight container at room temperature for up to 2 days.
Recipe
2 ingredient Pita (No yeast)
servings4 Pitas
Soft 2 ingredient pita made without yeast or rise time. Bake in the oven or cook on the stovetop.
Ingredients
- 1½ cups (180 g) self rising flour (see notes for alternative)
- ½ cup (120 ml) buttermilk or plain yogurt
Instructions
- Preheat the oven to 350°F (180°C) and line a baking tray with parchment paper.
- Mix the flour and buttermilk or yogurt with a spatula or your hands to form a soft dough.
- Divide into 4 equal pieces. Roll each into a 6-inch (15 cm) circle about ¼ inch (6 mm) thick.
- Leave plain, or brush with beaten egg and sprinkle with sesame or poppy seeds.
- To bake: Bake for 8 to 10 minutes, or until lightly browned.
- To cook on the stovetop: Heat a lightly oiled skillet over medium heat. Cook one pita at a time for 2 to 3 minutes per side until lightly browned.
Recipe Notes
This recipe uses self-rising flour. If you don't have any, mix together 1½ cups all purpose flour, 2¼ teaspoons baking powder, and ¼ teaspoon salt. Use the same amount of buttermilk or yogurt.
Nutrition
Serving: 1pita | Calories: 188kcal | Carbohydrates: 35g | Protein: 7g | Fat: 2g | Saturated Fat: 1g | Polyunsaturated Fat: 0.4g | Monounsaturated Fat: 0.3g | Cholesterol: 4mg | Sodium: 15mg | Potassium: 94mg | Fiber: 1g | Sugar: 2g | Calcium: 44mg | Iron: 0.4mg
Hungry for more?
Sign up for my free newsletter to get emails about new recipes .And don't forget to follow me on YouTube, Facebook, Pinterest, and Instagram for all the latest deliciousness.


Leave a Reply