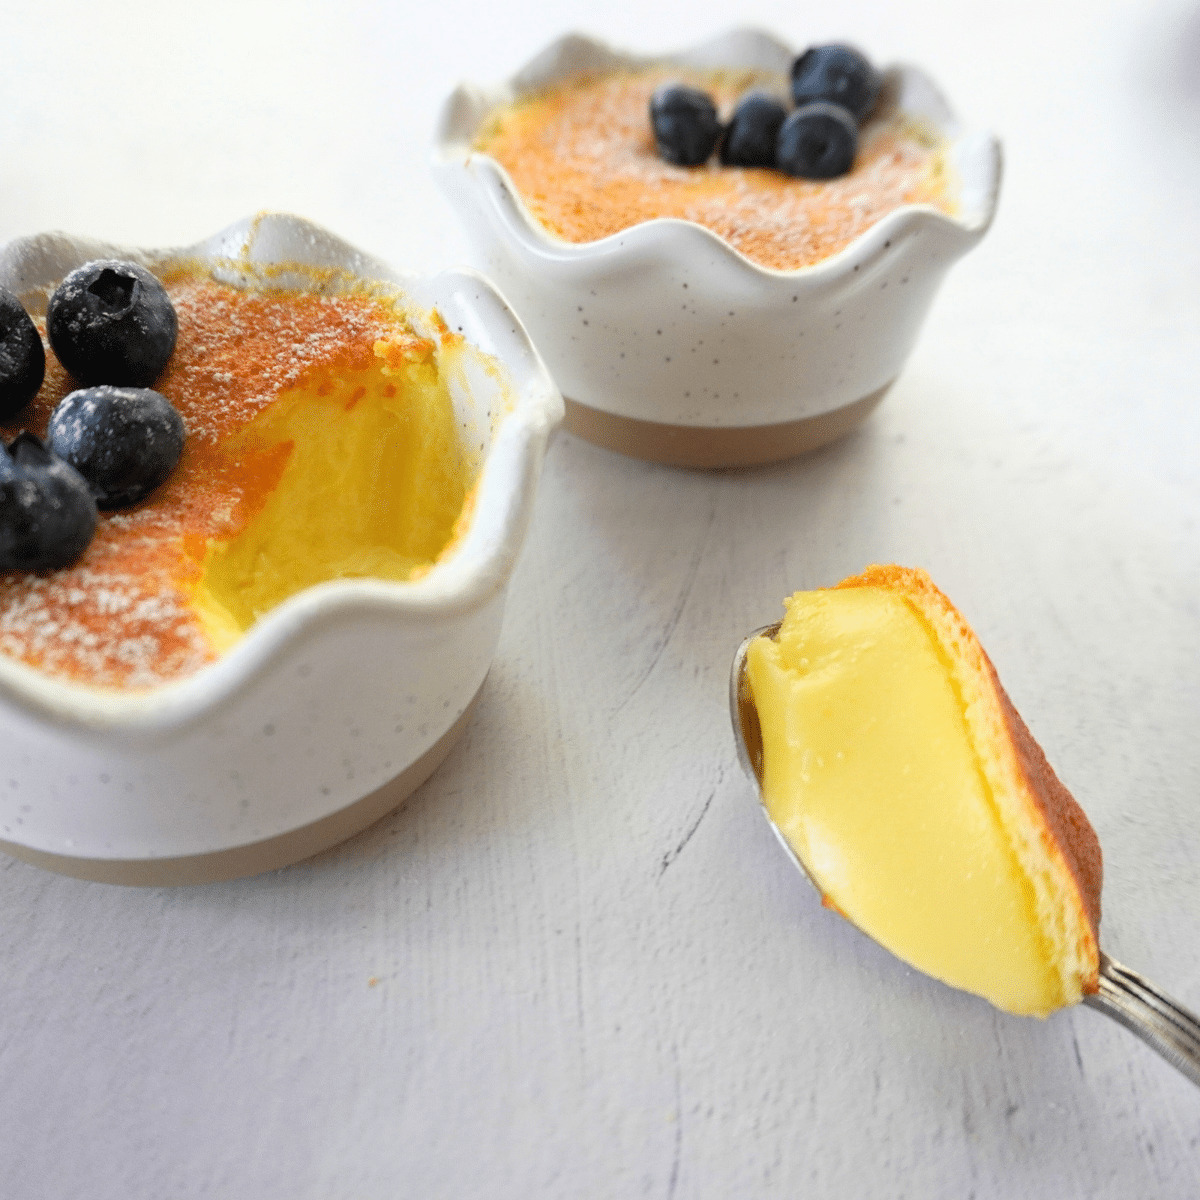
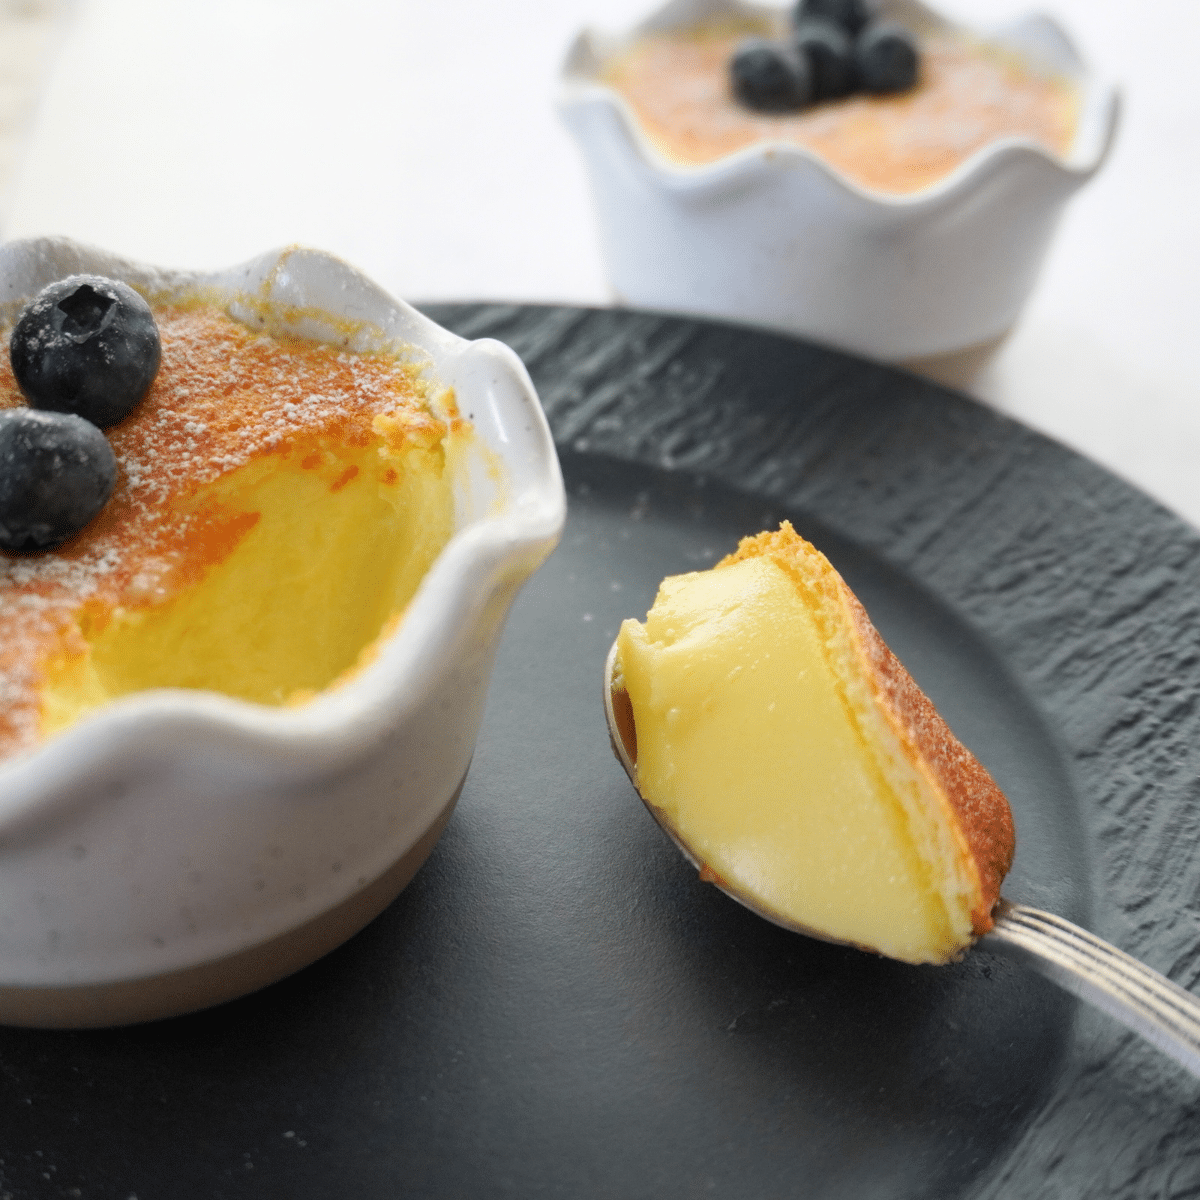
These Lemon Pudding Cakes need only 6 ingredients to create one batter that magically separates into two delicious layers. The top bakes into a light, fluffy cake, while the bottom forms a luscious lemon pudding.
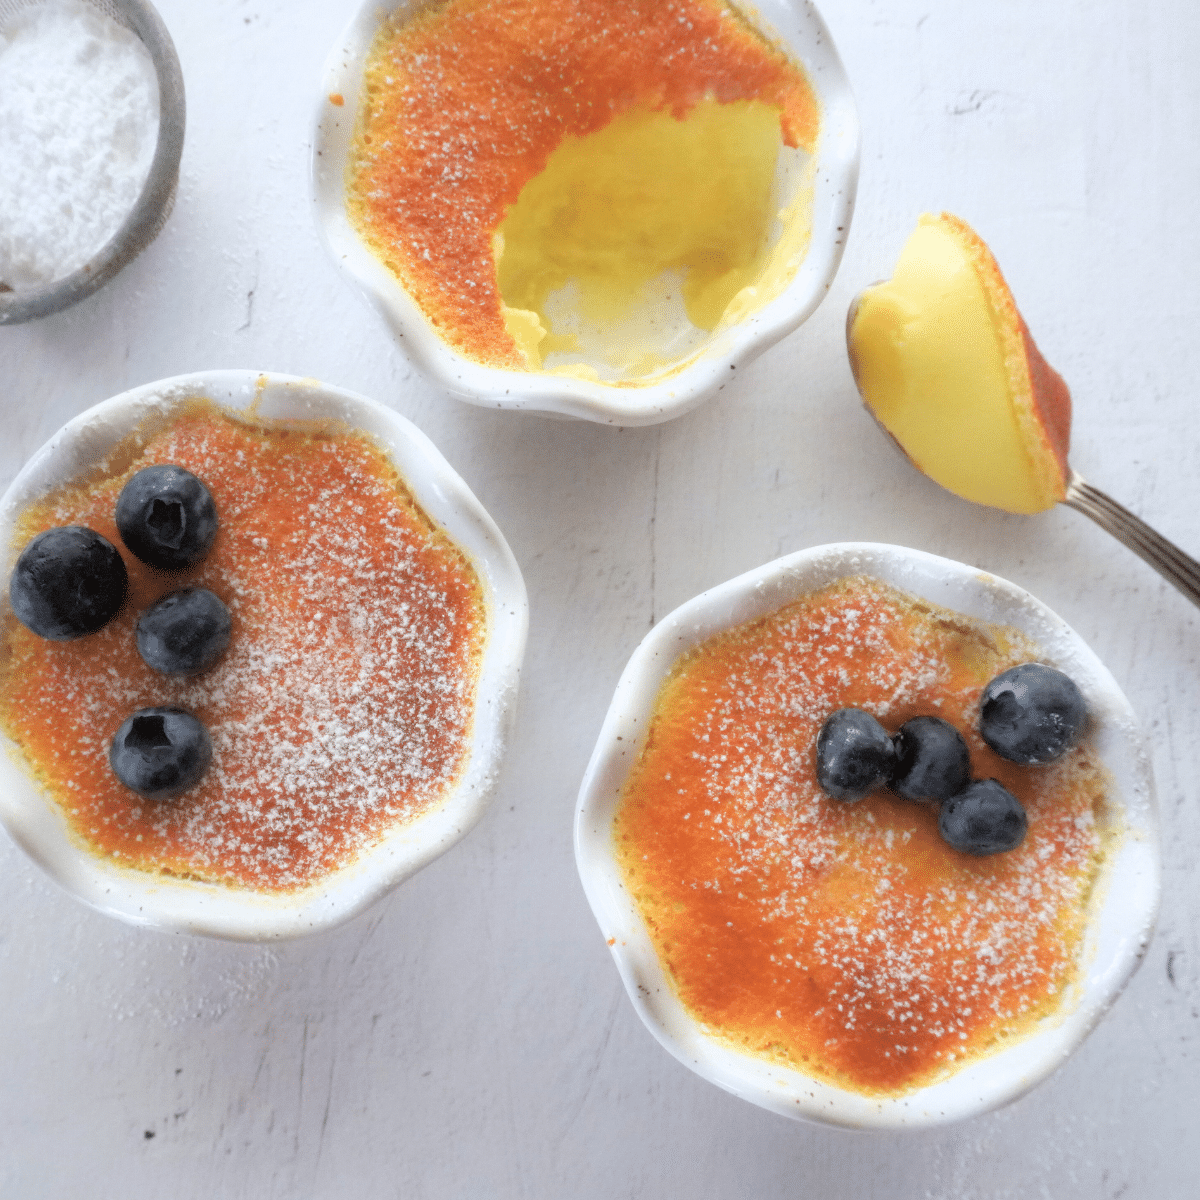
These Lemon Pudding Cakes strikes the perfect balance of tang, sweetness and luxurious richness without being overly heavy, with the most incredible lemon flavour.
They are a lot like my Magic Cake recipes. Both start with a single batter that separates into layers, but with a difference.
- The Lemon Pudding Cakes have two layers—a light, fluffy cake on top and a luscious lemon pudding beneath—
- while the Magic Cake has three layers: a dense base, a creamy custard like center, and a sponge cake top. Check out my Magic Cake recipe here to see the similarities and differences for yourself!
Visual instructions
Here are step by step pictures so you can see what the batter at each stage should look like.
The full printable recipe with amounts and instructions are at the end of this post.
First, spray four ramekins - 4 oz (½ cup or 120 ml) with nonstick cooking spray then begin making the batter.
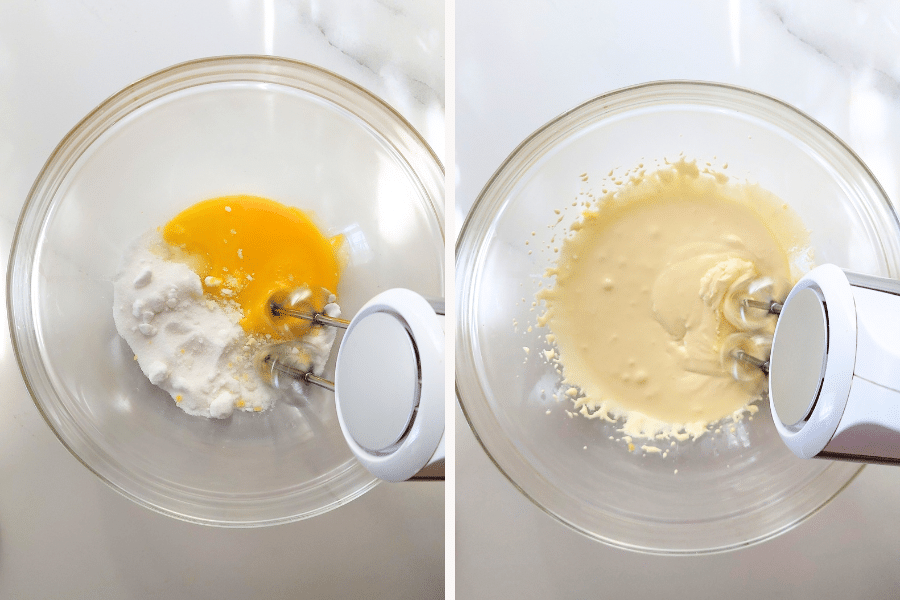
- Beat together sugar, lemon zest and egg yolks. Beat for about 4 to 5 minutes until it turns pale or light in color.
- Pour in the melted butter and lemon juice - beat for one minute
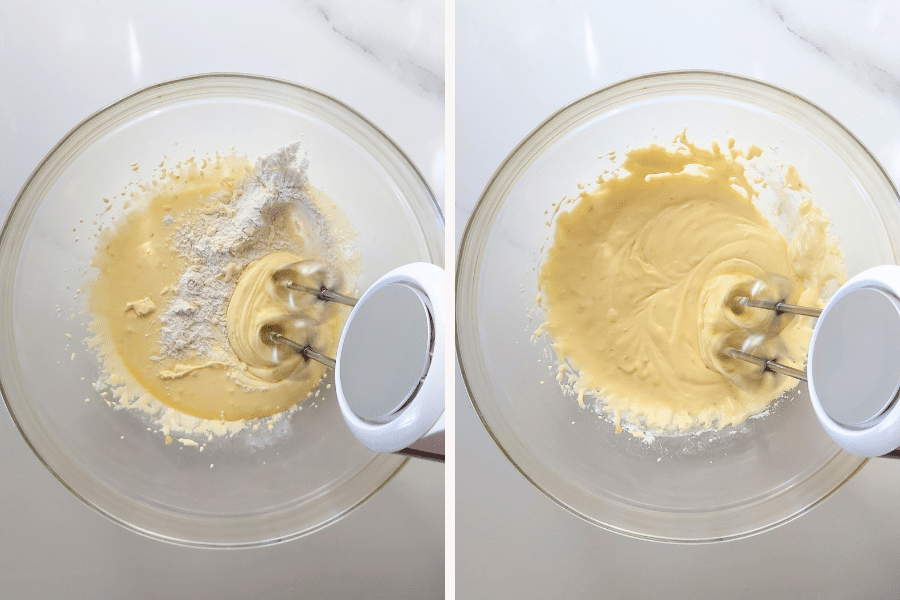
- Add all purpose flour (plain flour) - beat for about 30 seconds to combine

- Pour in the milk and mix until just combined - set the bowl aside
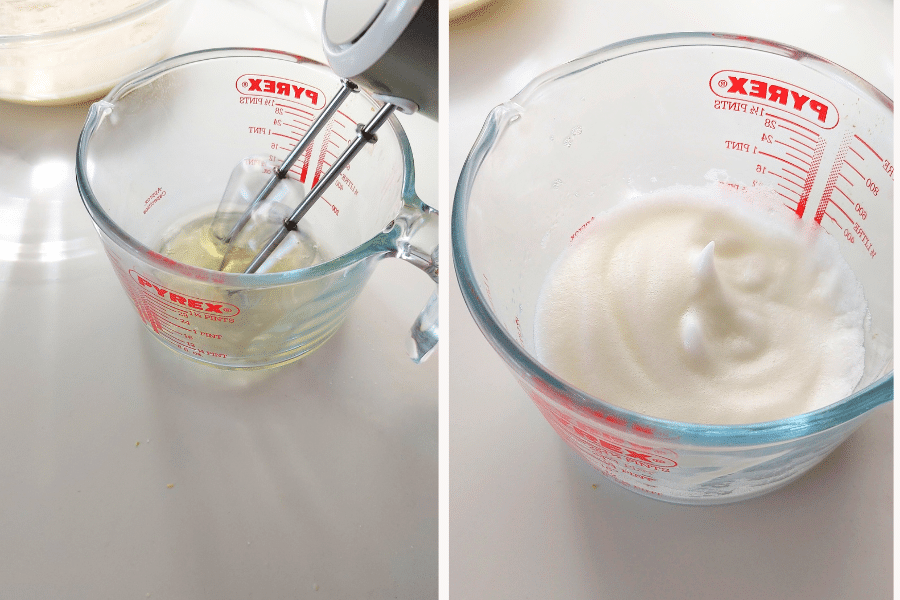
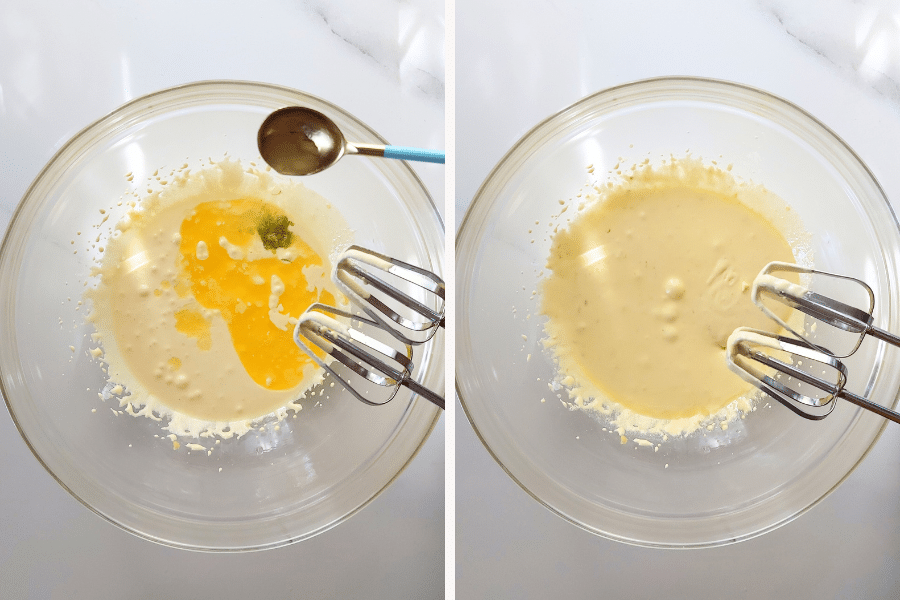
- Beat the egg whites on medium speed about 4 - 5 minutes . When you lift the beaters out, the peaks should be stiff. Be careful not to overbeat the egg whites past this stage. Or the result will be curdled egg whites.
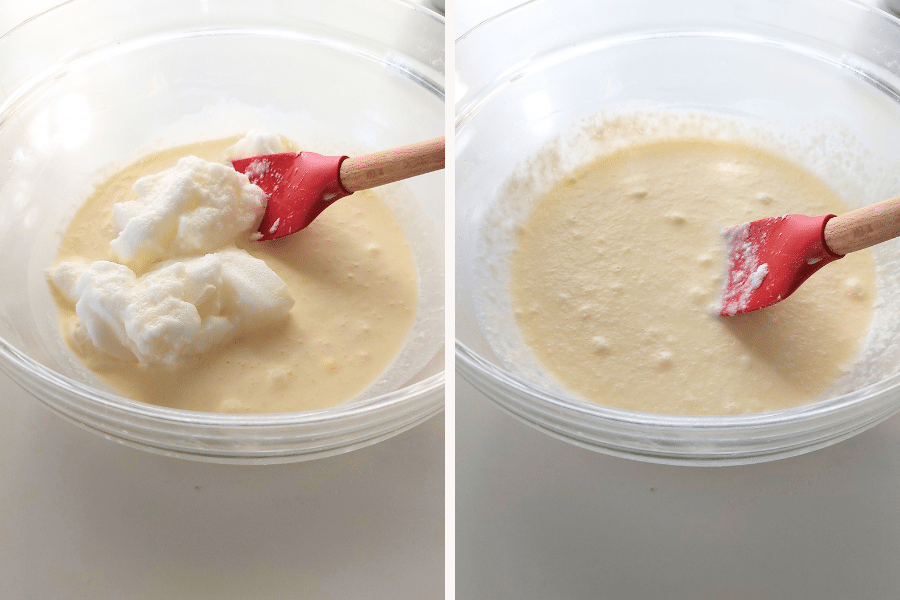
- Use a spatula to transfer the beaten egg whites to the yolk mixture. Fold the beaten whites gently into the yolk mixture with a spatula.
- It's perfectly fine if you see a few specks of egg white on the surface. You don't want to overbeat it. The batter will be light, foamy, and liquidy.
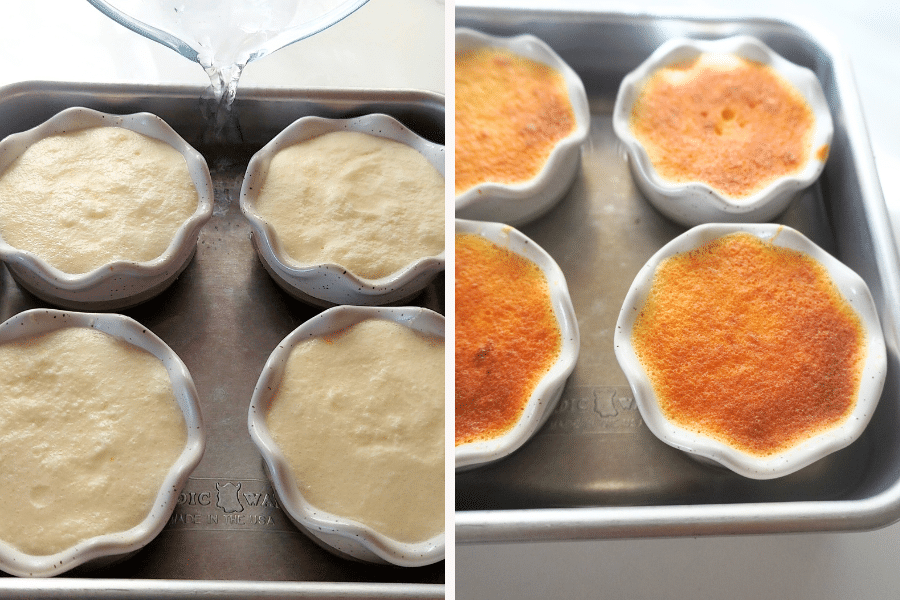
- Place the prepared ramekins in a baking pan. Spoon the batter evenly into each one—it’ll come close to the top, and that's perfectly fine because it won’t overflow during baking
- Pour room temperature water into the pan to reach halfway up the sides of the ramekins (known as a water bath) see tips below
- Bake for about 35 - 40 minutes, or until the cakes are puffy and lightly golden on top.
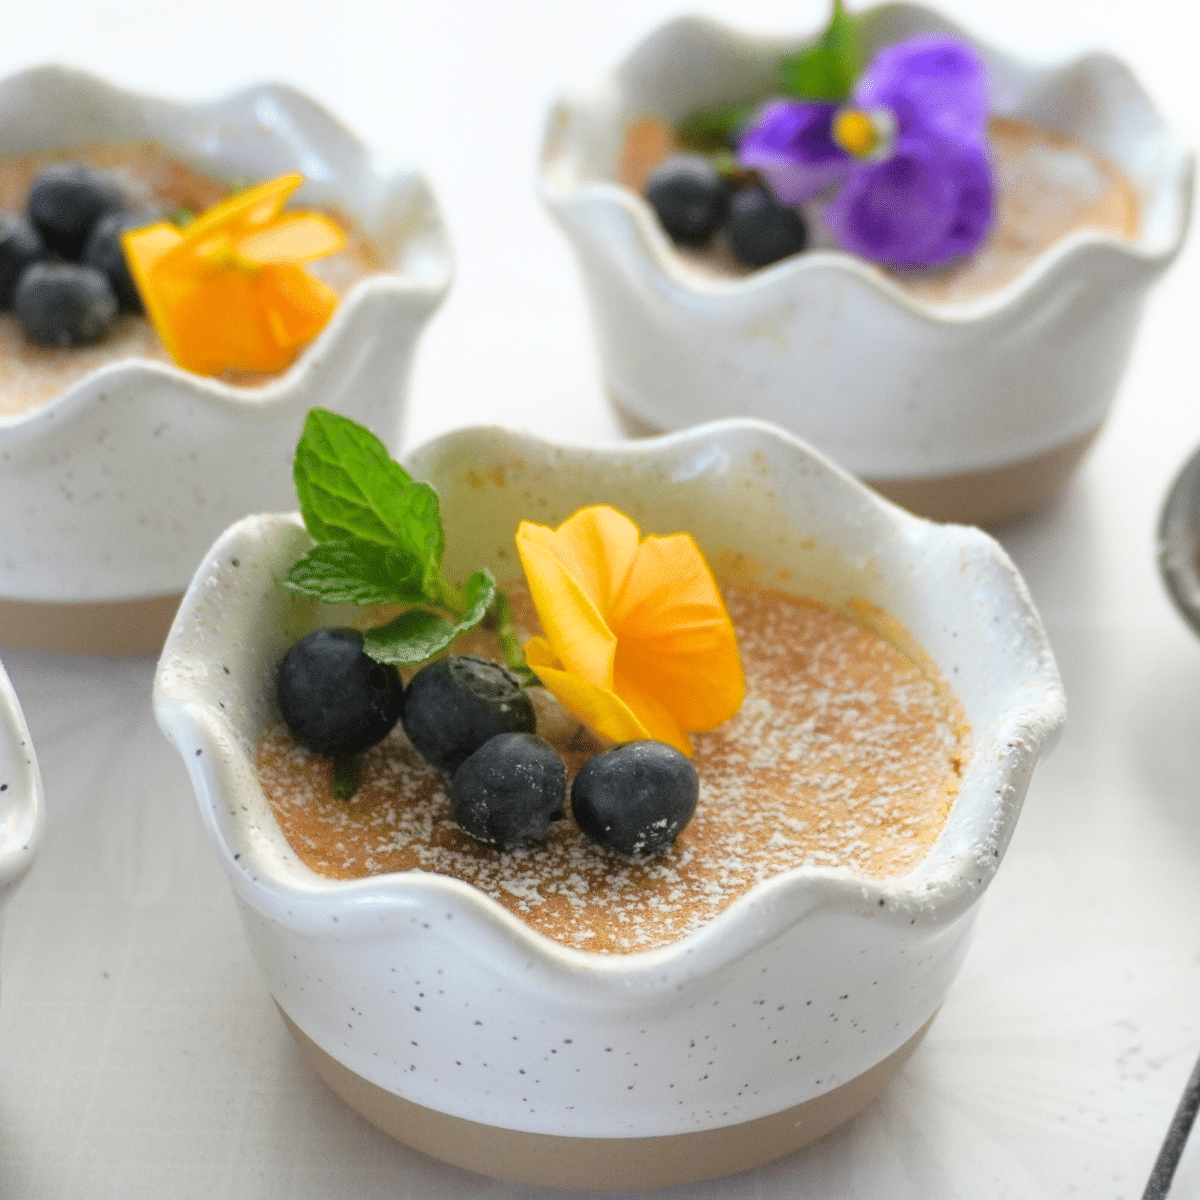
- Once baked, carefully remove the ramekins from the baking dish and let cool on a rack for about 20 minutes before serving. (They will sink a bit as they cool that’s okay.) Dust with powdered sugar and serve with berries, if you like.
Tips
Ramekin sizes: For this recipe, I used 4 ramekins, each with a 4 oz (½ cup or 120 ml) capacity.
To check the size of your ramekins, fill one with water and pour it into a measuring cup. If yours are a different size, no problem—you can still use them! Just adjust the amount of batter you pour in, keeping in mind:
- An 8 oz ramekin holds 1 cup (240 ml).
- A 4 oz ramekin holds ½ cup (120 ml)
- A 6 oz ramekin holds ¾ cup (180 ml)
A water bath is really important when baking these cakes because it gives them the humid environment they need to stay fluffy, so don’t skip this step.
- A water bath is a technique used in baking, especially for delicate desserts like these lemon pudding cakes.
- You place your ramekins into a larger pan filled with water, which gently heats up and surrounds the cakes as they bake.
- This method ensures the cakes cook evenly, staying soft and smooth without cracking
Time to bake: Since ovens can differ, keep an eye on the puddings to make sure the tops don’t burn.
If they start browning too fast, just tent some foil over the bowls without letting it touch the cakes about halfway through baking. It’s perfectly fine to open the oven for this—the cakes won’t sink, as long as it’s just for a few seconds.
Enjoy 😋
Recipe
Lemon Pudding Cakes
- ½ cup (100g) white granulated sugar
- 2 large eggs, separated
- 1 Tablespoons lemon zest
- 3 Tablespoons (40g )butter, melted
- 2 teaspoons 10ml lemon juice (at room temperature) (see note 1)
- 2 ½ Tablespoons 20g all purpose (plain) flour
- 1 cup milk, at room temperature Use whole milk for the richest taste but lower-fat or nondairy milk works too.
- Spray four ramekins - 4 oz (½ cup or 120 ml) with nonstick cooking spray (See note 2 for ramekin sizes)
Egg yolk mixture
- In a large bowl, beat together sugar, lemon zest and egg yolks. Beat for about 4 to 5 minutes until it turns pale or light in color.
- Pour in the melted butter and lemon juice - beat for one minute
- Add all purpose flour (plain flour) - beat for about 30 seconds to combine
- Pour in the milk and mix until just combined - set the bowl aside
Beat egg whites
- In a separate bowl beat the egg whites on medium speed about 4 - 5 minutes .
- When you lift the beaters out, the peaks should be stiff. Be careful not to overbeat the egg whites past this stage. Or the result will be curdled egg whites.
Transfer beaten egg whites to yolk mixture
- Use a spatula to transfer the beaten egg whites to the yolk mixture. Fold the beaten whites gently into the yolk mixture with a spatula.
- It's perfectly fine if you see a few specks of egg white on the surface. You don't want to overbeat it. The batter will be light, foamy, and liquidy.
Preheat the oven
- Preheat the oven now to 325° F / 170°C (150°C if you are using a fan assisted oven) and set a rack in the middle position
Fill batter into ramekins
- Place the ramekins into a baking pan with high sides. Spoon the batter evenly into each one—it’ll come close to the top, and that's perfectly fine because it won’t overflow during baking.
Water bath (don't skip this step) - see note 3
- Pour room temperature (tap water is fine) water into the baking pan to reach halfway up the sides of the ramekins
Bake
- Bake for between 30 - 38 minutes, or until the cakes are puffy and lightly golden on top. My oven tends to bake quickly, so I typically remove them after 32-33 minutes.
- If they start browning too fast, just tent some foil over the bowls without letting it touch the cakes about halfway through baking. It’s perfectly fine to open the oven for this—the cakes won’t sink, as long as it’s just for a few seconds.
Cool
- Once baked, carefully remove the ramekins from the baking dish and let cool on a rack for about 20 minutes before serving.
- Cooling the lemon pudding cakes helps the pudding part set and thicken. If you cut into them right away, the pudding might be too runny. Letting them cool lets the pudding firm up and makes them taste better.
- They will sink a bit as they cool, that's okay. Dust with powdered sugar and serve with berries, if you like.
- You can serve warm or refrigerate and serve cold.
- Storing: Cover leftover cakes tightly and refrigerate for up to 3 days.
- * Refer to the visual instructions in the post above for a guide on what each step of the recipe should look like.
- To check the size of your ramekins, fill one with water and pour it into a measuring cup. If yours are a different size, no problem—you can still use them! Just adjust the amount of batter you pour in, keeping in mind:
- An 8 oz ramekin holds 1 cup (240 ml).
- A 4 oz ramekin holds ½ cup (120 ml)
- A 6 oz ramekin holds ¾ cup (180 ml
- A water bath is a technique used in baking, especially for delicate desserts like these lemon pudding cakes.
- You place your ramekins into a larger pan filled with water, which gently heats up and surrounds the cakes as they bake.
- This method ensures the cakes cook evenly, staying soft and smooth without cracking
Want even more delicious recipes? Subscribe free to receive new post notifications emailed to you. Or follow along on Facebook, Pinterest, and Instagram. If you love sharing recipes please come and join my All about cooking and baking Facebook group or Subscribe to my YouTube channel


Leave a Reply