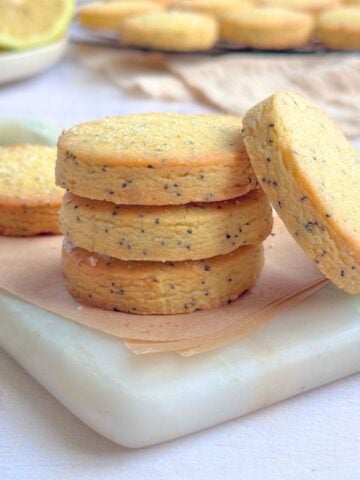
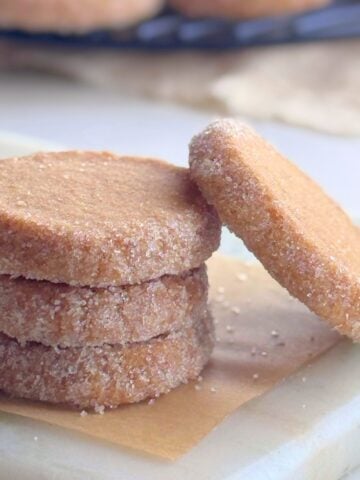
These easy Glazed Sugar Cookies made without eggs are soft, sweet and perfect for decorating. It’s easy to cut shapes out with and when you bake them the cookies will not spread.
Frosted with a simple glaze that's easily tintable, covers smoothly and dries firmly so that you can stack your finished cut-out sugar cookies without fear of smudging them.

Visual guide to making Glazed Sugar cookies
This is just a visual guide, so you can see the process. When you are baking, you will need to refer to the recipe card below.
Make the dough
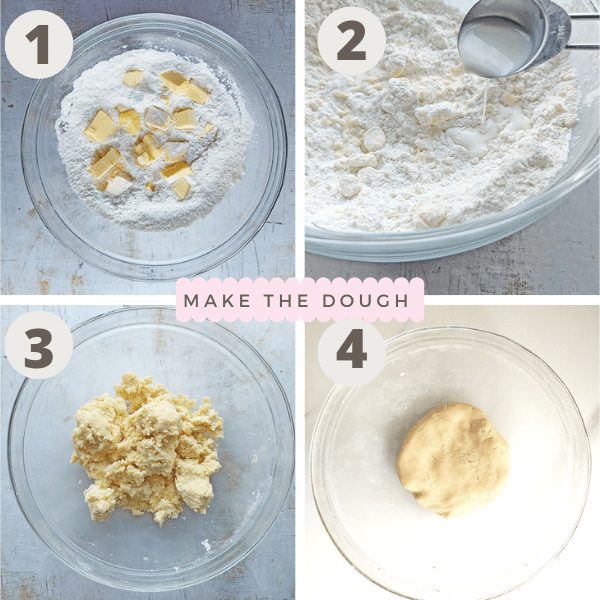
- In a large bowl combine the flour, sugar, salt, butter and vanilla extract.
- Add the milk
- Mix until the dough forms a crumbly mass.
- Gather the dough into a smooth ball. The dough at first may seem like it won't come together, but keep mixing. Chill dough in the fridge for 10 minutes.
Roll out and cut the dough, freeze, bake
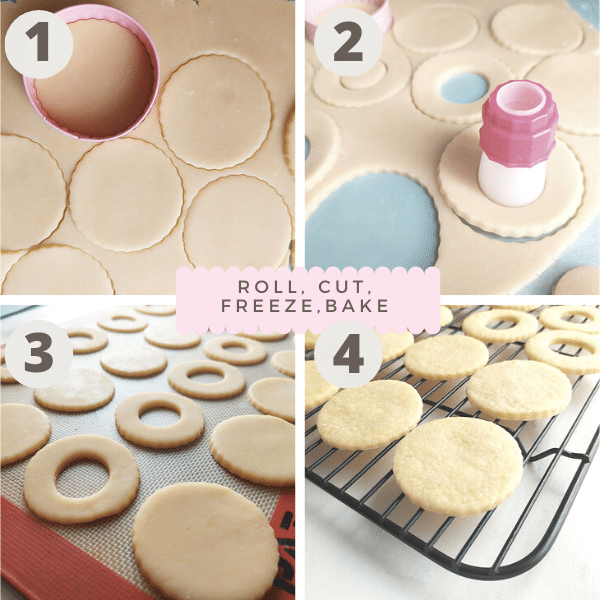
- Use a 2 inch (6cm)" round cookie cutter to cut out cookies. (This is going to be the bottom part of the cookie)
- With a smaller (about 1 inch/3cm) round cookie cutter or piping, nozzle cut a window out of half the shapes. (This is going to serve as the top part of the cookie).Gather up the scraps, knead into a flat disc, roll, and repeat (if the dough is too warm, pop it back into the fridge for a bit).
- Transfer the cookies onto a baking sheet lined with parchment paper and freeze for 20 minutes.
- Bake. Leave the cookies on the baking sheet for 10 to 12 minutes before transferring to a cooling rack. Allow to cool completely before glazing.
Make the glaze
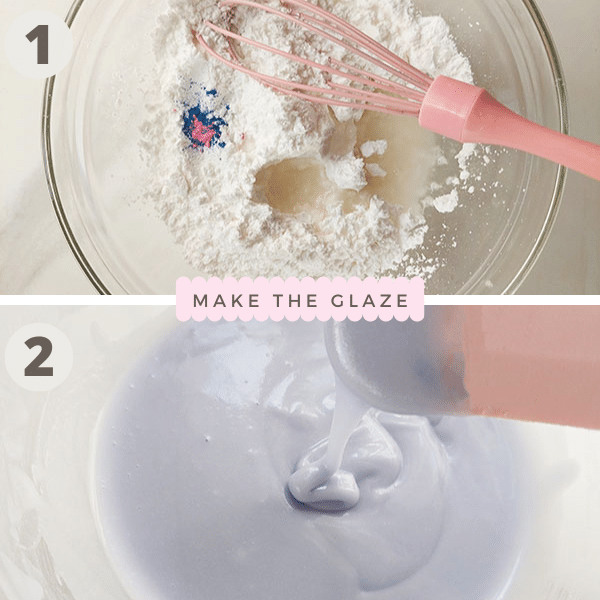
- Combine powdered sugar and hot water and coloring (optional) in a medium-sized bowl
- Mix until smooth.
Glaze, decorate, fill, sandwich
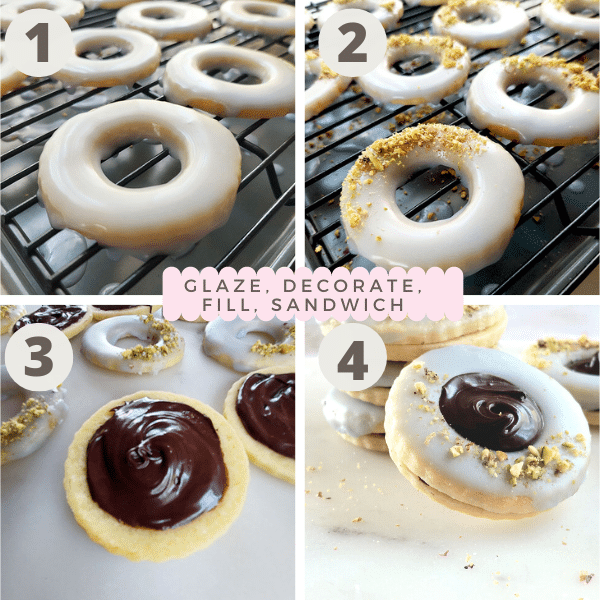
- Dip the top halves of the cookies in the glaze and leave to dry on a cooling rack. The glaze takes about 15 minutes to dry.
- If you are adding any decoration like sprinkles or chopped peanuts, then do it before the glaze has completely dried.
- While the glaze is drying, spread about 1 teaspoon of your preferred filling on each of the bottom halves, leaving about ¼-inch (6mm) border.
- Take the top part of the cookie (those with the cut-out center) and place it over the bottom half. Press lightly and gently to sandwich the cookies.

Tips and frequently asked questions
TIP: Measure your flour correctly! Adding too much flour to the recipe is the most common mistake. The best, and easiest way to measure flour is by using a kitchen scale. If you don’t have one then fluff your flour with a spoon, sprinkle it into your measuring cup, and then use a knife to level it off
Yes, the dough can be kept in the fridge for up to 4 days, or
Frozen for up to 3 months. If frozen thaw in the refrigerator overnight before you roll out.
For a recipe like this the chill time is only there to let you handle the dough without damaging the surface of the cookies. It’s not about how they spread in the oven.
This recipe does not use baking powder because baking powder would cause the cookies to puff up and lose their shape.

RECIPE
Glazed Sugar Cookies (no eggs)
For the cookies
- 2 cups cake OR all-purpose flour
- 1 cup powdered sugar
- ¼ teaspoon salt see notes
- ⅔ cup butter at room temperature, cut into cubes see notes on room temperature butter
- 1 teaspoon vanilla extract
- 2 Tablespoons milk
- Filling see notes
For the Glaze
- 2 cups sifted powdered sugar
- 4 ½ Tablespoons hot water see notes
- Food coloring (optional) see notes
- Topping/ decoration (optional) see notes
Make the cookies
Make the dough
- In a large bowl combine the flour, sugar, salt, butter and vanilla extract. Add the milk Mix until the dough forms a crumbly mass.
- Gather the dough into a smooth ball. The dough at first may seem like it won't come together, but keep mixing.
Refrigerate for 10 minutes
- Chill dough in the fridge for 10 minutes.
Roll out and cut the dough
- Liberally dust a work surface with flour, and roll out the dough to ⅛-inch (3mm) thickness.
- Use a 2 inch (6cm)" round cookie cutter to cut out cookies. (This is going to be the bottom part of the cookie)
- With a smaller (about 1 inch/3cm) round cookie cutter or piping, nozzle cut a window out of half the shapes. (This is going to serve as the top part of the cookie)
- Gather up the scraps, knead into a flat disc, roll, and repeat (if the dough is too warm, pop it back into the fridge for a bit).
Freeze cut out shapes for 20 minutes
- Using a metal spatula, transfer the cookies onto a baking sheet lined with parchment paper and freeze for 20 minutes.
Bake
- Bake in a preheated oven at 350 °F / 180 °C (160°C fan forced) 10 to 12 minutes.
- Remove from the oven and leave the cookies on the baking sheet for 10 to 12 minutes before transferring to a cooling rack.
- Allow to cool completely before glazing.
Make the glaze
- Combine powdered sugar and hot water and coloring (optional) in a medium-sized bowl. Mix until smooth.
- If your glaze is too thick, stir in more hot water, half a teaspoon at a time, until it reaches the consistency you desire.
- Or if the glaze is too thin, you can add more powdered sugar, a tablespoon at a time, until it reaches the right consistency.
Assemble the cookies
- Dip the top halves of the cookies in the glaze and leave to dry on a cooling rack. The glaze takes about 15 minutes to dry.
- If you are adding any decoration like sprinkles or chopped peanuts, then do it before the glaze has completely dried.
- While the glaze is drying, spread about 1 teaspoon of your preferred filling on each of the bottom halves, leaving about ¼-inch (6mm) border.
- Take the top part of the cookie (those with the cut-out center) and place it over the bottom half. Press lightly and gently to sandwich the cookies.
- Store in an airtight container at room temperature for up to 4 days.
# ADDITIONAL INFORMATION
- See a visual guide on how to make the cookies, freezing, storage, tips and frequently asked questions in the post below
- Additional information: See a visual guide on how to make the cookies, freezing, storage, tips and frequently asked questions in the post above.
- Nutrition has been calculated without the filling
Enjoy ♡
Want even more delicious recipes? Subscribe free to receive new post notifications emailed to you. Or follow along on Facebook, Pinterest, and Instagram. If you love sharing recipes please come and join my All about cooking and baking Facebook group or Subscribe to my YouTube channel


Leave a Reply