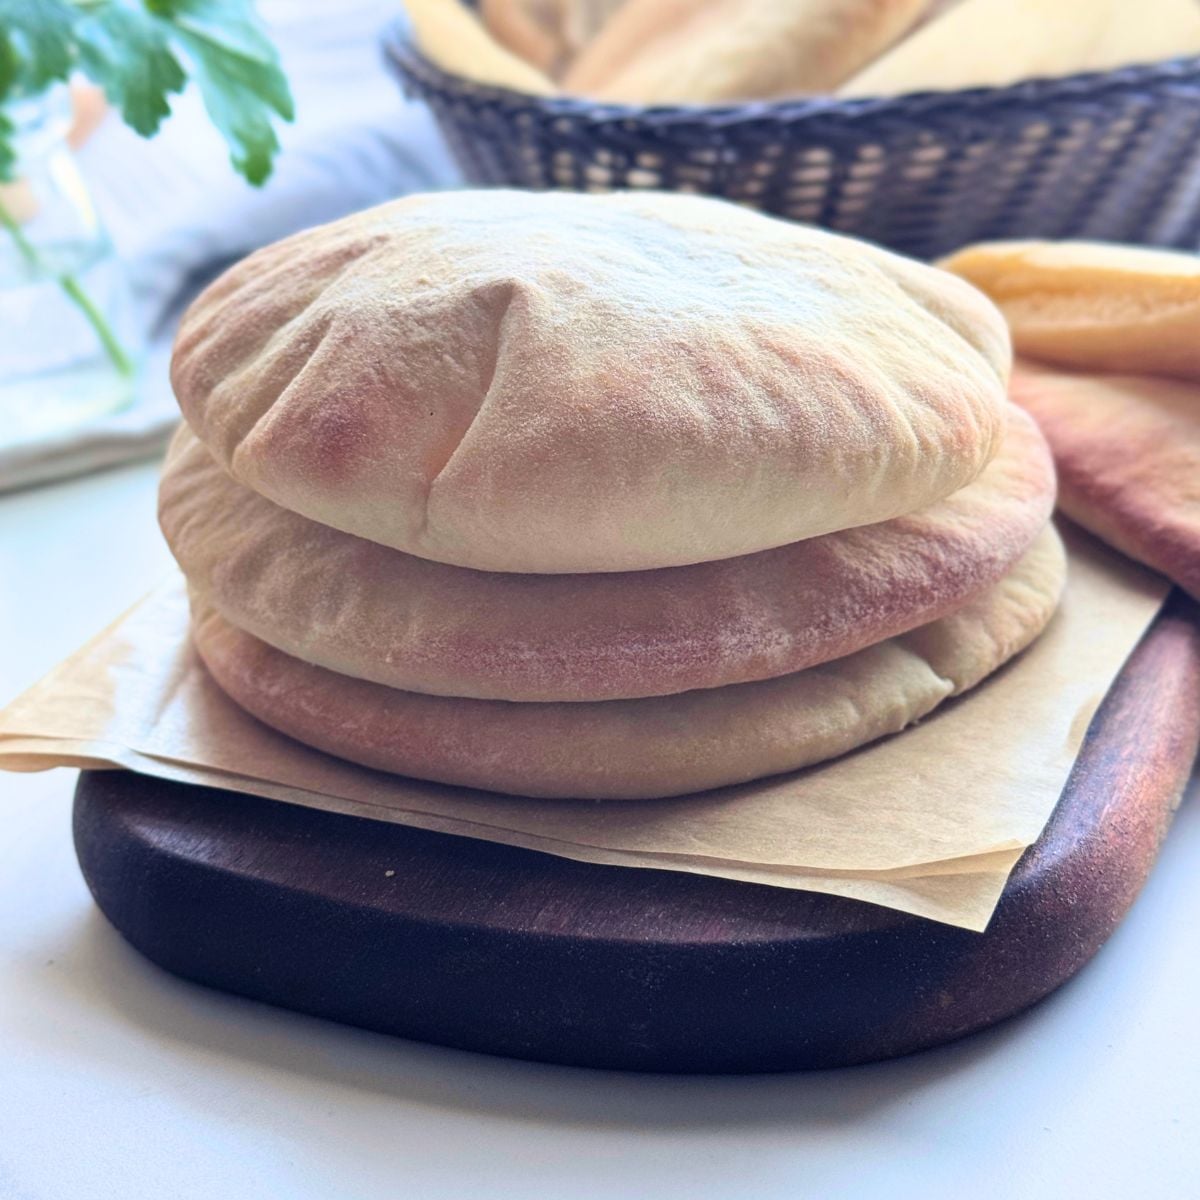
This easy homemade pita bread puffs as it bakes, creating a pocket perfect for your favorite fillings. The dough is easy to work with and bakes into soft, fluffy pitas.

Step by step photos
These visual instructions help you see the process. You can also find the full printable recipe with ingredient amounts and instructions at the end of the post.
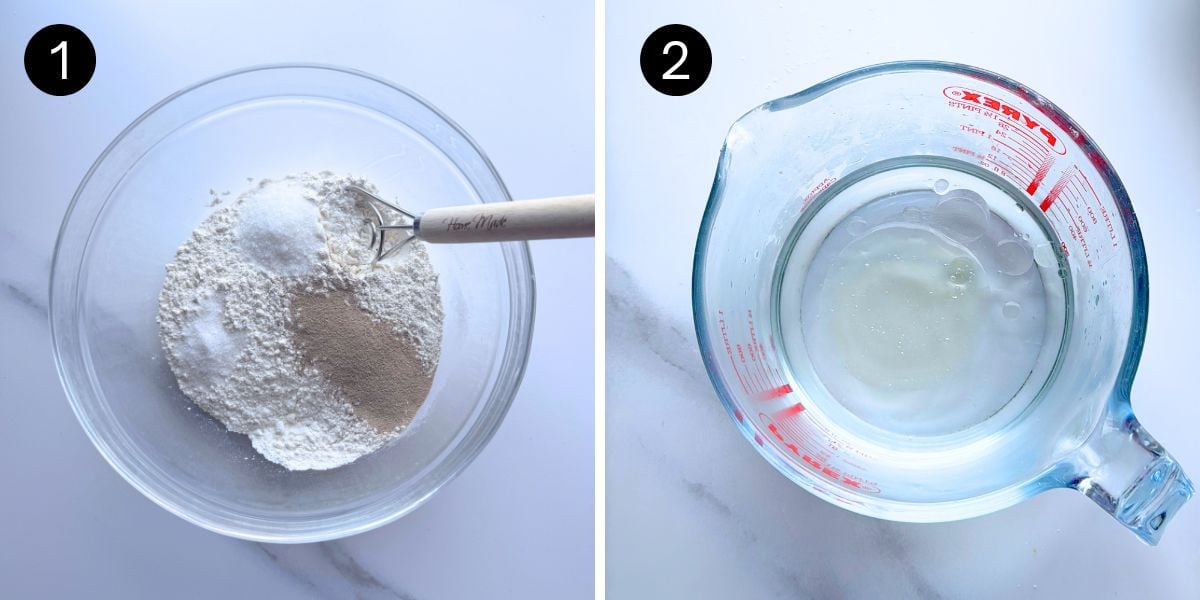
- Flour mixture: In a large bowl, whisk together the flour, sugar, salt, and instant yeast.
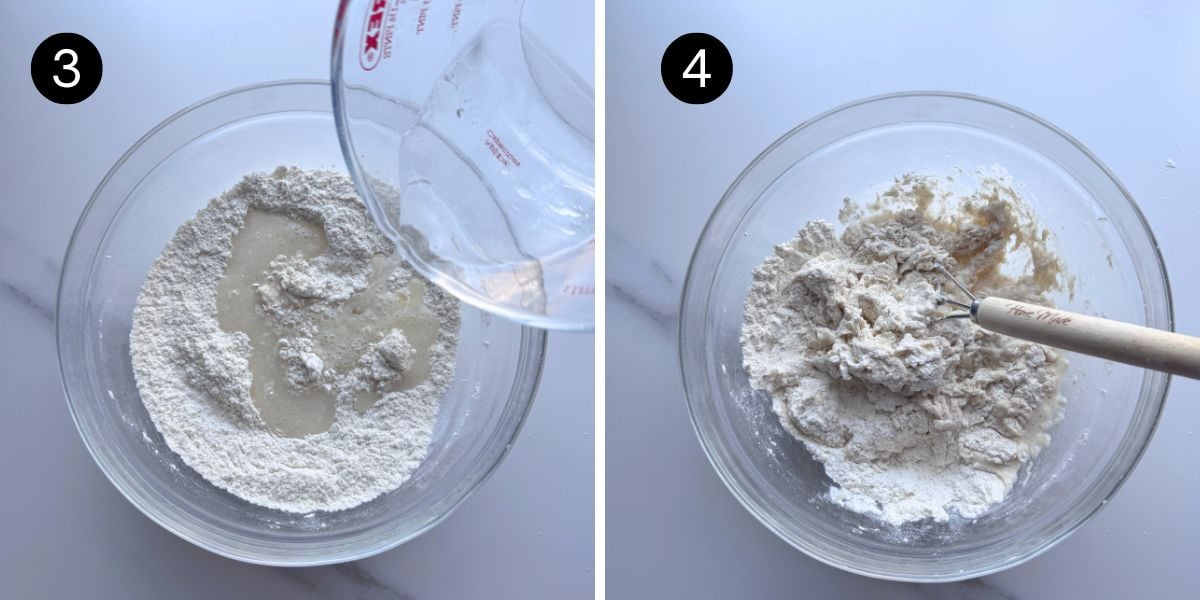
- Water mixture: In a measuring jug, stir together the lukewarm water (100°F–110°F / 38°C–43°C) and oil.
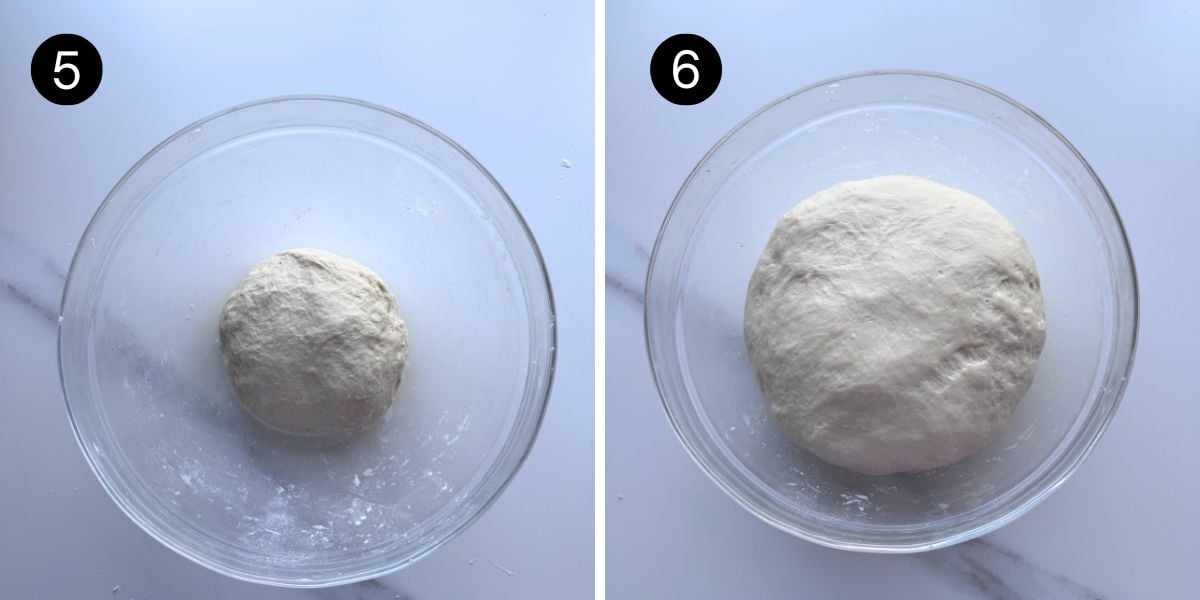
- Pour the water mixture into the flour mixture.
- Mix with a spatula or dough whisk to form a shaggy dough.
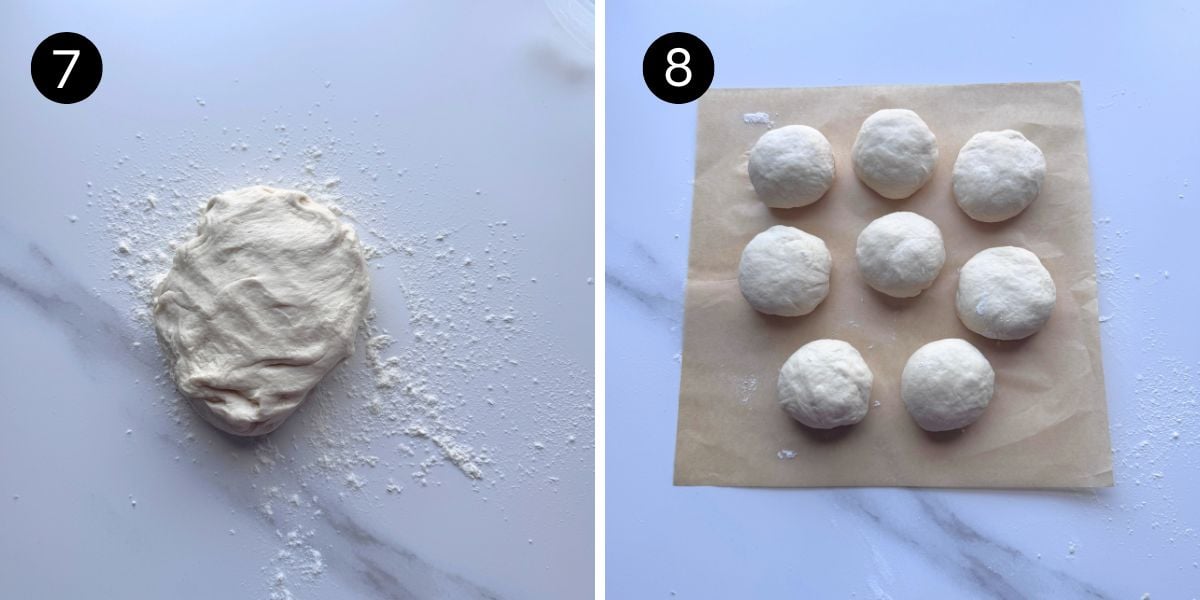
- Knead the dough by hand for 6 to 8 minutes, until smooth. Lightly oil a bowl, place the dough inside, cover with plastic wrap, and let rise for 45 to 60 minutes, or until doubled in size.
- After rising, the dough should have doubled in size.
- Turn the dough onto a lightly floured surface
- divide into 8 equal pieces (about 80 g each). Shape each piece into a smooth ball.
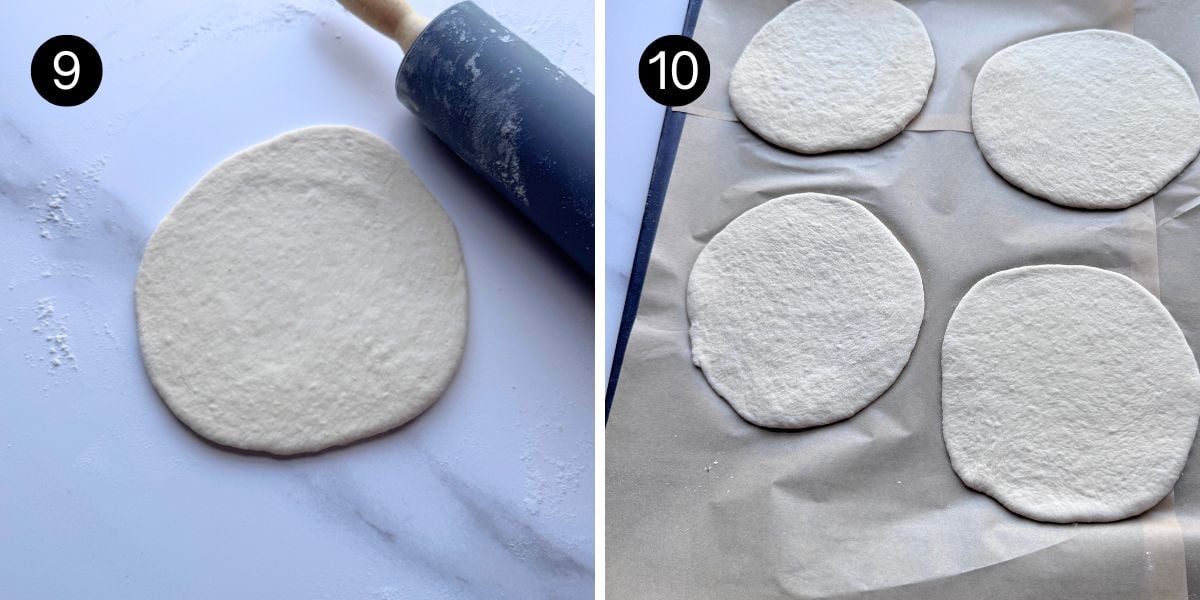
- Roll each ball into a circle about 6 inches (15 cm) in diameter and approximately ¼ inch (6 mm) thick.
- Place on parchment-lined baking sheets. Cover lightly and let rest for 15 to 20 minutes.
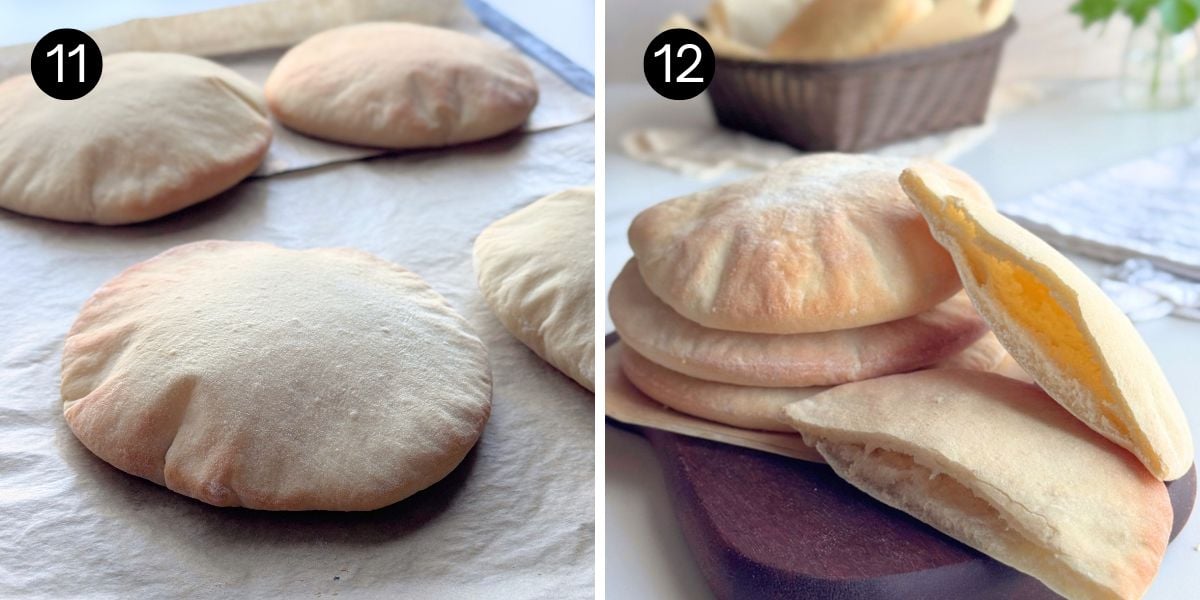
- Bake for 8 to 10 minutes, or until puffed and lightly golden around the edges.
- Serve warm. Cover any leftover pitas with a clean kitchen towel while they cool to help keep them soft.
Storage
Room temperature: Store the cooled pita bread in an airtight container or resealable bag at room temperature for up to 3 days.
Freezing: Freeze in a freezer-safe bag or airtight container for up to 2 months. Thaw at room temperature, then warm in the microwave for a few seconds or in a warm oven before serving.
Recipe tips
- Yeast: I used instant yeast, which is added directly to the flour. If you're using active dry yeast, use the same amount. Stir it into the lukewarm water and sugar from this recipe and let it stand for 5 to 10 minutes, or until foamy. Add the yeast mixture and the oil to the flour mixture, then continue with the recipe.
- Lukewarm water: Water between 100°F and 110°F (38°C to 43°C) helps activate the yeast.
- Stand mixer option: The dough can also be mixed and kneaded with a stand mixer fitted with the dough hook. Knead on low speed for 4 to 5 minutes, or until smooth and elastic.
- Roll evenly: Roll each pita to about 6 inches (15 cm) in diameter and approximately ¼ inch (6 mm) thick for even baking and puffing.
- Bake in a preheated oven: If your oven doesn't have a preheat indicator, allow 10 to 15 minutes for it to preheat to 400°F (200°C) before baking. A hot oven helps the pitas puff and form a pocket.
- Convection (fan) oven: If you're using a convection (fan) oven, reduce the oven temperature to 180°C (355°F).
Make ahead option
Once the dough has been kneaded, place it in a lightly oiled bowl, cover tightly, and refrigerate for up to 24 hours.
When you're ready to continue, let the dough stand at room temperature for 30 to 45 minutes before dividing, shaping, and baking as directed.
Recipe
Easy Homemade Pita
Watch how to make the recipe
- 3 cups (360 g) all purpose flour (plain flour)
- 1 Tablespoon (12 g) granulated sugar
- 1¼ teaspoons salt
- 2½ teaspoons (9 g instant yeast)
- 1 Tablespoon (15 ml) oil (canola or vegetable oil)
- 1 cup (240 ml) lukewarm water (100°F–110°F / 38°C–43°C)
- Flour mixture: In a large bowl, whisk together the flour, sugar, salt, and instant yeast.
- Water mixture: In a measuring jug, stir together the lukewarm water and oil.
- Combine: Pour the water mixture into the flour mixture and mix with a spatula or dough whisk until a shaggy dough forms.
- Knead: Turn the dough onto a lightly floured surface and knead by hand for 6 to 8 minutes, or until smooth.
- Rise: Lightly oil a bowl, place the dough inside, cover with plastic wrap, and let rise for 45 to 60 minutes, or until doubled in size.
- Shape: Turn the dough onto a lightly floured surface and divide it into 8 equal pieces (about 80 g each). Shape each piece into a smooth ball.
- Roll each ball into a circle about 6 inches (15 cm) in diameter and approximately ¼ inch (6 mm) thick.
- Rest: Place the rounds on parchment-lined baking sheets. Cover lightly and let rest for 15 minutes.
- Preheat the oven: Meanwhile, preheat the oven to 400°F (200°C).
- Bake for 8 to 10 minutes, or until the pitas are puffed and lightly golden around the edges.
- Enjoy warm. Cover any leftover pitas with a clean kitchen towel while they cool to help keep them soft.
Storage
- Store the cooled pita bread in an airtight container or resealable bag at room temperature for up to 3 days
Hungry for more?
Sign up for my free newsletter to get emails about new recipes .And don't forget to follow me on YouTube, Facebook, Pinterest, and Instagram for all the latest deliciousness.


heather (delicious not gorgeous) says
i love how fluffy these look!! i can imagine how good they'd be with baba ghanoush, hummus, everything....
The Gardening Foodie says
Thank you Heather, oh yes, you can really go all out with the topping, it really tastes good 🙂
Ruby & Cake says
I have never attempted making pita bread before, it looks so much less complicated than I had imagined. Yours look like perfect fluffy pillows! So delicious!!
The Gardening Foodie says
Thank you Ruby...it really is simple, and I hope that you get a chance to try out the recipe...it is really delicious 🙂
Deepika|TheLoveOfCakes says
Your pita bread looks better than store brought! It's perfectly puffed up and the texture looks lovely too! I love having a pita sandwich whenever I can..and stuffing my own pita bread would be amazing! Bookmarking to try soon!
The Gardening Foodie says
Thank you Deepika, oh yes it does taste so good as a sandwich... and I hope that you get to try it out soon as well 🙂
Patrick says
These look amazing! I love pita and there is so much you can do with it! I see this a being a staple recipe to make over and over!
The Gardening Foodie says
Thank you Patrick,oh that is so true, pita is such a versatile bread 🙂
Denise Browning says
Although pita is available at stores, as any other bread the fresh ones are way more delicious.
The Gardening Foodie says
Oh that is so true Denise, homemade is always so much tastier 🙂
Matt says
Yummmm! I saw this on instagram the other day and just had to check it out. We love pita here but always have gotten store bought. I can't imagine how good this is fresh and homemade. When I get the time (and I should be able to justify an hour haha) I will def be trying this out! Thanks for the recipe 🙂
The Gardening Foodie says
Thank you Matt... I really hope that you get to try out this recipe too, it is so different when compared to store bought 🙂
Katherine | Love In My Oven says
These are SOOO soft and fluffy looking!! I've tried pita a few times but mine never looks as good as this - I've got to try your recipe! I love toasting my pita and dipping it in hummus and/or tzatziki. So good!
The Gardening Foodie says
Thank you Katherine, oh I hope that you get to try it too...and dipping it in hummus sounds really yummy 🙂
Kelly @ Kelly Lynns Sweets and Treats says
You definitely made this look easy! I have never had homemade pita bread but it sounds so yummy!
The Gardening Foodie says
Thank you Kelly, I hope that you get a chance to try out this recipe, homemade pita is so good 🙂
neil@neilshealthymeals.com says
I love making my own pita breads Ashika. And do you know what's always good to see in a recipe, a "how to" guide like in yours, so I can check I'm making them correctly!
Thanks for this recipe and I hope you have a great weekend!
The Gardening Foodie says
Thank you Neil...I am glad that you like making your own pita breads as well, they just taste so great:)
Kelsie | the itsy-bitsy kitchen says
My grandma always made pita bread for my sister and me when we were little. We LOVED making pizza with it but it's been years since I made it on my own. I'll have to try your recipe and relive all the fun I had baking with her :). Hope you're having a great week, Ashika!
Louise - Cooking with kids says
These look so much better than shop bought pita bread ?.
The Gardening Foodie says
Thank you Louise, they taste so much better too 🙂
The Gardening Foodie says
Awww, that is so sweet Kelsie, and it sounds like you and your sister had lots of fun ...I hope that you get to try out this recipe soon as well.
Have a great weekend 🙂
2pots2cook says
Love your suggestion ! These are really easily combined with everything ! Thank you !
The Gardening Foodie says
Thank you, I am so glad that you like the recipe 🙂
Maria | kitchenathoskins says
Didn't know pita bread could be made so easily at home. You've certainly made it look so simple Ashika, these look so soft, like fluffy pillows. I can imagine how wonderful these would be stuffed with hot falafels or just plain with a bowl of hummus, yum.
The Gardening Foodie says
Thank you Maria, oh yes these are so easy to make and so good with just any filling or topping 🙂
Thao @ In Good Flavor says
These look gorgeous! They are so puffy, soft, and perfectly baked. I could eat them, plain , straight from the oven!
The Gardening Foodie says
Thank you Thao...haha, they are hard to resist when the of the oven, they taste so good plain as well 🙂
Emma - Bake Then Eat says
Very little beats homemade bread, I don’t make it often but I am tempted to make these, they look gorgeous.
The Gardening Foodie says
Thank you Emma...oh I hope that you give it a try , they are delicious 🙂