These chocolate chunk cookies are what chocolate lovers dreams are made of!
Filled with chunks of chocolate and baked to a tender fudginess with crisp golden edges, this is the ultimate treat. Super easy to make, these delights are ready to munch on within an hour.
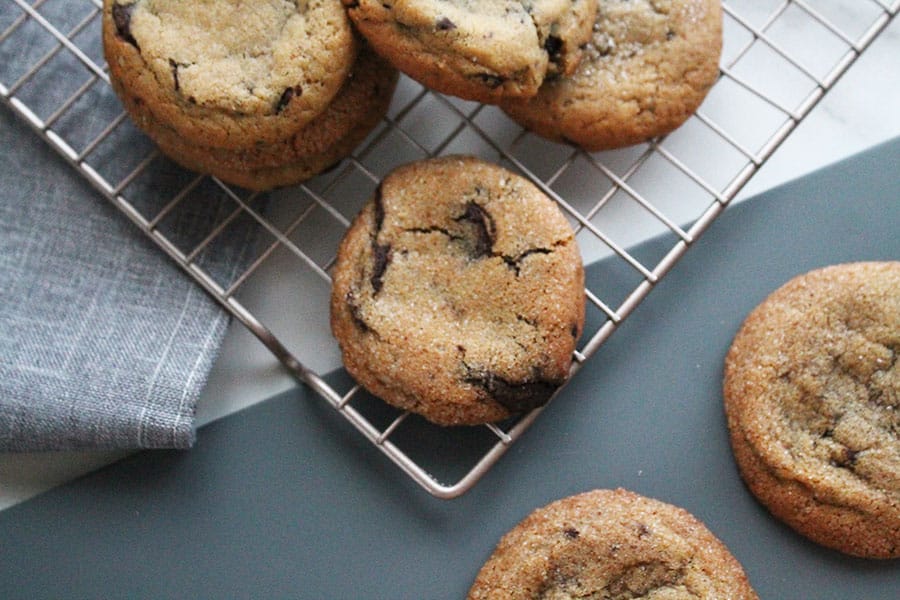
Chocolate Chunk Cookies
Chocolate chunk cookies are filled with pieces of a roughly chopped chocolate bar. When added to the batter and baked, they result in a melty deliciousness.
Any bar of plain chocolate is suitable for this recipe, not just baking chocolate. Use your favorite plain milk, dark or white chocolate for this bake.
This recipe does not require any special equipment, just a bowl, whisk and spatula works perfectly.
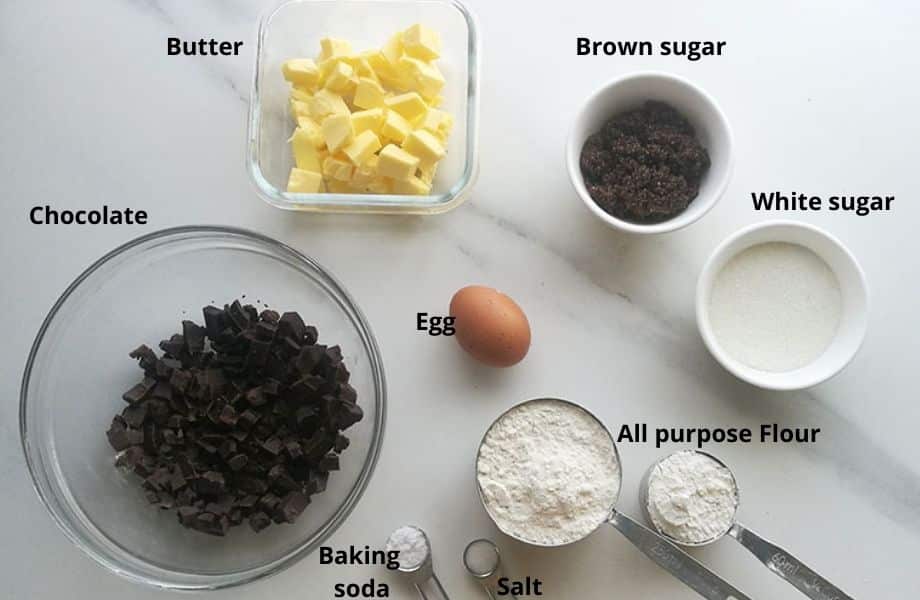
Ingredients
The ingredients are super simple, nothing complicated here! (Scroll down to the end for the full printable recipe.)
How to make Chocolate Chunk Cookies
Scroll down for the detailed recipe card
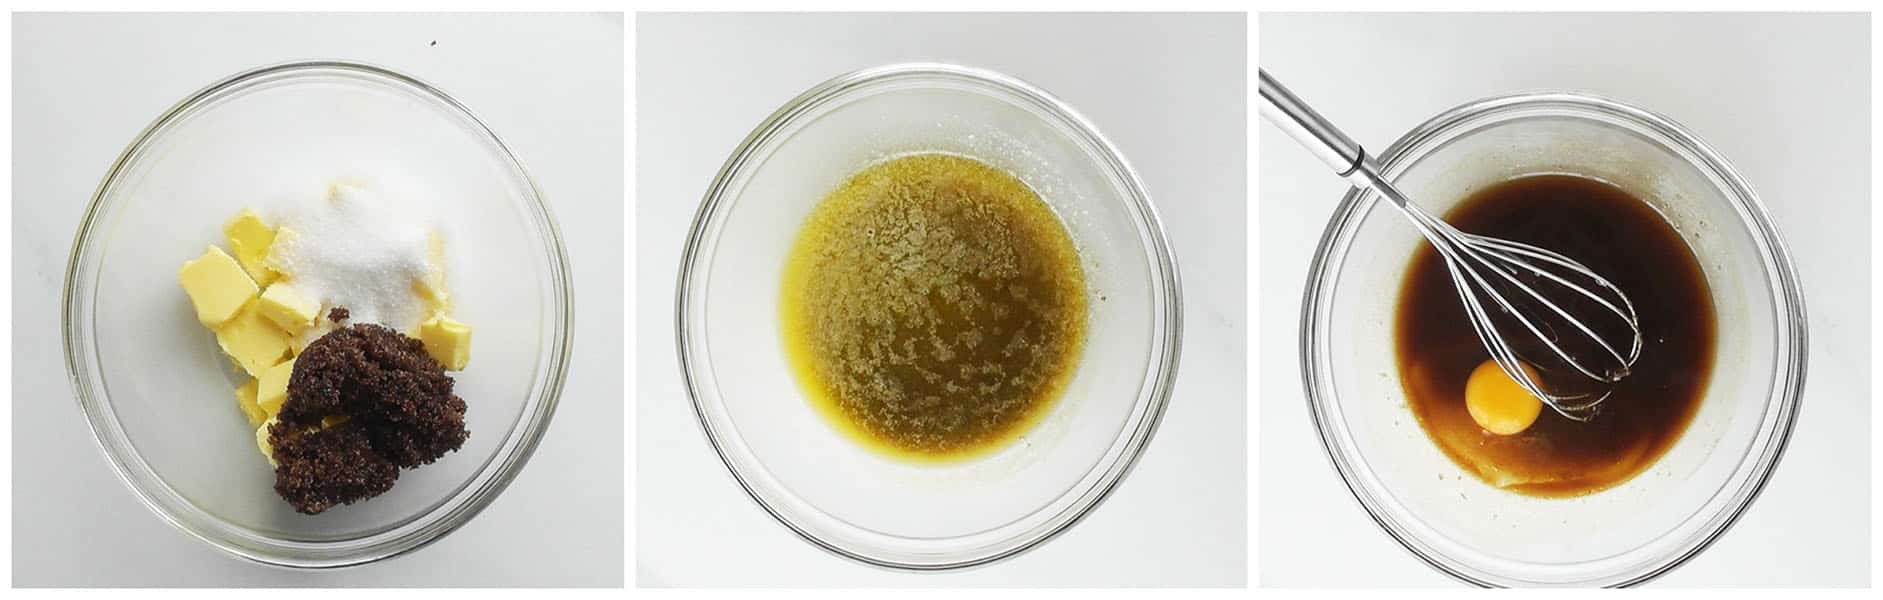
- Melt the butter with the both brown and white sugar. This can be done in a pan on the stovetop or a bowl in the microwave.
- Once the butter has just melted, whisk the melted butter and sugar together for about 1 minute.
- Add in the egg and mix well to combine (about 30 seconds)
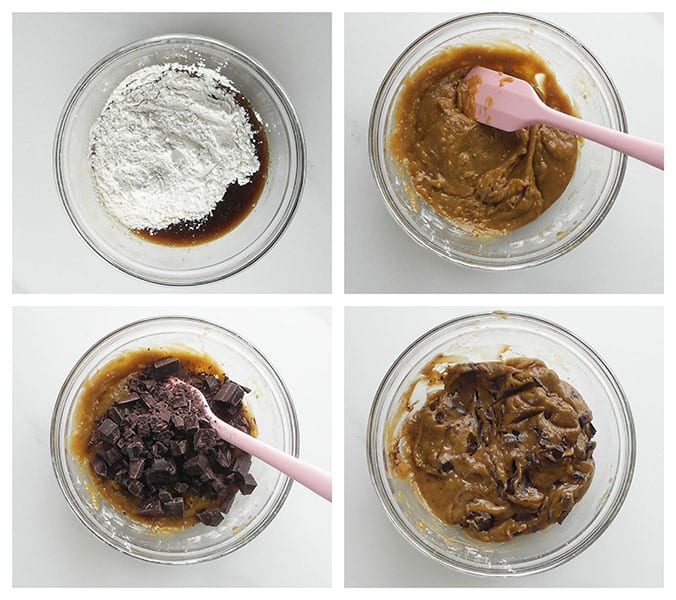
- Sift in the flour, baking soda (bicarbonate of soda) and salt. Mix with a spatula until just combined. Do not over mix.
- Mix in the chopped chocolate pieces. The cookie dough will look “creamy”. This is normal and is because of the melted butter.
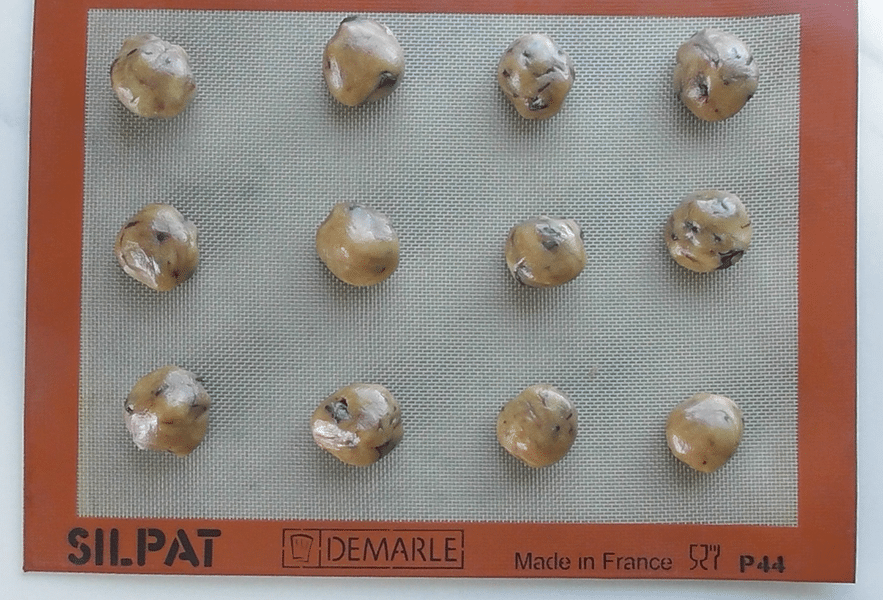
- This dough is now going to be refrigerated for 15 minutes. This will harden the dough, making it easier for you to scoop onto the baking sheet.
- Line a baking sheet with a Silpat silicone mat or parchment paper. Use a medium-sized ice cream scoop to shape 12 to 14 cookies. Or use a spoon to scoop 12 to 14 cookies onto your lined cookie sheet.
- Place the shaped cookie dough about 2 inches (5cm) apart. The cookies need space to spread during cooking. If necessary, bake your cookies in 2 separate batches.
- You can either roll the scooped cookies into balls. This will give the cookies a smoother baked texture.
- Alternately, you can just bake them as a scooped cookie (without the additional rolling). Resulting in a rough craggier baked texture.
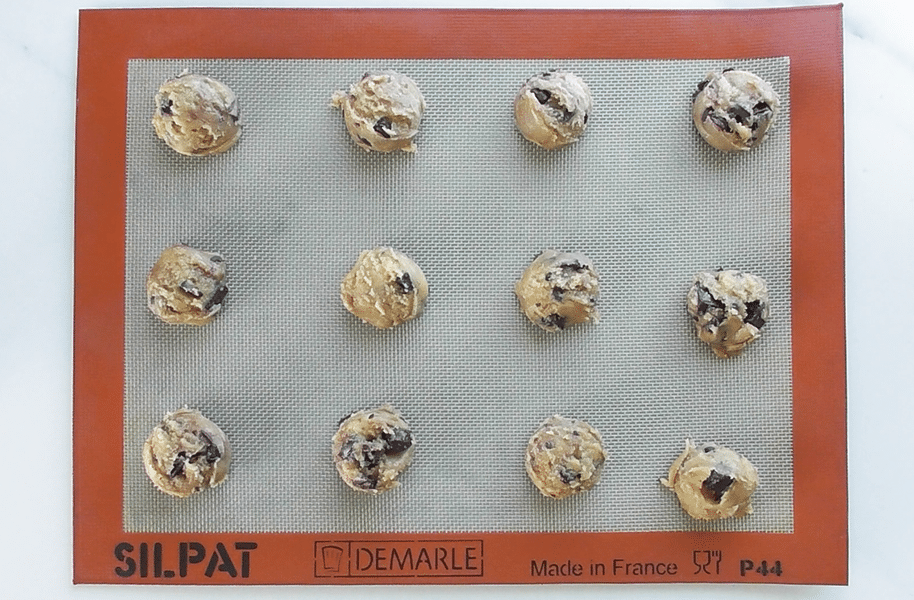
- The shaped dough is now going to be refrigerated once more. This time for 30 minutes. Popping your dough in the fridge allows the butter to cool.
- As a result, the cookies will expand more slowly, holding onto their fudgy texture. If you skip the chilling step, you’re more likely to wind up with flat crispy disks instead of tender chewy cookies.
- Bake for 10 minutes in a preheated oven of 370°F (190°C) 170° (fan).
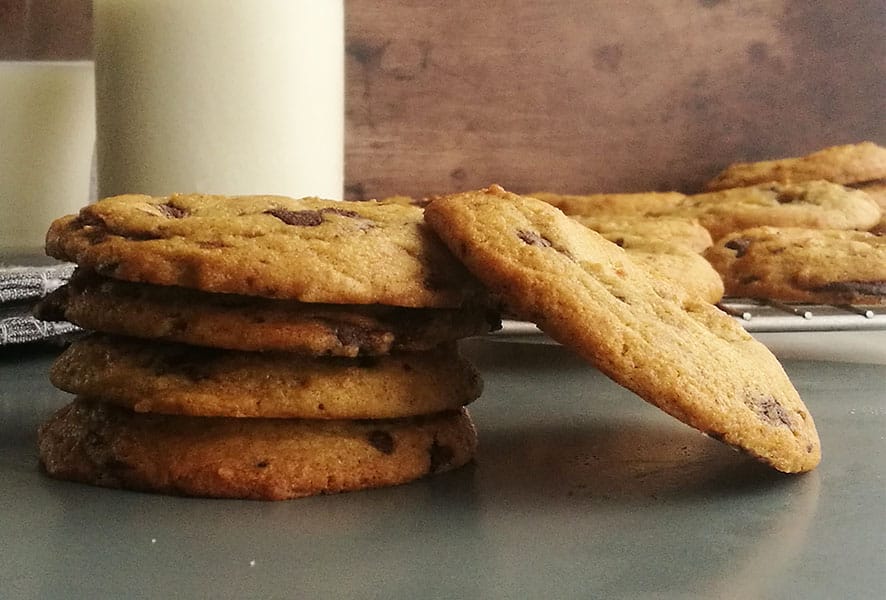
- Remove from the oven once the edges have turned crisp and golden and the middle lightly browned.
- Do not over bake. The cookies will still be very soft when removed from the oven.
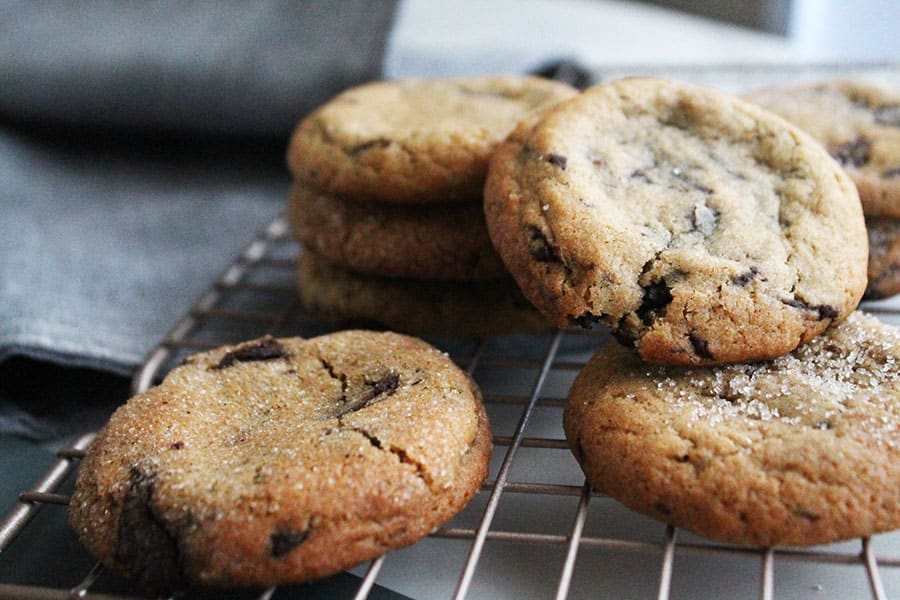
- They continue to bake and harden on the warm baking sheet. Leave the cookies on the baking sheet for about 5 minutes before transferring to a wire cooling rack.
Storage
At room temperature: These cookies, once cooled, can be stored in an airtight jar on the countertop for up to 5 days
In the refrigerator: Once cooled, store in the fridge in an airtight container for up to 2 weeks
In the freezer: Let the baked cookies cool then pop them into a Ziploc bag or airtight container for up to 2 months. Thaw at room temperature. Or defrost in the microwave on medium setting for 35 to 40 seconds.
Tips for chocolate chunk perfection
-
Do not overwork the dough
The more you mix the dough after adding the flour, the more gluten is formed, which can result in cookies which are tough or hard.
After adding the flour, mix gently just until you see no more visible flour.
-
Chocolate chunks not evenly distributed
To mix in the chocolate chunks without overworking the dough, gently fold the chips into the dough with a scooping motion until they’re evenly distributed.
-
Place the unbaked shaped cookie dough about 2 inches apart on the baking sheet.
The cookies will spread and expand as they bake. When the dough balls are placed too close together on the baking sheet, they spread and stick together while baking.
Place the shaped cookie dough about 2 inches (5cm) apart. The cookies need space to spread during cooking. If necessary, bake your cookies in 2 separate batches.
-
Do not over bake
Remove from the oven once the edges have turned crisp and golden and the middle lightly browned. Do not over bake. The cookies will still be very soft when removed from the oven.
They continue to bake and harden on the warm baking sheet.
Leave the cookies on the baking sheet for about 5 minutes before transferring to a wire cooling rack.
-
Chill cookie dough to prevent flat cookies
Popping the shaped/scooped dough in the fridge allows the butter to cool. As a result, the cookies will expand more slowly, holding onto their fudgy texture.
If you skip the chilling step, you’re more likely to wind up with flat crispy disks instead of tender chewy cookies.
30 minutes will do the trick if you’re looking to avoid the cookies spreading all over the baking sheet.
-
Use parchment paper or a silicone mat to prevent cookies from burning at the bottom
Its as simple as lining your baking sheet with parchment (baking) paper or a silicone mat.
Parchment or silicone mats serve as a barrier between the baking sheet and cookies.
This helps keep the bottom of the cookies away from the direct heat of the baking sheet; especially if it is a dark cookie sheet which retains a lot of heat.
Parchment paper and silicone mats are non stick and prevent the cookies from sticking to the pan and burning.
**NEVER EVER use wax wrap as an alternative to parchment or silicone mats!!! Wax wrap will melt at high temperatures and could catch on fire in the oven**
Chocolate chunk cookies
- ½ cup butter
- ⅓ cup brown sugar
- ⅓ cup white sugar
- 1 large egg
- 1 ¼ cups all-purpose OR cake flour
- ½ teaspoon baking soda bicarbonate of soda
- ¼ teaspoon salt
- 1 cup 5 oz / 150g chocolate cut into small pieces see note 1
- Melt the butter with the both brown and white sugar. This can be done in a pan on the stovetop or a bowl in the microwave. Once the butter has just melted, whisk the melted butter and brown and white sugar together for about 1 minute.
- Add in the egg and mix well to combine (about 30 seconds)
- Sift in the flour, baking soda (bicarbonate of soda) and salt. Mix with a spatula until just combined. Do not over mix. See note 2
- Mix in the chopped chocolate pieces. The cookie dough will look “creamy”. This is normal and is because of the melted butter.
- This dough is now going to be refrigerated for 15 minutes. This will harden the dough, making it easier for you to scoop onto the baking sheet.
- Line a baking sheet with a Silpat silicone mat or parchment paper. See note 3Use a medium-sized ice cream scoop to shape 12 to 14 cookies. Or use a spoon to scoop 12 to 14 cookies onto your lined cookie sheet.
- Place the shaped cookie dough about 2 inches (5cm) apart. See note 4
- You can either roll the scooped cookies into balls. This will give the cookies a smoother baked texture.Alternately, you can just bake them as a scooped cookie (without the additional rolling). Resulting in a rough craggier baked texture.
- The shaped dough is now going to be refrigerated once more. This time for 30 minutes. see note 5.
- Bake for 10 minutes in a preheated oven of 370°F (190°C) 170° (fan).
- Remove from the oven once the edges have turned crisp and golden and the middle lightly browned. Do not over bake. See note 6
- Leave the cookies on the baking sheet for about 5 minutes before transferring to a wire cooling rack.
Storage
- At room temperature: These cookies, once cooled, can be stored in an airtight jar on the countertop for up to 5 days
- In the refrigerator: Once cooled, store in the fridge in an airtight container for up to 2 weeks
- In the freezer: Let the baked cookies cool then pop them into a Ziploc bag or airtight container for up to 2 months. Thaw at room temperature. Or defrost in the microwave on medium setting for 35 to 40 seconds.
Camila @ Microwave Choice says
looks delicious 🙂 Can't wait to try it. Thanks for sharing such a unique recipe.