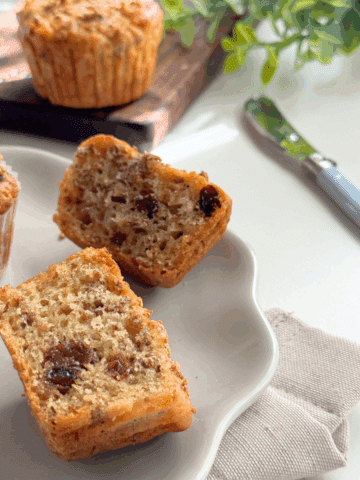
These 3 Ingredient Cheese Muffins are incredibly simple. Just 5 minutes to prep and 20 minutes to bake. With only three ingredients, you’ll have perfectly fluffy, golden muffins in no time. They’re ideal as a quick snack, breakfast, or for serving alongside a warm bowl of soup.
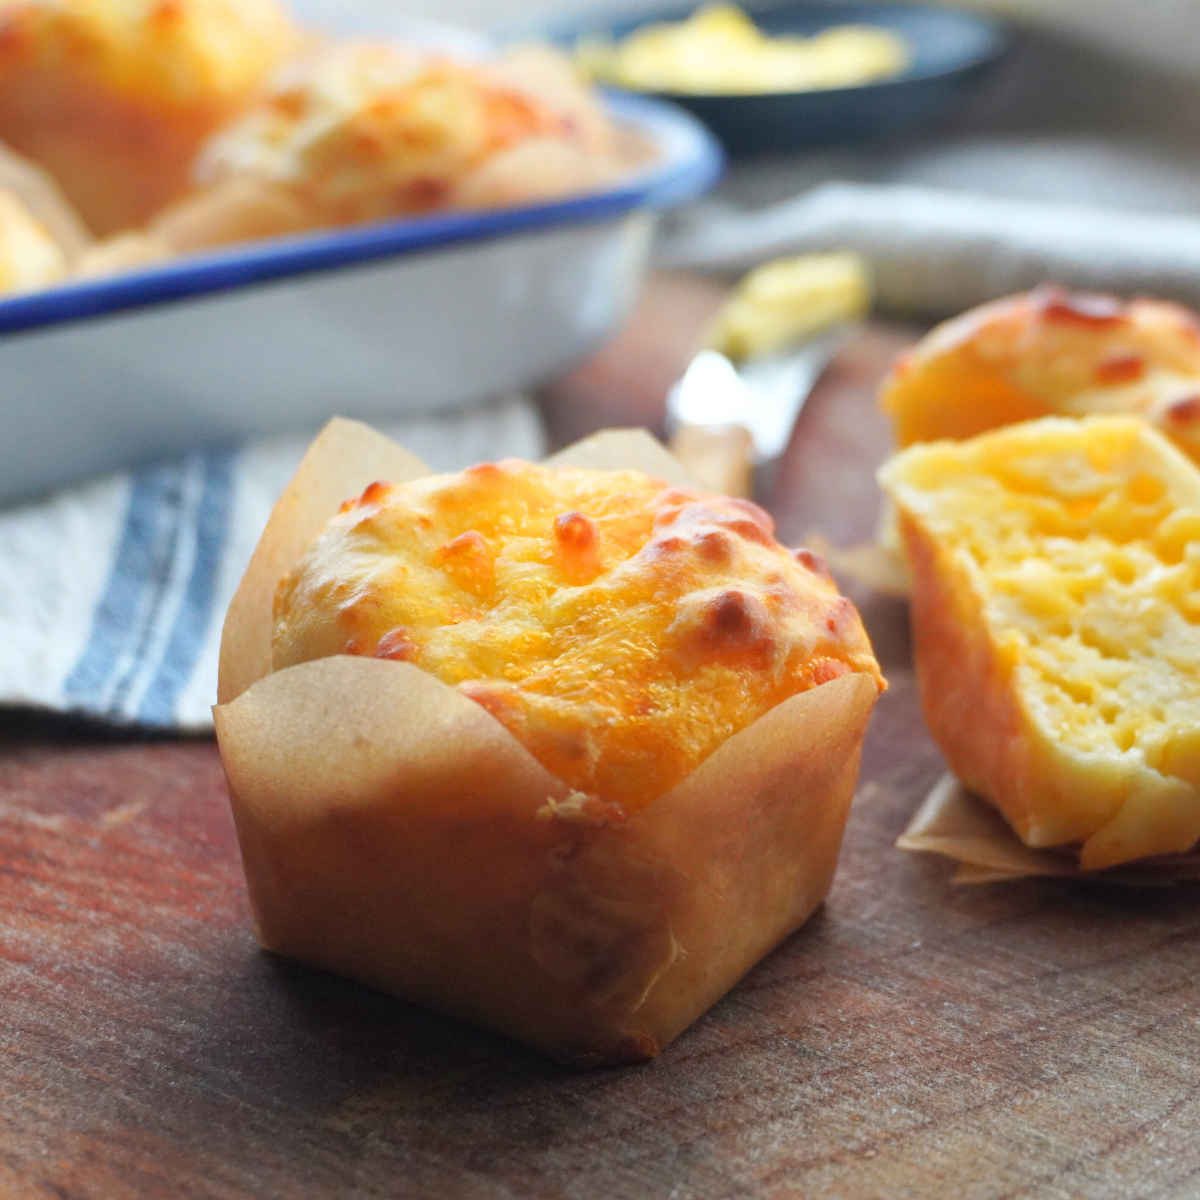
Enjoy them fresh from the oven or pack them up for later, warm, cheesy goodness made easy with just 3 ingredients 😋
Visual Instructions
These visual instructions help you see the process. You can also find the full printable recipe with instructions and ingredients at the end of the post.
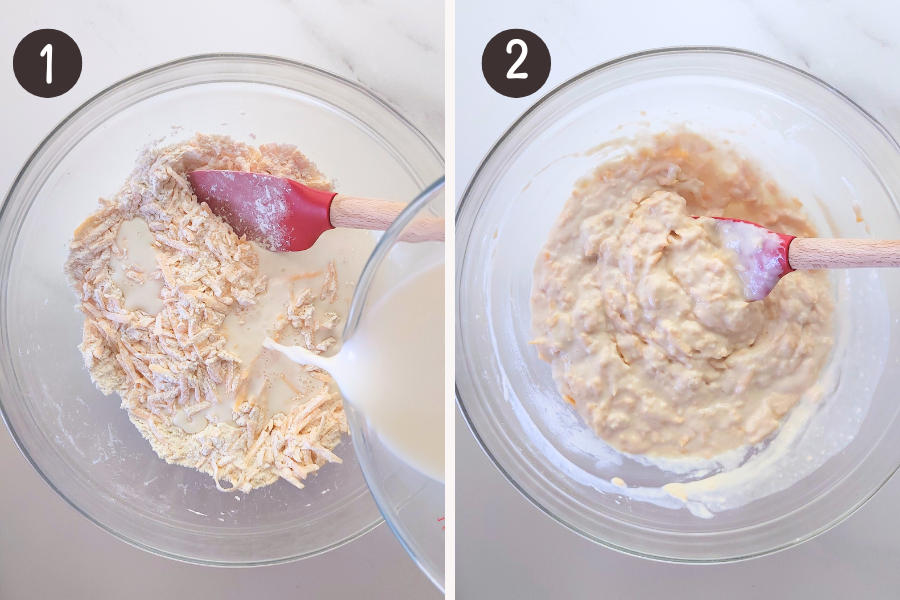
In a bowl, mix together self-rising flour, milk, and grated cheese. Adding salt is optional, as some cheeses can be quite salty, so you might not need it.
👩🍳 Baking tip
- Substitution: If you don’t have self-rising flour, you can make your own by combining 2 cups (240 g) of all-purpose flour / plain flour with 3 level teaspoons of baking powder.
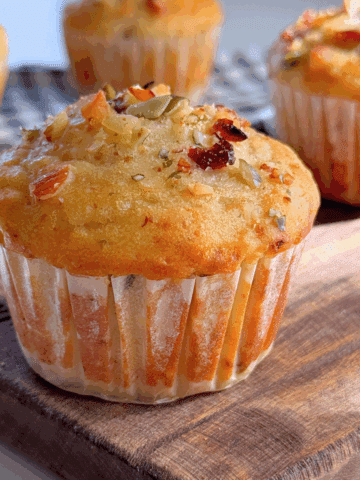
- You can also include any of your favorite ingredients at this step, such as chopped chives, dried red chili flakes, chopped red bell peppers, sun-dried tomatoes, dried Italian herbs, freshly ground black pepper, or cayenne pepper.
Gently mix until a thick batter forms, taking care not to overmix. You only need to combine the ingredients until they're just blended.
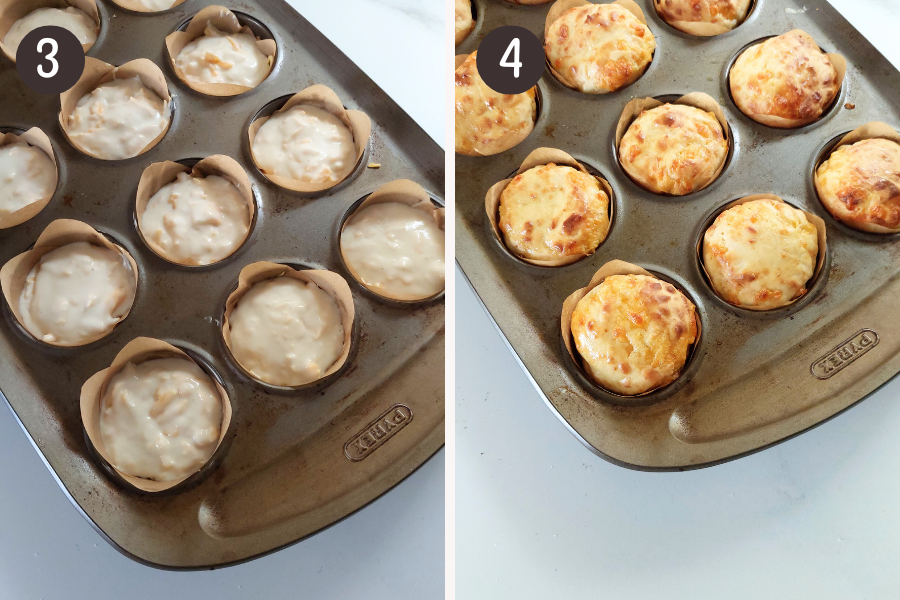
Divide the batter equally into your lined muffin pan filling each up to ¾ full and bake for 20 minutes
👩🍳 Best Liners for Cheese Muffins
For this cheese muffin recipe, avoid using standard paper muffin liners (the ones with creases/folds). The muffins can get stuck between the folds—even when sprayed with non-stick spray—because of the moist batter and melted cheese.
Instead, here are some options with a smooth, crease-free inner surface to prevent sticking and allow for easy release:
- Cut squares of parchment paper to line the muffin cups. I cut parchment and lined my pan, here’s a picture below to show you how it looks. Parchment liners are smooth and flat, so they don’t have deep creases where batter can stick.
- Use store bought tulip liners. Made from parchment paper, these offer a non-stick surface with extra height, keeping everything contained without the folds.
- Use mini ramekins.

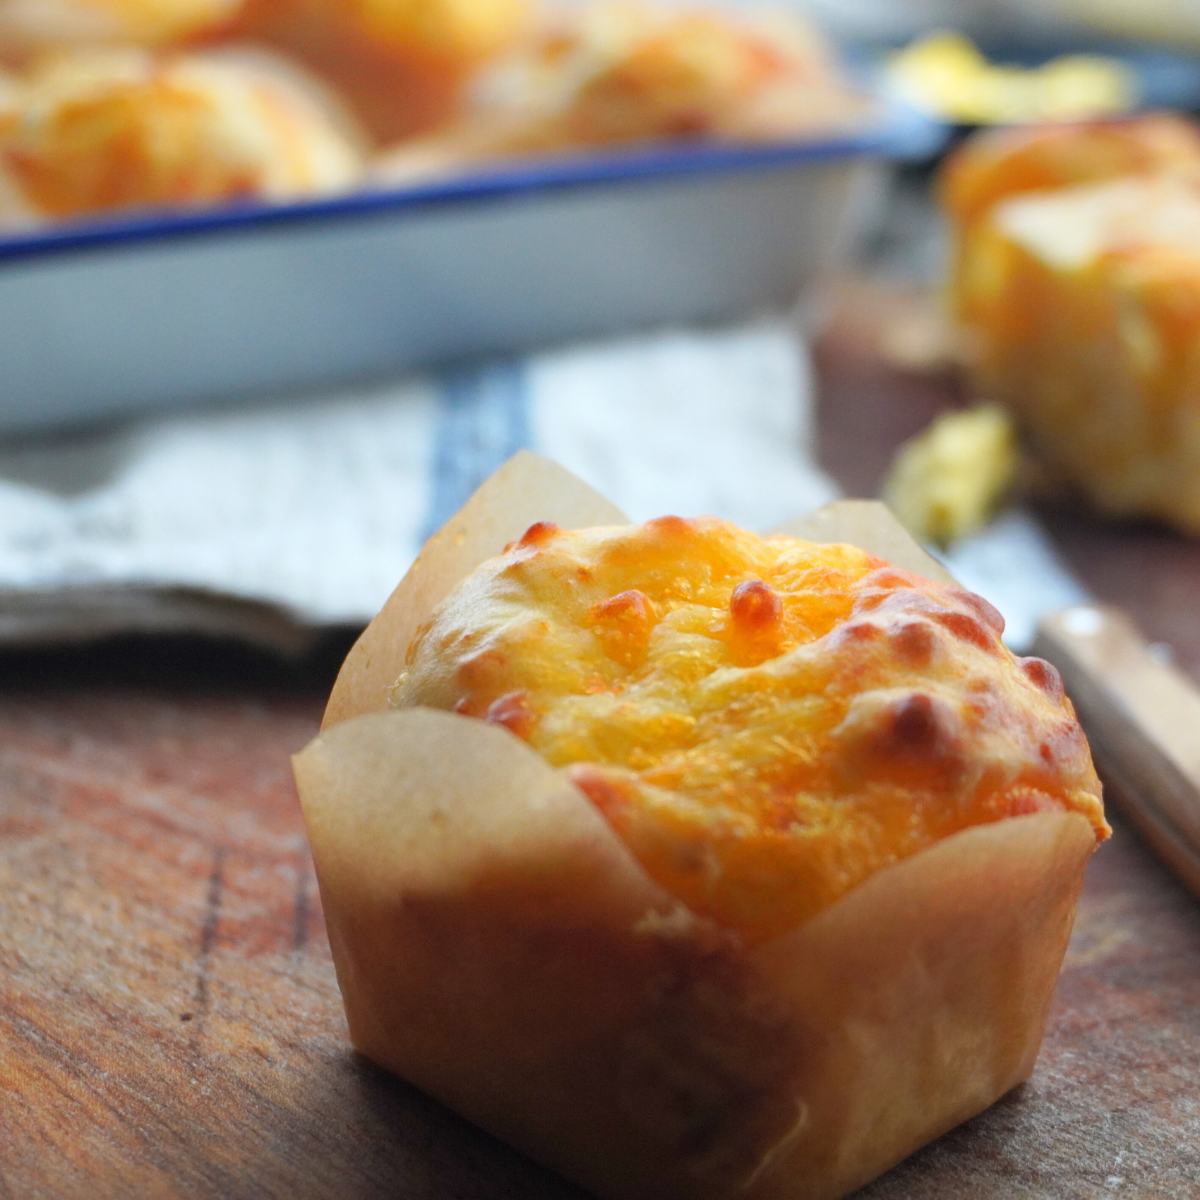

Enjoy ♥
Recipe
3 ingredient Cheese Muffins
- 2 cups (240g) self-rising flour (self raising flour) (see note 1)
- 2 cups (200g) grated cheese (I used cheddar in this recipe)
- 1 ½ cups (360ml) milk
- Salt to taste
- Position the oven rack in the middle of the oven, and preheat to 356°F (180°C) (160°C fan).
- In a bowl, mix together self-rising flour, milk, and grated cheese. Adding salt is optional, as some cheese can be quite salty, so you might not need it.
- Optional: You can also include any of your favorite ingredients at this step, such as chopped chives, dried red chili flakes, chopped red bell peppers, sun-dried tomatoes, dried Italian herbs, freshly ground black pepper, or cayenne pepper.
- Gently mix until a thick batter forms, taking care not to overmix. You only need to combine the ingredients until they're just blended.
- Divide the batter equally into your lined muffin pan filling each up to ¾ full and bake for 18-20 minutes. (See note 2)
- Remove from the oven and serve warm
- Store leftovers in an airtight container for up to 2 days.
- To reheat, microwave for 20 to 30 seconds, or slice in half and warm on a skillet over the stove.
Video
2) Liner Choice: For this cheese muffin recipe, avoid using standard creased paper liners, as the moist batter and melted cheese can stick to the folds. Instead, use options with a smooth, crease-free inner surface, like parchment paper squares, store-bought tulip liners, or mini ramekins for easy release and no sticking.
Scroll Up for the STEP by STEP Photos Don’t miss the process shots in the post above. Simply scroll up to find them—they were created especially to help you make this recipe perfectly every single time you try it.
This recipe was originally published on October 9, 2018 and updated on November 3, 2024 with updated content and photos.
😋 Hungry for more?
Sign up for my free newsletter to get emails about new recipes! And don't forget to follow me on YouTube, Facebook, Pinterest, and Instagram for all the latest deliciousness!

Ron says
I could have these with any meal. Cheese muffins with a bit of lingonberry jam is one of my favorite foods. Thanks for sharing your recipe.
Marsha says
Love your recipes. Thanks for sharing.
The Gardening Foodie says
Awww thank you Marsha, You are welcome,and I am glad that you like the recipes too 🙂
[email protected] says
These cheese muffins remind me of the tasty and easy cheese muffins I made at my home economics class way back in my secondary school days. Lovely for breakfast with a spread of butter on. Yum!
Kelly @ Kelly Lynns Sweets and Treats says
I love quick and easy recipes like this! Reminds me of a recipe we made in home ec in high school! Love that you can add whatever you want to these too 🙂
Salomie Stevenson says
I'm definitely going to try these. Thanks for the recipe.
Danel Rigby says
These are so tasty, can they be frozen?
The Gardening Foodie says
Hi Danel, thank you 🙂 ...yes these muffins can be frozen for up to 1 month. To defrost, just pop it into the microwave for a few seconds or leave at room temperature until defrosted.
rachel says
Great. In these days of lock-down I ran out of bread. Made these to go with lunch-time soup. Added chilli and spring onions. So easy to make and quicker than bread. went down a treat with all my family.
The Gardening Foodie says
Hi Rachel 😃 Thank you, I am so glad that you and your family enjoyed these muffins. It must have tasted amazing with the addition of spring onion and chilli 😋
Amanda says
These were amazing and rose so high!!so quick to make and yummy!
Flora says
My muffins stuck to the wrapper, I don’t know what went wrong
The Gardening Foodie says
Hi Flora. Thank you for giving my recipe a try. I am sorry that it stuck to the wrapper.
There are a few reasons why this happens and how it can be prevented the next time. It is best to allow the muffins to cool for about 10 to 15 minutes before removing the wrapper. Trying to remove the wrapper immediately after it has been baked will cause it to stick to the muffins.
Another way to prevent this is to lightly spray the inside of the muffin wrappers with nonstick cooking spray before adding the batter. I do this whenever I bake cupcakes or muffins and it works without fail.
I hope that this helps answer your question 🙂
BA says
I use the patty pan for thee and once greased just before dropping spoonfuls into the patty pan I melt bovril and butter together and put a half teaspoon into the each patty pan and then the mixture. Once baked the cheese puffs soak up the bovril and butter . So yummy.