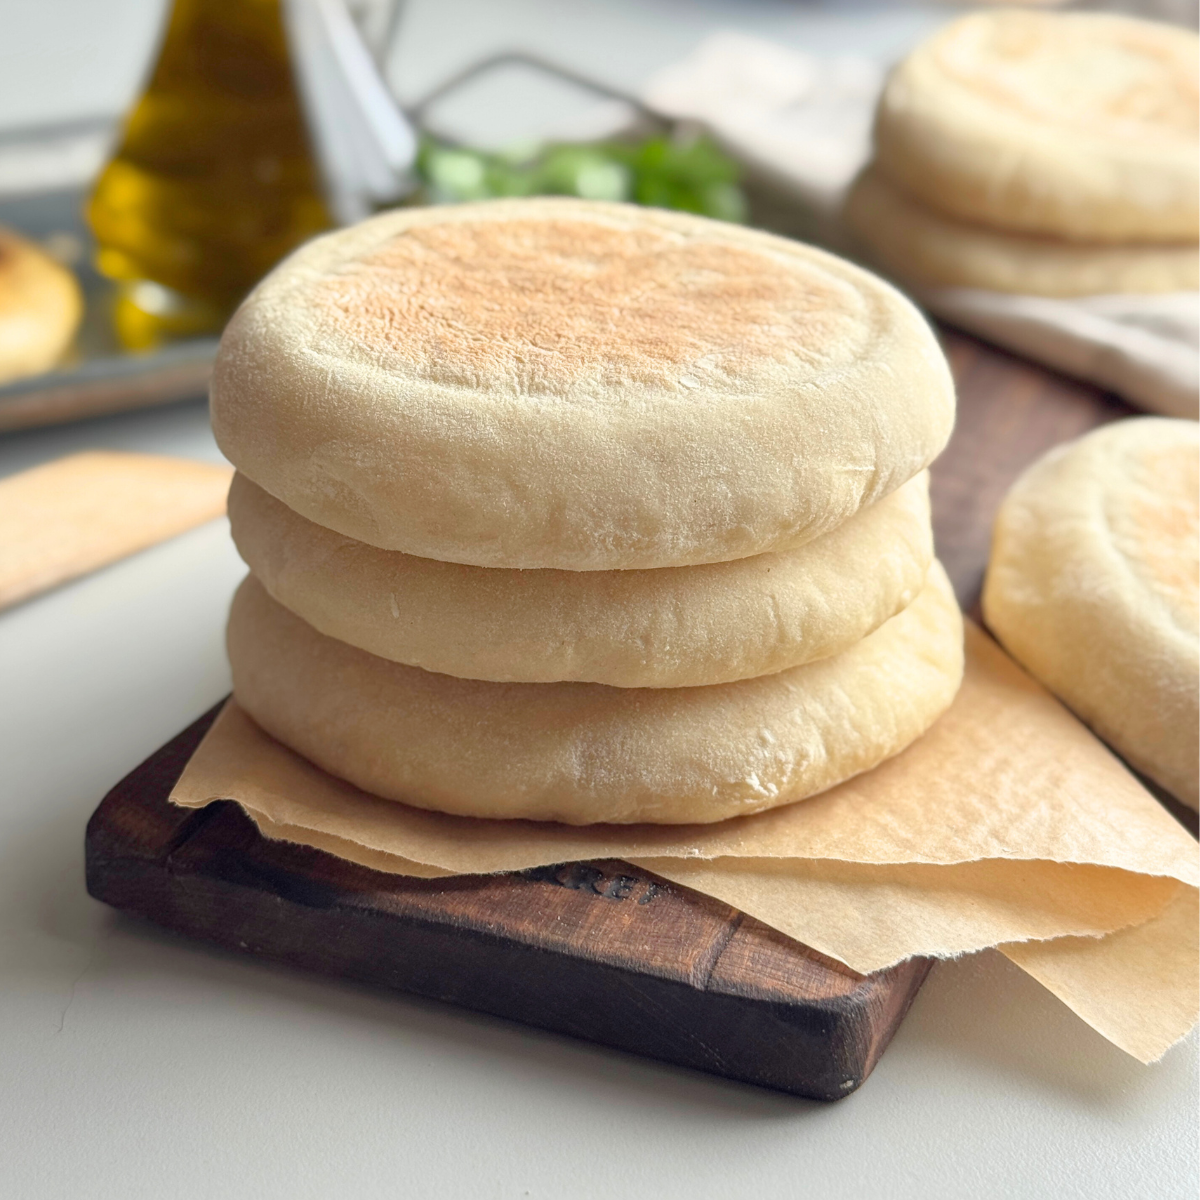
My recipe for no-knead 4 ingredient pita is super easy to make and budget-friendly too. Made using just 4 basic ingredients, you can have soft fluffy pitas on your table in under an hour. Perfect for sandwiches, wraps or just a pizza base, this is one amazing recipe.
Updated August 2025 with new photos and video. Same easy recipe, just a much better view.
4 ingredient Pita (No knead)
If you want to skip the usual kneading that comes with most yeast doughs, this pita is the answer. The ingredients,flour, yeast, salt, and warm water are mixed together in one bowl
After a quick 10-minute rest, you’ll shape and cook. No kneading, no waiting around for hours.
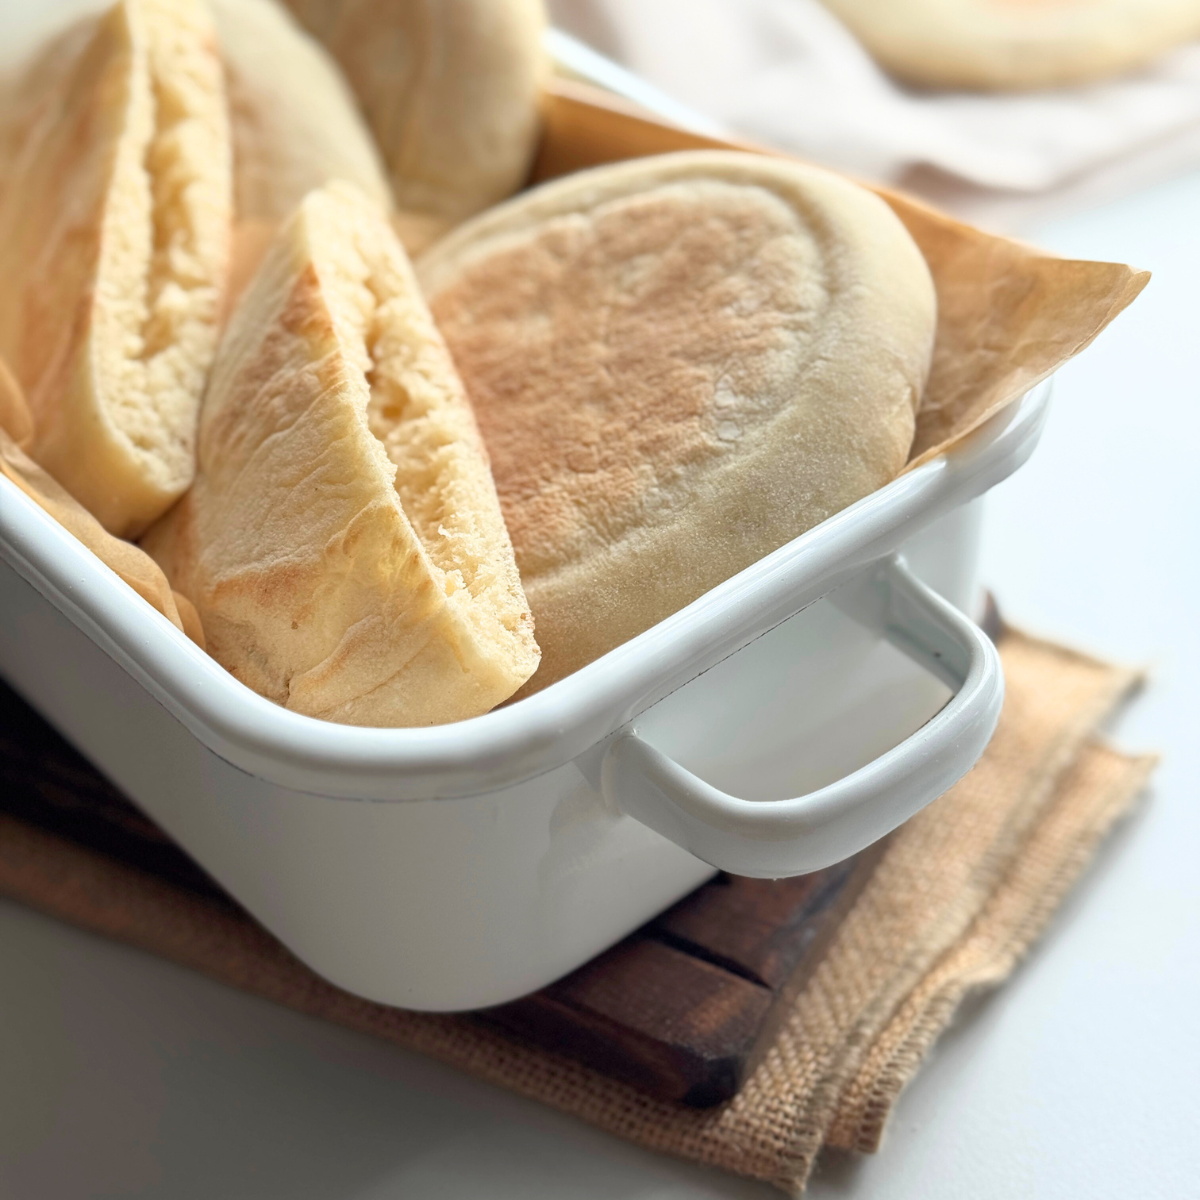
I divided the dough into 7 pieces, rolled each about 5 inches (12 cm) round and ¼ inch thick (6 mm), and they puffed up beautifully.
How to make 4 ingredient Pita (no knead)
These are the visual steps. For the full recipe with exact measurements, scroll to the recipe card at the bottom of this post
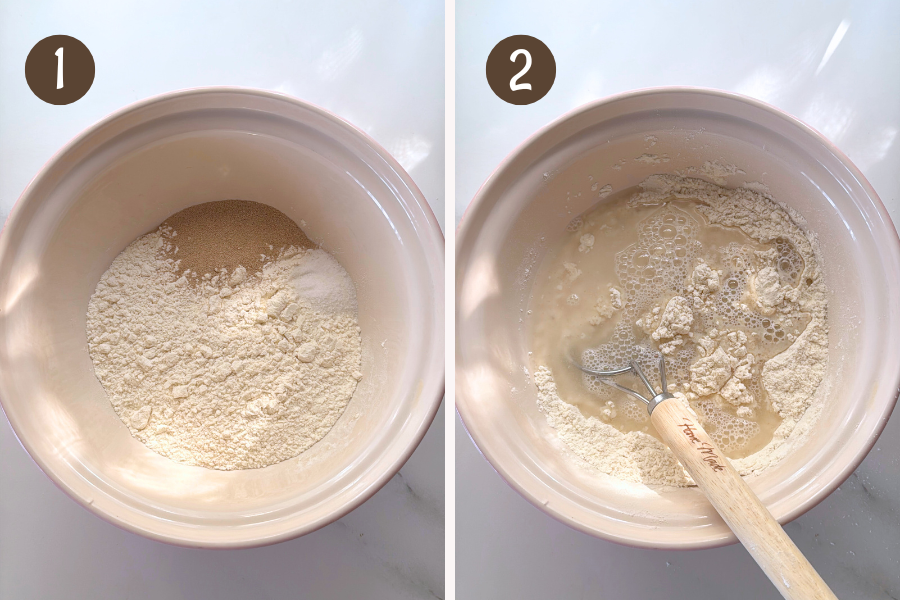
- Whisk together all-purpose flour, rapid-rise yeast (instant dry yeast) and salt in a large bowl.
- Pour in the warm water and stir to combine. Make sure the water you add is warm, not hot, ideally between 100–115°F (37–46°C) if you're using a thermometer.
Water that's too cold can slow down the rise, and water that's too hot can kill the yeast.
If using active dry yeast instead, dissolve it in the warm water from the recipe and let it sit 5–10 minutes until foamy before adding.
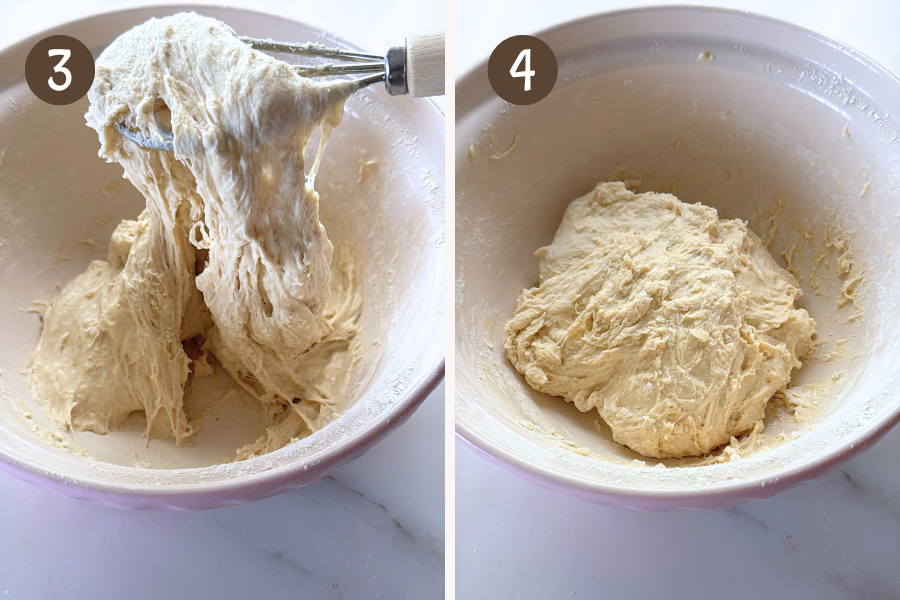
- As you mix, the dough will look shaggy and sticky at first — totally normal.
- Add extra flour a bit at a time (up to 1 cup / 120g extra if needed ) and mix until you get a soft but not too wet dough. It’s okay if it’s slightly tacky, just not overly sticky. Cover and let it rest for 10–15 minutes.
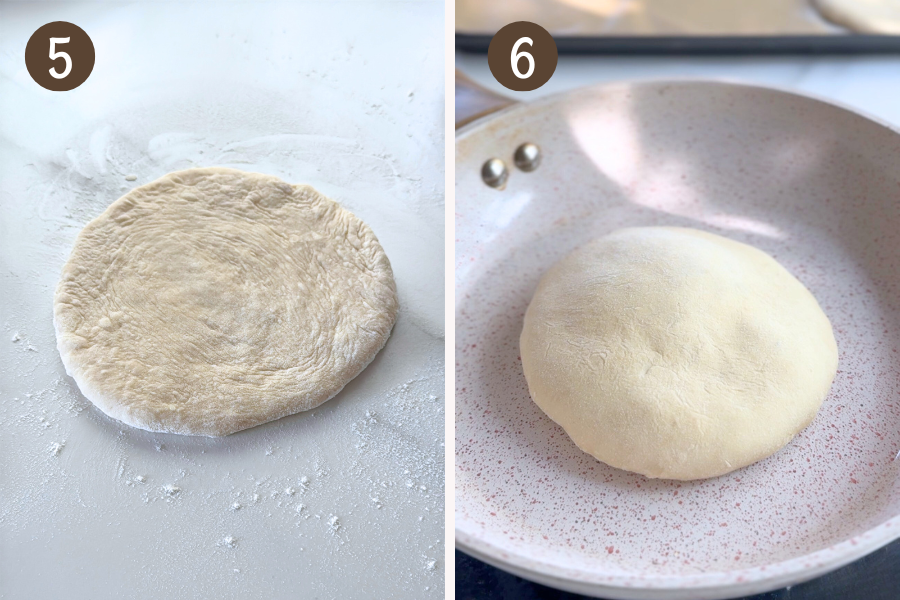
- Roll the dough: Divide the dough into 7 portions. On a floured surface, roll (or gently press) each into a circle around 12 cm (5 inches) wide and ¼ inch (6 mm) thick.
- Heat a nonstick or cast iron pan over medium-high. Gently place a pita in the pan and cook for 2½ to 3 minutes per side until puffed and golden.
- Place rolled pitas on parchment as you go to prevent sticking. Cover with another sheet of parchment or a towel to keep them from drying out.
- No rolling pin? Press the dough flat with your hands, not as precise, but works in a pinch.
- Wrap warm pitas in a clean towel as you cook the rest to keep them soft.
Oven or stovetop
You can cook these on the stovetop or bake them. Both give great results.
- Stovetop: My favorite — soft, fluffy, and slightly charred. Cook for 2 ½ to 3 minutes per side on a heavy pan.
- Oven: Softer texture, lighter color. Preheat to 475°F (245°C) with a tray inside. Bake for 6–10 minutes or until puffed and lightly golden.
How to store your pita
- Room Temperature: Keep in an airtight bag or container for up to 2 days.
- Freeze: Layer with parchment and freeze in a freezer safe container or zip-top bag for up to 2 months.
- Reheat: Thaw and warm in a dry pan or low oven for a few seconds to revive softness.
Fridge not recommended, it dries them out fast.
What to serve with pita
Homemade pita is wildly versatile, here are a few easy ways to use it
- Pocket sandwich: Slice it open and fill with your favorite sandwich fillings, from grilled veggies to falafel or halloumi.
- Wrap it up: Use it like a soft flatbread for wraps, gyros, or leftovers.
- Dip and scoop: Cut into wedges and serve with hummus, tzatziki, or any dip.
- Pita pizza: Top with sauce, cheese, and anything you like, bake just until melted and bubbly.
Enjoy ♥
Recipe
4 Ingredient Pita Bread
Watch how to make the recipe
- 2 cups (240g) all-purpose flour (plain flour)
- 1 cup (250ml) warm water (see note 1)
- 1 Tablespoon (10g) instant yeast (rapid-rise yeast)
- 1 teaspoon salt
- Combine the flour, yeast, and salt in a large bowl.
- Add water and mix to form a soft dough. Sprinkle with a bit more flour (can use up to 1 cup extra) if the dough is too sticky.
- Cover the bowl and allow to rest for 10 minutes.
- Divide the dough into 7 portions
- Roll each portion into a round about 5 inches (12 cm) wide and ¼ inch thick (around 6 mm).
- Place one pita at a time on a non-stick or cast iron pan. Cook on medium high heat for about 2 ½ to 3 minutes on each side.
- Cover the cooked pita to maintain the soft texture, until you are ready to serve.
- Ensure that the water added to the dry ingredients is just warm, not too hot or too cold. Too cold and the yeast will not enable the dough to rise, and very hot water will kill the yeast. If you have a thermometer, it should read between 100°F – 115°F (37°C – 46°C).
- Cook time is based on stovetop method. Oven baking times may vary (see post for details).
See more:
Want even more delicious recipes? Subscribe free to receive new post notifications emailed to you. Or follow along on Facebook, Pinterest, and Instagram. If you love sharing recipes please come and join my All about cooking and baking Facebook group or Subscribe to my YouTube channel


Linda, Kefalonia says
Could you freeze them?
Would they work as a sort of Naan Bread to have with a Curry?
The Gardening Foodie says
Hi Linda, yes these pitas can be frozen,
To freeze the cooked pitas, place a sheet of parchment/wax wrap between each cooked pita. Place the stack of pitas in a ziplock or airtight container and into the freezer.
Defrost in the fridge or microwave for a few seconds. Keep them covered loosely with a kitchen towel while in the microwave. This will keep the pitas pliable.
Avoid moving the pitas back and forth between frozen, to thawed and then frozen again as this can negatively impact the texture of the tortillas.
These could work as a naan bread with curry. You could also try these easy to make flatbread recipes on my blog: 3 ingredient yogurt flatbread
Toasted Sesame and Garlic filled Naan
3 Ingredient Spicy Garlic Flatbread
Yeast Free Stove Top Pita Recipe
I hope this helps answer your question 🙂
Lisa says
If I want to double this recipe do I just use 2 times the ingredients or do I have to change the amount of yeast?
The Gardening Foodie says
Hi Lisa, to double the recipe, all the ingredients need to be doubled, including the yeast.
I hope this helps answer your question 🙂
Happy baking 🙂
roberto says
hi too much water for flour 2 cups flour equals 480 gr not 240
The Gardening Foodie says
Hi Roberto, The ratio of flour to water in this recipe is correct.
When you measure flour and liquid in a cup, remember that flour is way lighter than liquid.
So, while 1 cup of liquid weighs around 250 ml or grams, flour, being lighter, only weighs about 120 g.
That means if you put 2 cups of flour on a scale, they'll be around 240 g. On the other hand, 2 cups of water will weigh about 500 ml or grams on the scale.
I hope this helps 🙂
Brittney says
I've been using this recipe for a while now. I make them as-written, but I often will add a tbsp of garlic powder for souvlaki 🤤
The Gardening Foodie says
Hi Brittney. It's great to know that you've been using this pita recipe and enjoying it. Plus the addition of garlic powder for souvlaki sounds like a really delicious way to enhance the flavors 😋
Corinna says
I made these for dinner tonight and stuffed them with an italian-style salad. They were out-of-this-world good!!! I used bread flour because that's what I had on hand, but otherwise followed the recipe exactly. Outstanding result, and everyone was SUPER impressed! Thank you!
The Gardening Foodie says
Hello Corinna,
Thank you, and you're very welcome😊
It must have been a wonderful enjoying these pitas with the salad. I'm thrilled to hear that you and everyone else found them delicious. While the use of bread flour may have provided a slightly different texture, I'm glad to know that the overall outcome was exceptional😊
Paul says
I was rushed for time today and needed a quick pita recipe for dinner. Did a bit of a double take on the amount of yeast. Results, way better than expected, they puffed up like a softball on my pan. Put them right into a tortilla bag and they were super soft and flavorful. Awesome recipe. A keeper for sure.
The Gardening Foodie says
Hello Paul, I appreciate you sharing the outcome of the recipe. I'm delighted to hear that the pita turned out so well for you 😊
Danya says
Wow! I usually fail when it comes to recipes but this one is straight forward and super easy! They came out amazing!
The Gardening Foodie says
Hi Danya, Thank you for your wonderful comment 😊
It makes me so happy to hear the recipe worked well for you. Enjoy your homemade pita 😊
Mark Du Ree says
I’m going to hold off on the stars for now. I made the recipe exactly as written, but I didn’t get any puffing or pocket. My water was 110F. I weighed the ingredients. Dough did rise in the 10 minute wait period, so I don’t think the yeast was bad (it was a new 1lb pack of Saf-instant, anyway). The hydration did seem a little too much…maybe I needed a tad more flour. Used AP flour. Cooked on cast iron.
Heather says
Fun and delicious! I am not a baker but I do cook well. Bread is my kryptonite but this recipe was awesome to make. Our pita turned out somewhat perfect, I didn't get the poof until about the 3rd try, my cast iron was not hit enough. This is why I am not a bread maker - I don't have the patience, but his recipe gave me confidence! Will make again, we just harvested eggplant and make Abagannuc to go with the pita. Thank you for helping out dinner turn out great!
The Gardening Foodie says
Heather, this made my day! I totally get the cast iron learning curve. Once it’s hot enough, it’s like pita magic. I love that this recipe gave you some bread confidence, and the eggplant pairing sounds incredible. So glad it worked out
Thank you for making my recipe part of your day. It means a lot 🙂