
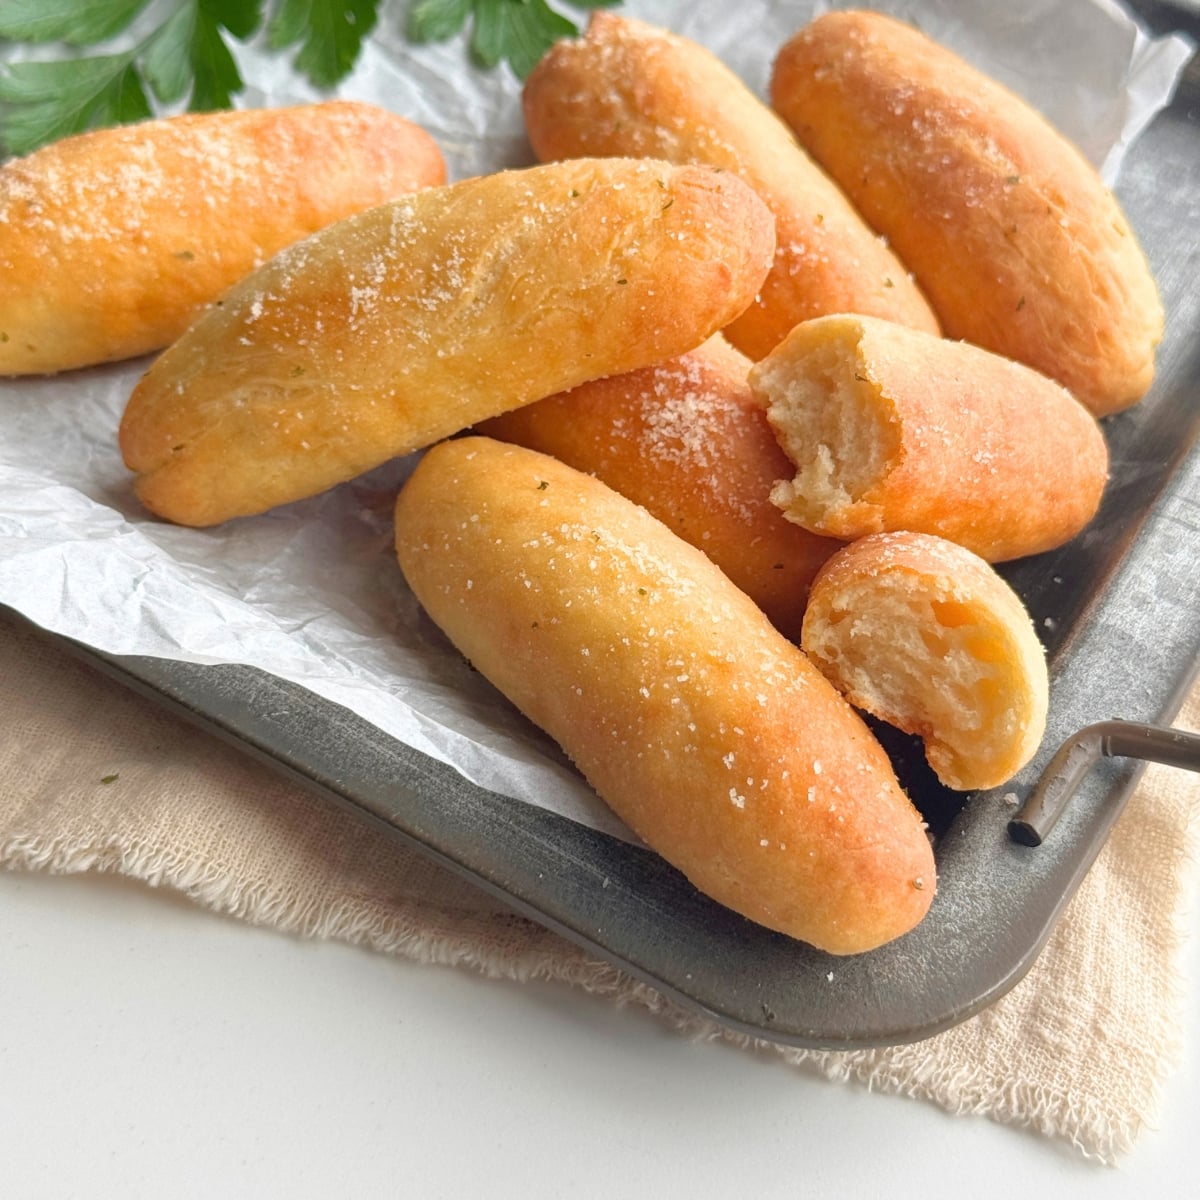
These 3 Ingredient Garlic Breadsticks are soft and fluffy inside, golden on the outside and brushed with plenty of garlic butter. With no yeast, no kneading and no waiting for dough to rise, these homemade breadsticks are ready in under 30 minutes from start to finish.
Step by step photos
These visual instructions help you see the process. You can also find the full printable recipe with ingredient amounts and instructions at the end of the post.
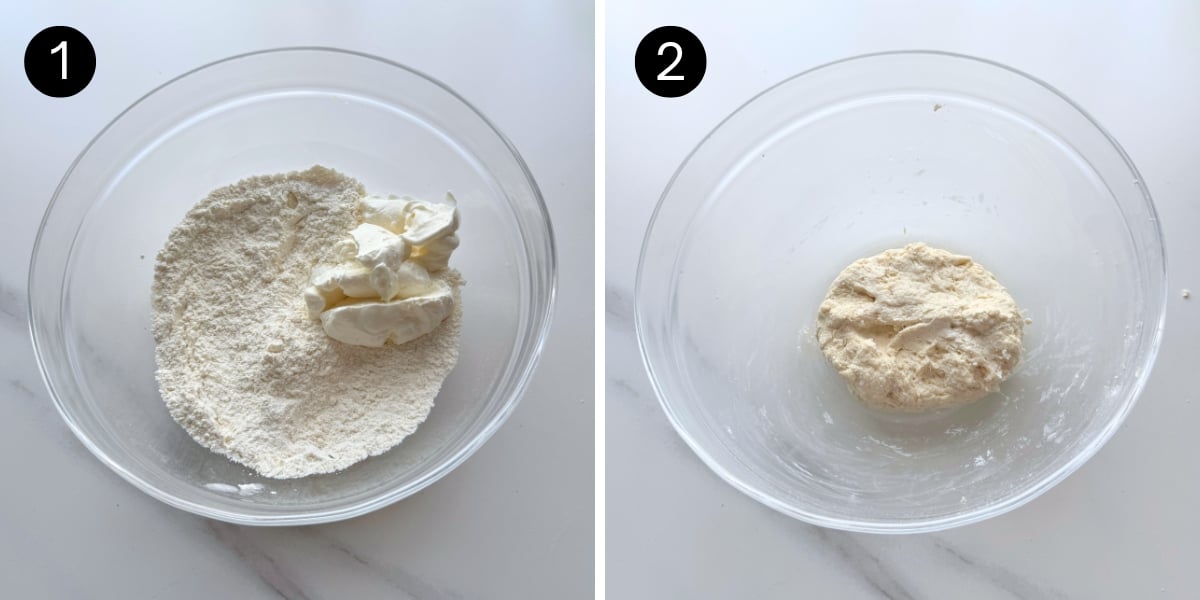
- Add the self-rising flour and Greek yogurt to a large bowl.
- Mix with a spoon or spatula to combine, then use your hands to gently form a soft dough. Do not knead.
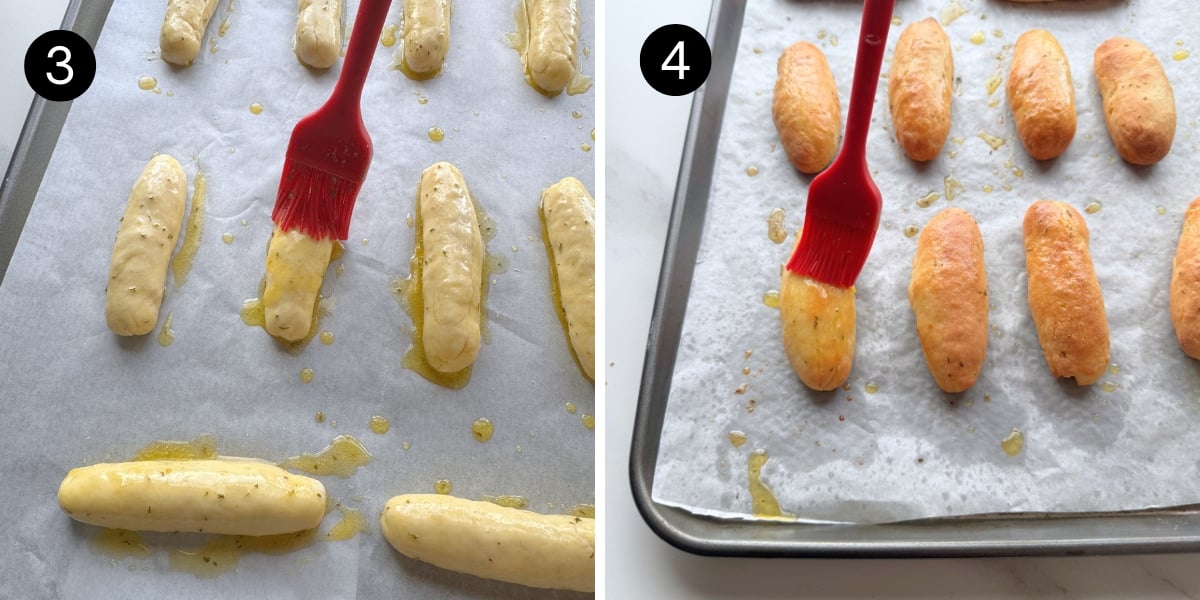
- Divide the dough into 10 equal pieces (about 35 g each if weighing). Roll each piece into a breadstick about 4½ inches (11–12 cm) long. Place on a baking sheet and brush with half of the garlic butter.
- Bake for 12–15 minutes, until puffed and lightly golden. Remove from the oven and brush the warm breadsticks with the remaining garlic butter.
Storage: Store leftover breadsticks in an airtight container at room temperature for up to 2 days. Warm them for a few minutes in the oven or air fryer before eating.
Use self-rising or all-purpose flour
This recipe uses self-rising flour to keep the breadsticks to just three ingredients. I’ve also tested the recipe using all-purpose flour, so you can still make these if you don’t have self-rising flour.
- To replace the 1½ cups (180 g) self-rising flour, use 1½ cups (180 g) all-purpose flour, 2 level teaspoons baking powder and ¼ teaspoon salt. Whisk well before adding the yogurt.
- I’ve also included this substitution in the printable recipe card below.
Store-bought or homemade garlic butter
I used store-bought garlic butter to keep these breadsticks to just three ingredients, but you can make your own if you prefer.
- Gently warm 4 tablespoons (56 g) butter, then stir in 1 crushed garlic clove and ¼ teaspoon Italian seasoning. Leave for 10 minutes, then strain before using so the garlic pieces don’t burn during baking.
- The homemade option is also included in the printable recipe card below.
Don’t just stop at garlic butter
Garlic butter is my favorite for these breadsticks, but there are plenty of other ways to change them up.
- Sprinkle with grated Parmesan or cheddar cheese.
- Brush with herb butter before baking.
- Sprinkle with sesame, poppy or other seeds before baking.
Recipe tips
- Greek yogurt: Full-fat plain Greek yogurt gives the dough a thicker consistency, but regular plain yogurt works too. Give it a good stir before measuring to mix in any liquid that has separated.
- Don’t knead the dough: Mix just until the ingredients are combined, then use your hands to gently form a soft dough.
- Keep them similar in size: Divide the dough into 10 pieces (about 35 g each if you’re weighing) so they bake evenly.
- Brush with garlic butter twice: Once before they go into the oven and again while they’re still warm.
Preheating the oven tip: In my recipes, I suggest preheating the oven about 10–15 minutes before it’s needed.
- This is just a guide, as we all work at a different pace during prep. It gives the oven enough time to heat without leaving it running longer than necessary.
Recipe
3 Ingredient Garlic Breadsticks (No Yeast)
Watch how to make the recipe
- 1½ cups (180 g) self-rising flour (see notes for using all purpose flour )
- ¾ cup (180 g) full-fat plain Greek yogurt (see notes for using plain yogurt)
- 4 tablespoons (56 g) store-bought garlic butter, divided (see notes for homemade option)
- Preheat the oven to 375°F (190°C) or 350°F (180°C) fan/convection about 10–15 minutes before the breadsticks go into the oven. Line a baking sheet with parchment paper.
- Add the self-rising flour and Greek yogurt to a large bowl. Mix with a spoon or spatula, then use your hands to gently form a soft dough. Do not knead.
- Divide the dough into 10 equal pieces (about 35 g each if weighing). Roll each piece into a breadstick about 4½ inches (11–12 cm) long and place on the prepared baking sheet.
- Brush the breadsticks with half of the garlic butter.
- Bake for 12–15 minutes, until puffed and lightly golden.
- Remove from the oven and brush the warm breadsticks with the remaining garlic butter.
- All-purpose flour: I also tested these breadsticks with all-purpose flour and they worked just as well. If you don’t have self-rising flour, replace the 1½ cups (180 g) self-rising flour with 1½ cups (180 g) all-purpose flour, 2 teaspoons baking powder and ¼ teaspoon fine salt. Whisk these three ingredients well before adding the yogurt.
- Greek yogurt: Full-fat plain Greek yogurt gives the dough a thicker consistency, but regular plain yogurt works too. Give regular yogurt a good stir before measuring to mix in any liquid that has separated.
- Homemade garlic butter: I used store-bought garlic butter to keep this a 3-ingredient recipe, but you can make your own instead. Gently warm 4 tablespoons (56 g) butter in a small saucepan. Remove from the heat and stir in 1 crushed garlic clove and ¼ teaspoon Italian seasoning. If using unsalted butter, add a pinch of salt. Leave for at least 10 minutes to allow the flavors to infuse. Strain just before using, removing the garlic pieces so they don’t burn when the breadsticks are brushed before going into the oven.
Hungry for more?
Sign up for my free newsletter to get emails about new recipes .And don't forget to follow me on YouTube, Facebook, Pinterest, and Instagram for all the latest deliciousness.


Katherine | Love In My Oven says
I just made some breadsticks last night with a soup! I wish I had seen your recipe - 3 ingredients is my kind of recipe!! Happy holidays to you, my friend!
Kelly @ Kelly Lynns Sweets and Treats says
There's no excuse not to make these! Three ingredients and super easy! Just the recipe I need right now. Happy Holidays my friend XOXOXO
Emma @ Bake Then Eat says
These breadsticks are a great idea, I've always said you have the best bread recipes. Merry Christmas Ashika to you and your family 😀
2pots2cook says
Perfect for New Year's Eve ! Thank you Ashika !
Kelsie | the itsy-bitsy kitchen says
Only three ingredients? I'm so excited to try these because I loooove garlic bread! Happy New Year, Ashika!
Deepti says
This has become my go to recipe for my kid's lunch box. Thank you!
Cass says
Amazing! I made 8 bigger breadsticks though. I thought they turned out almost like olive garden breadsticks!
The Gardening Foodie says
Hi Cass, thank you for giving this recipe a try...I am so glad that you loved it too 🙂
Jagjit Kaur says
Hi, Thanks for sharing this recipe. I ran out of yeast and wanted to bake some bread to go along with soup and pasta. They came out good.
The Gardening Foodie says
Hi Jagjit, thank you and you are welcome 🙂
I am glad that you enjoyed this recipe too 🙂
Jana says
Hello. Thank you for the simplicity of ingredients Abe procedures. I had to make buttermilk on the spot, and doubled the batch, but it ended up very sticky. Adding a bit of hot water and AP flour still couldn’t get it to separate easily to form sticks. I ended up hand squeezing them into ball form at a total of 11 pieces. Baked for 16 minutes at 375 degrees, and then another 7 minutes at 425 degrees. It came out a little dense on the inside, but my kids loved it. Will try again with warm butter milk and see if it helps. Again, thank you.
The Gardening Foodie says
Hi Jana, Thank you for giving this recipe a try and you are welcome 🙂
A possible reason for it being too sticky was probably too much liquid added when you made your buttermilk. It has to be thick, and not a milk-like consistency.
This recipe also has to be made using self-raising flour which contains raising agents. This will help to prevent the dense texture. If you do not have self-raising flour, you will find notes at the bottom of the recipe card explaining how to make your own.
I hope that this helps 🙂
I would love to know how it turns out when you do give this recipe a try again.
Jana says
Hello Ashika. Thank you for your response. I did try to make these bread sticks again this morning, with the same results as last time. I had used self rising AP flour on both occasions and did try using warm homemade buttermilk. Unfortunately I did not see your reply until now. The bread still came out with great flavor, and I used one to make a breakfast sandwich. Overall still a great and simple recipe. My son and God brother claims it tastes like Little Caesar's bread. LOL! The next time I attempt to do this, i will try to purchase buttermilk and also Greek yogurt. I plan on trying one batch to be topped with homemade caramel sauce and the other with sugared cinnamon mix. 🙂
Shivani says
The recipe sounds amazing, but I don't have baking powder. Can I use baking soda instead?
The Gardening Foodie says
Hi Shivani, Thank you 🙂
To answer your question: Using baking soda alone might alter the taste and texture of the recipe. You can make your own baking powder too by mixing together 1 tablespoon of baking soda and 2 tablespoons of cream of tartar.
Use 1 1/4 teaspoons of this mix to substitute for the baking powder.
I hope that this helps to answer your question 🙂
Kelly says
Turned out wonderful for the first time making! Will definitely use again, I can't believe they got soft and puffy! (Used AP flour note and vinegar)
Jasmine Hammond says
Can I just put in a bread bowl if I don’t want sticks?
The Gardening Foodie says
Hi Jasmine, since the dough is soft and yeast-free, it might not hold up as firmly as a traditional bread bowl, so it’ll be a bit softer in texture, more like a biscuit.
If you're okay with that, it can still work as a flavorful bread. Just bake it a bit longer (around 20-25 minutes) and watch for a golden, firm crust. If you want it to hold its shape better, you could also try baking it in a smaller pan.
I hope this helps
Happy baking 😊