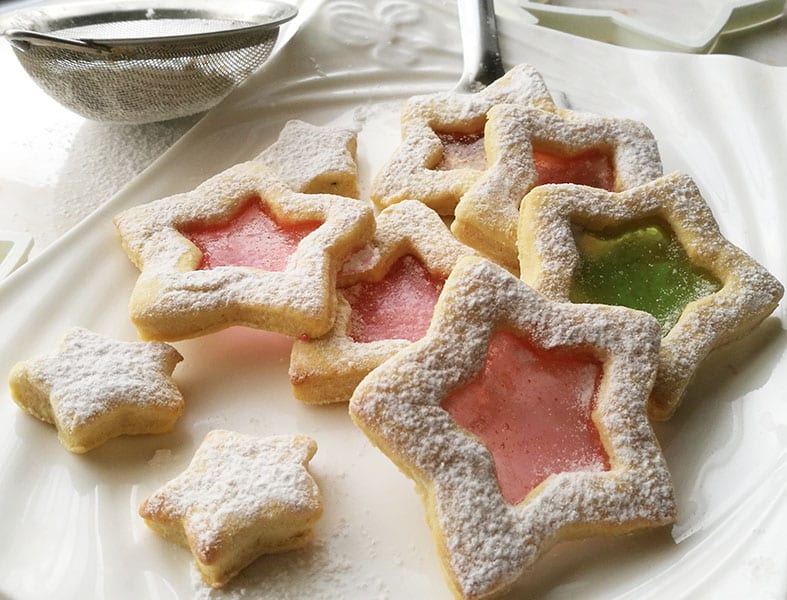
Stained Glass Butter Cookies
These beautiful festive Stained Glass Butter Cookies are super impressive and so easy to make too. A light buttery cookie filled with hard candy to create a stunning stained glass effect.
Servings 24 cookies
Ingredients
- 1 cup butter softened
- 1 cup white sugar
- ½ cup buttermilk See note 1
- 1 ½ teaspoons vanilla extract
- 3 cups all-purpose flour OR cake flour
- Assorted colour hard candy See note 2
Instructions
- Use a mixer to beat together the butter and sugar. Beat for up to 4 minutes until the mixture is creamy and light in colour.
- Add in the buttermilk and vanilla extract and beat until it is incorporated into the creamed mixture.
- Fold in the flour, ⅓ ar a time using a metal spoon or spatula to form a soft dough.
- Press out the dough into a rectangle or form into a ball. Wrap the dough in plastic and refrigerate for 30 minutes or overnight. See note 3
- Remove the cookie dough from the fridge and roll out onto a well-floured surface, until about ½ an inch ( 1cm ) thick
- Cut out the cookies using any shape you prefer and place on the baking lined or greased a baking sheet. Use a smaller cutter to cut out the centre of the cookie dough making sure to leave a large enough border.
- Separate the candy into colours and either crush or leave as a whole candy to fill the inside of the cutout shapes before baking.
- Bake for 10 to 12 minutes until the edges are golden and the candy has melted.
- If you are using the cookies as an ornament then immediately after baking, use a toothpick to make a small hole at the top to thread a decorative ribbon.
- Allow to cool on the baking sheet for 5 to 10 minutes before serving or using as an edible Christmas decoration. See note 4
Notes
- If you do not have buttermilk then make your own by adding 1 Tablespoon/ 15ml lemon juice or vinegar to ½ cup / 125ml milk. Set aside for 5 minutes before using in the recipe.
- These can be either crushed or left as a whole candy to fill the inside of the cutout shapes before baking.
- Refrigeration of the dough - This firms up the dough, making it easier to cut into shapes. It also prevents the shaped dough from spreading during baking.
- Allow the baked cookies to cool on the baking sheet for 5 to 10 minutes before gently removing. The melted candy will be very hot and soft after baking. Allowing it to cool will harden the melted candy and make it easier to remove off the baking sheet.
Nutrition
Serving: 1cookie | Calories: 99kcal | Carbohydrates: 21g | Protein: 2g | Fat: 1g | Saturated Fat: 1g | Cholesterol: 2mg | Sodium: 16mg | Potassium: 37mg | Fiber: 1g | Sugar: 9g | Calcium: 20mg | Iron: 1mg
Tried this recipe?Mention @thegardeningfoodie or tag #thegardeningfoodie!