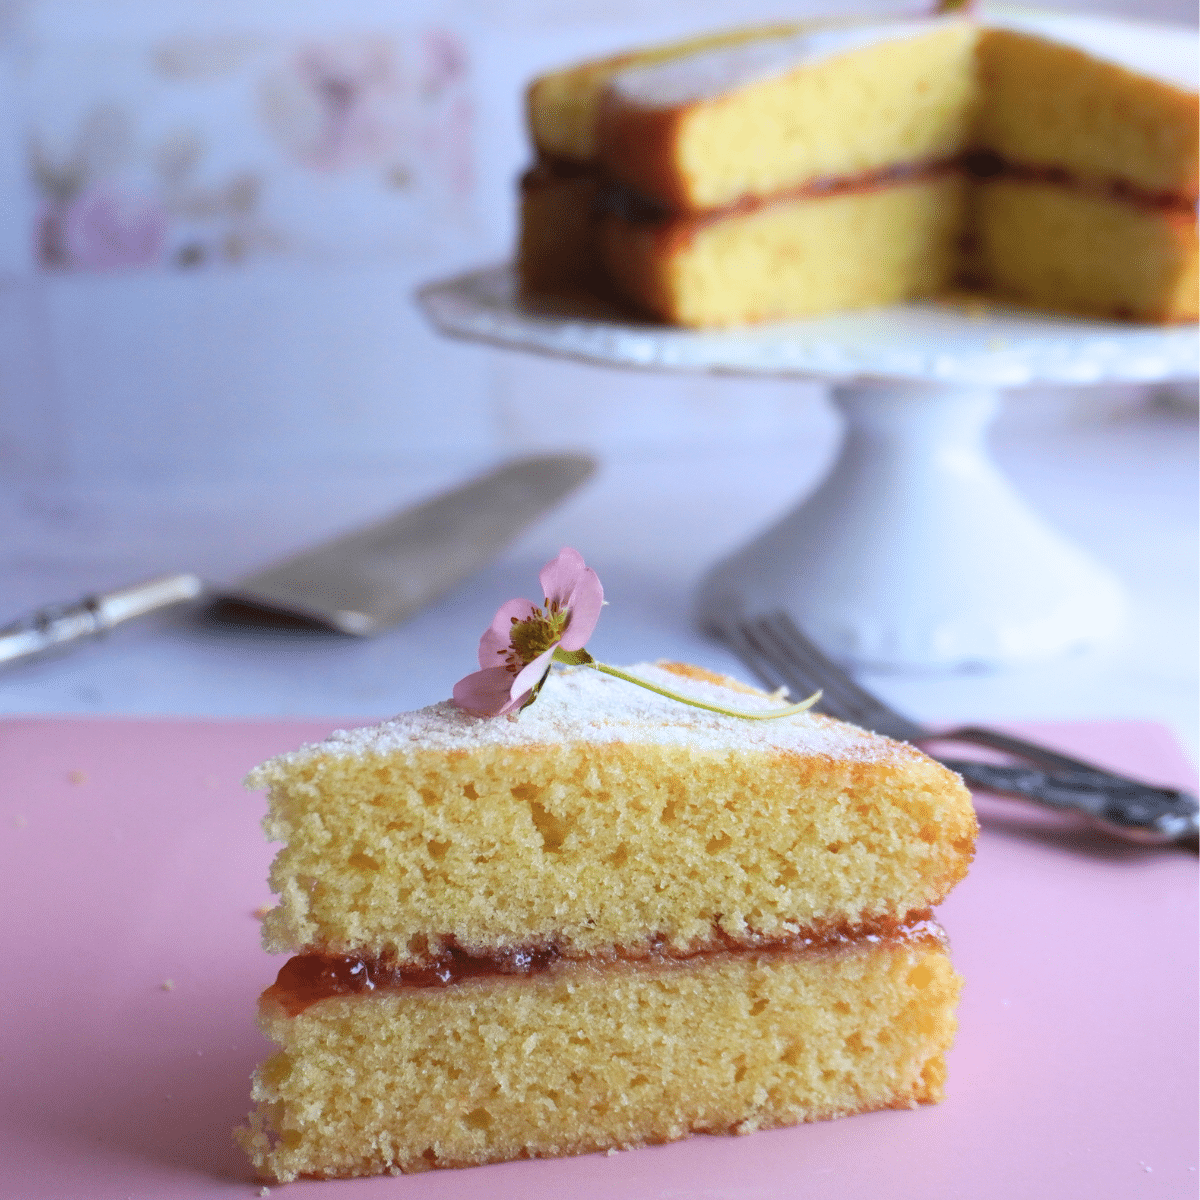
This Victoria Sponge Cake, truly known as Victoria Sandwich Cake in the UK, is usually made with self-raising flour. I’ve opted for all-purpose flour (plain flour) for convenience, so you won’t need to buy special flour and can still enjoy the light, airy texture this beloved cake is known for.
Ingredient list
Here’s the list of ingredients you’ll need. You can also find the full printable recipe with instructions and ingredients at the end of the post.
- 1 cup (225g) unsalted butter, at room temperature
- 1 cup (200g) white granulated or caster sugar
- 4 large eggs
- 1¾ cups (210g) all-purpose flour
- 1½ teaspoons baking powder
- ½ teaspoon salt (add ¼ teaspoon if using salted butter)
- Jam (raspberry or strawberry) - for the filling
- Whipped cream (optional) - for the filling
Visual Instructions
These visual instructions help you see the process. You can also find the full printable recipe with instructions and ingredients at the end of the post.
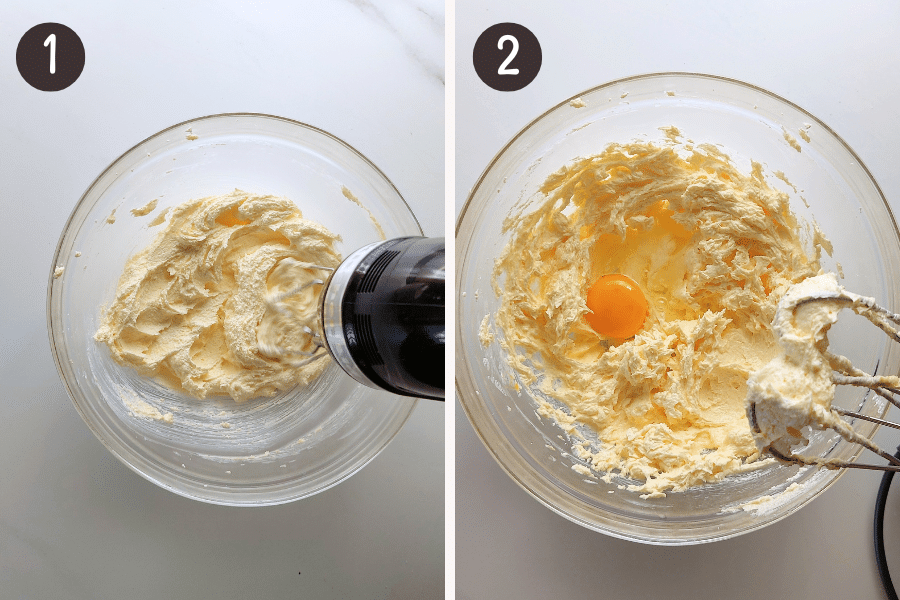
- In a large mixing bowl, beat the butter and sugar together until light in texture and pale in color (about 3-4 minutes)
- Add the eggs one at a time, mixing well after each addition. Scrape down the sides of the bowl with a spatula to ensure everything is combined.
👩🍳 Bakers tip
- Adding eggs one at a time helps the batter mix smoothly.
- If you add them all at once, the mixture can split or curdle, making it harder to combine.
- By adding eggs gradually, it helps create a smooth batter, which makes the cake light and fluffy.
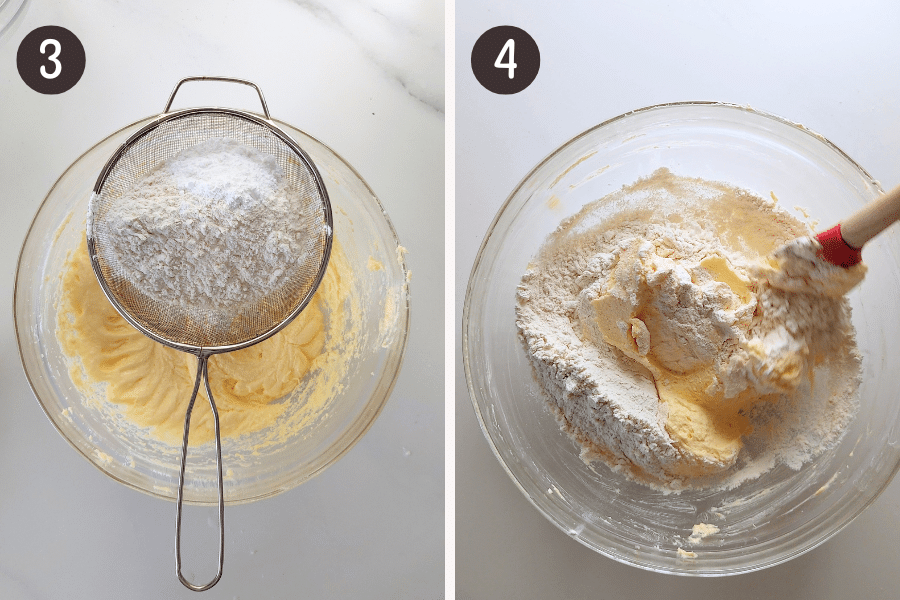
- Sift the all-purpose flour, baking powder, and salt over the butter mixture
- Gently fold the sifted dry ingredients into the butter mixture until just combined, ensuring there are no visible streaks of flour in the batter.
👩🍳 Bakers Tip
To fold means to scoop from the bottom, lift, and gently turn the mixture over the top without mixing too hard.
If the batter feels too thick, you can add 1-2 tablespoons of milk to make it smoother.
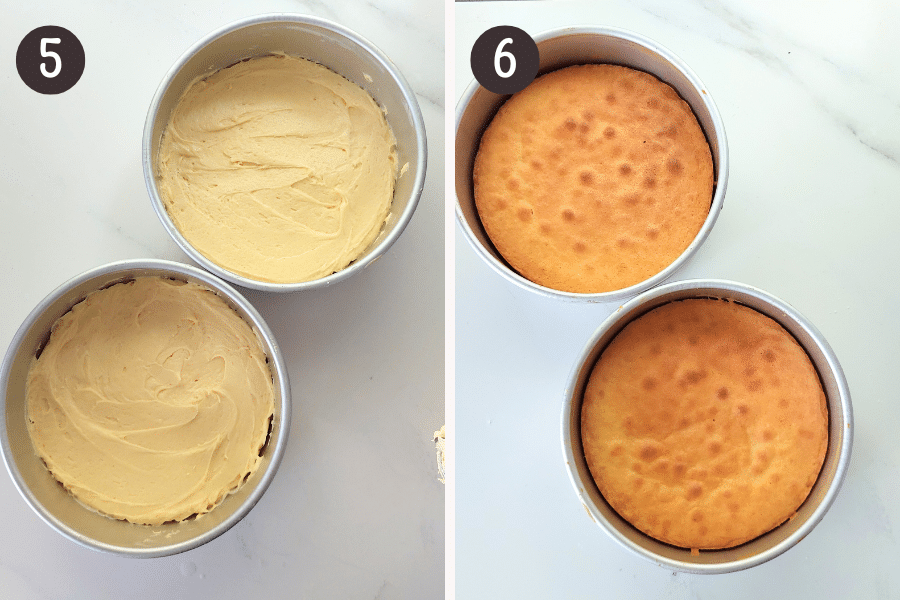
- Scoop the thick batter into the prepared cake pans, spreading it evenly with a spatula.
👩🍳 Bakers tip
- If the batter is sticking to the spatula while you're trying to spread it in the baking pans, dip the spatula in hot water first.
- The warmth creates a slight barrier between the batter and the spatula, making it easier to smooth out the surface evenly.
- Bake in the preheated oven for 20-25 minutes, or until a toothpick inserted into the center comes out clean. Allow the cakes to cool in the pans for about 10 minutes.
👩🍳 Bakers tip
- The texture of a Victoria Sponge cake is meant to be light, soft, and airy with a delicate crumb.
- The cake should spring back when lightly pressed, indicating it’s not dense.
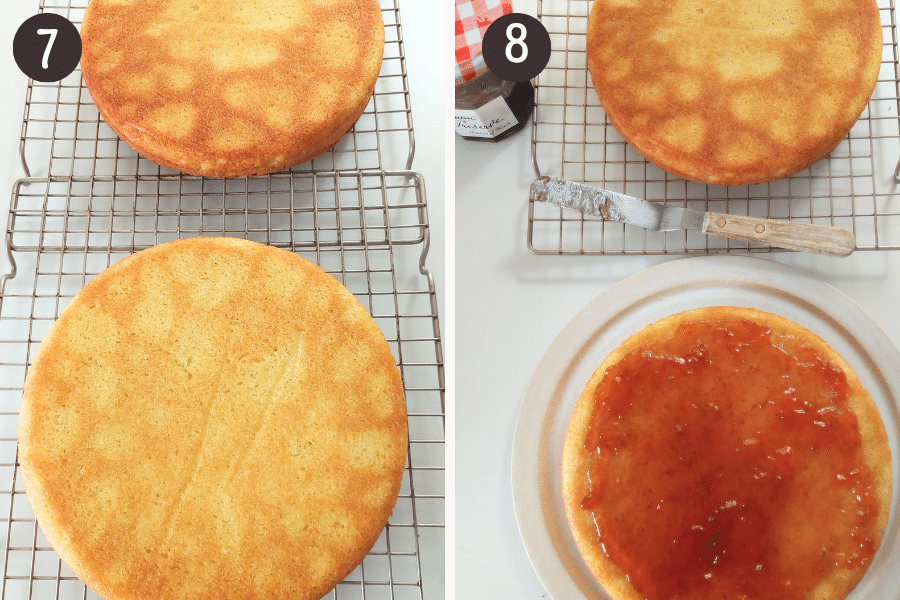
- Carefully turn them out onto a wire rack to cool completely.
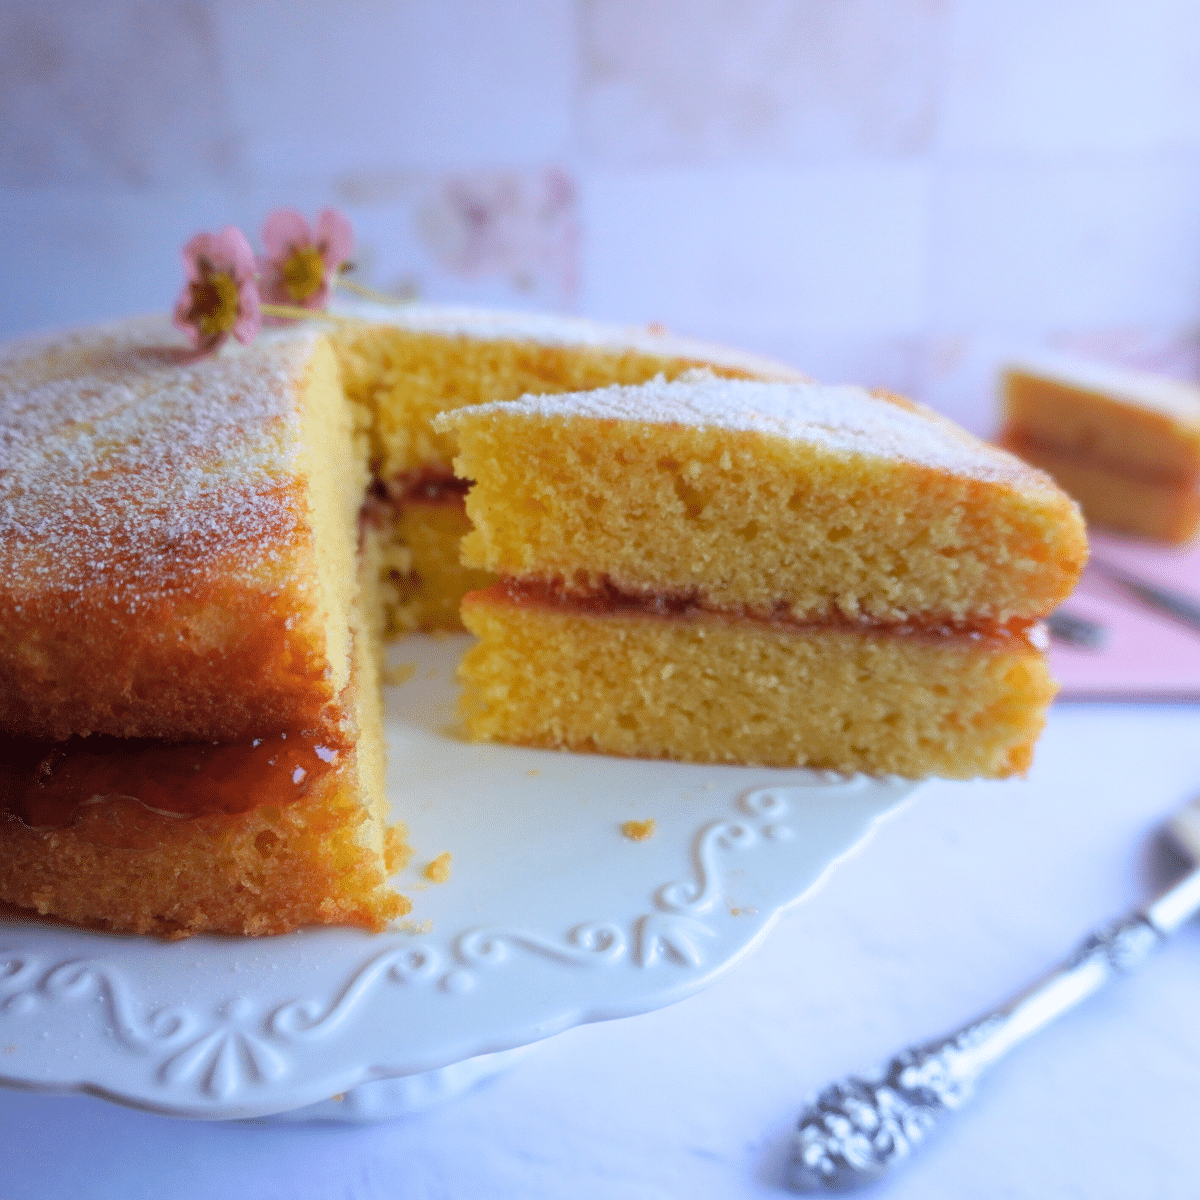
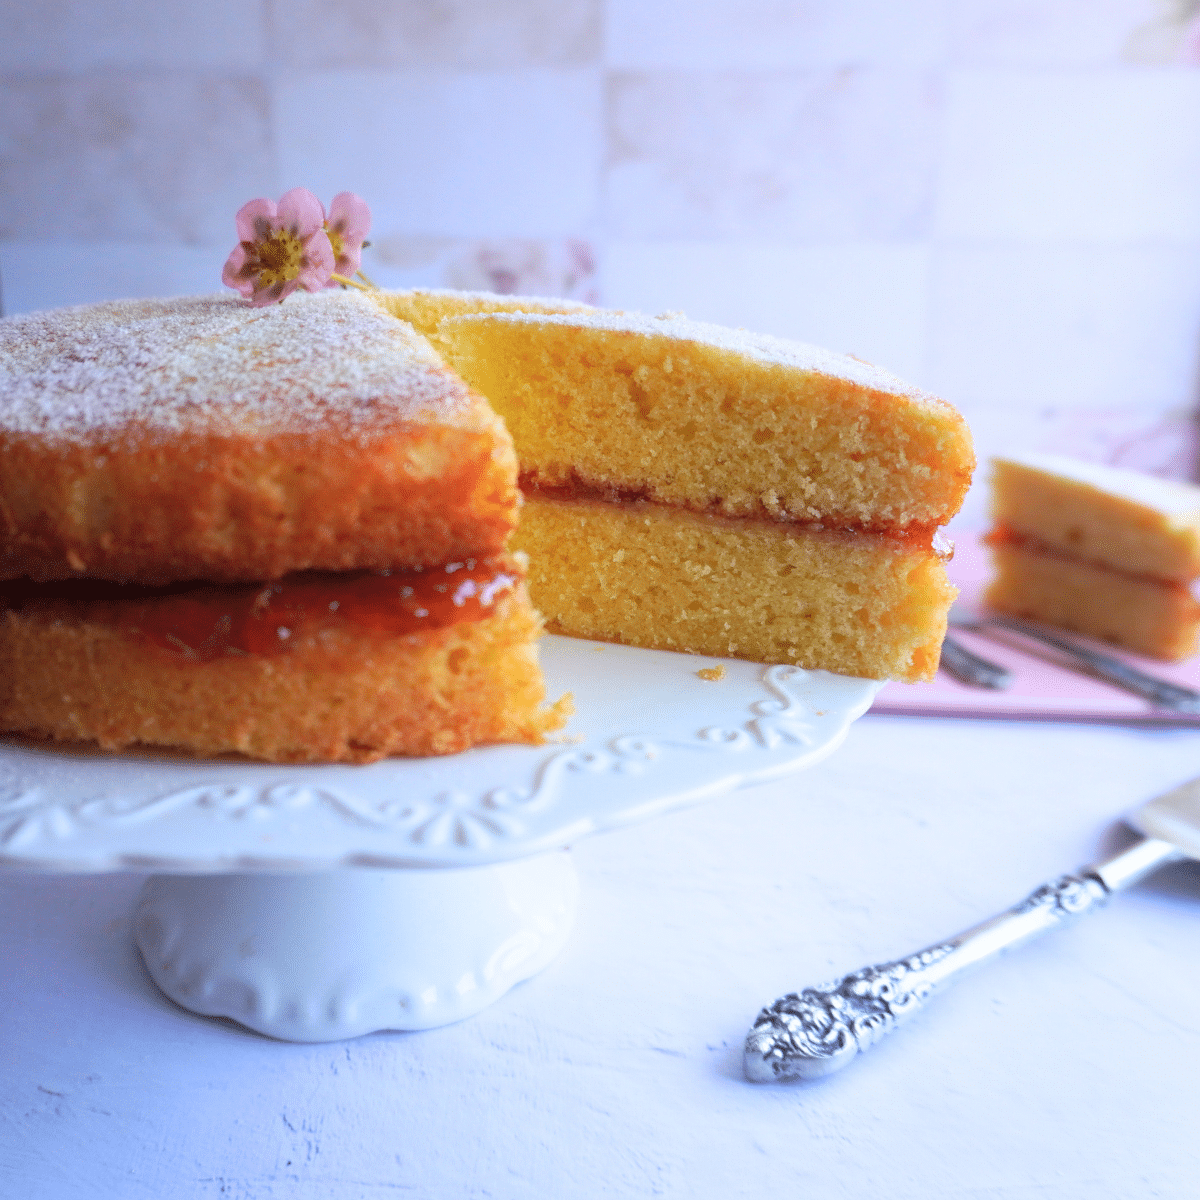
- Once the cakes have cooled, spread a generous layer of jam over one cake layer. You can add whipped cream as well if you like. Place the second cake layer on top and press down gently. Dust with powdered or superfine sugar (caster sugar) before serving.
How to Store Victoria Sponge Cake
Cool Completely: Always cool the cake completely before storing, regardless of the storage method.
Room Temperature: Store the cake in an airtight container at room temperature for up to 3 days to keep it fresh.
Refrigeration: If you have leftovers, refrigerate the cake in an airtight container for up to a week, though this may slightly alter the texture.
Freezing: For longer storage, wrap the cake tightly in plastic wrap and then in aluminum foil. It can be frozen for up to 3 months. Thaw in the refrigerator before serving.
Enjoy ♡
Recipe
Victoria Sandwich Cake
- 1 cup (225g) unsalted butter, at room temperature
- 1 cup (200g) white granulated sugar (or superfine sugar /caster sugar)
- 4 large eggs
- 1¾ cups (210g) all-purpose flour (plain flour)
- 1½ level teaspoons baking powder
- ½ teaspoon salt (add ¼ teaspoon if using salted butter)
- raspberry or strawberry jam (for the filling)
- Whipped cream (optional - for the filling)
- Grease and line two 8-inch (20 cm) round cake pans with parchment paper (baking paper)
- Preheat the Oven: Position the oven rack in the middle of the oven, and preheat to 356° F / 180° C (160° C fan)
- Cream the Butter and Sugar: In a large mixing bowl, beat the butter and sugar together until light in texture and pale in color (about 3-4 minutes)
- Add the Eggs: Add the eggs one at a time, mixing well after each addition. Scrape down the sides of the bowl with a spatula to ensure everything is combined. (see note 1)
- Sift Dry Ingredients: Sift the all-purpose flour, baking powder, and salt over the butter mixture.
- Combine the mixture: Gently fold the sifted dry ingredients into the butter mixture until just combined, ensuring there are no visible streaks of flour in the batter. (See note 2)
- Divide the Batter: Evenly divide the batter between the prepared pans and spread it smoothly with a spatula. (See note 3)
- Bake for 20-25 minutes, or until a toothpick inserted into the center comes out clean. (See note 4)
- Cool the Cakes: Allow the cakes to cool in the pans for about 10 minutes before carefully turning them out onto a wire rack to cool completely.
- Filling: Once the cakes have cooled, spread a generous layer of jam over one cake layer. You can add whipped cream as well if you like. Place the second cake layer on top and press down gently.
- Dust with powdered or superfine sugar (caster sugar) before serving.
2) Folding Technique: To fold means to scoop from the bottom, lift, and gently turn the mixture over the top without mixing too hard. If the batter feels too thick, you can add 1–2 tablespoons of milk to make it smoother.
3) Spatula Tip: If the batter is sticking to the spatula while you're trying to spread it in the baking pans, dip the spatula in hot water first. The warmth creates a slight barrier between the batter and the spatula, making it easier to smooth out the surface evenly.
4) Layer Height: Each layer should rise to about 2½ cm, which gives a perfect height when filled with jam. You can also add whipped cream for a taller cake.
Scroll Up for the STEP by STEP Photos Don't miss the process shots in the post above. Simply scroll up the post to find them. Those were created especially for you so that you can make the recipe perfectly every single time you try it.
Want even more delicious recipes? Subscribe free to receive new post notifications emailed to you. Or follow along on Facebook, Pinterest, and Instagram. If you love sharing recipes please come and join my All about cooking and baking Facebook group or Subscribe to my YouTube channel


Leave a Reply