Making sourdough from scratch is easier than you think. I’ll guide you through each step and share how my starter progressed, so you’ll know exactly what to expect. If you run into any issues along the way, feel free to leave a comment, and we can work through it together.
- Ingredients
- Understanding starter and discard
- Why You Need to Discard
- Visual Instructions
- Day One
- Day Two : What to Expect
- Day Three : What to expect
- Day four: What to expect
- Day five: What to expect
- Day six: What to expect
- Day seven: What to expect
- Day eight: What to expect
- Caring for your ready-to-use sourdough starter
- When you're ready to bake
- For example
- Storing your sourdough starter in the fridge
- Keeping your jar clean
- Recipes to try with your new starter
- Printable recipe card
Ingredients
- ¾ cup (100g) white bread flour (per feeding) (Total: ~800g (6 cups) over 8 days)
- ½ cup (100g) water (per feeding)
Flour: You can use any flour to make your sourdough starter, and all of them will work. Once your starter is ready, you can use it to bake with any flour you choose.
- White Bread Flour: Best for beginners, helps the starter grow quickly.
- All-Purpose Flour: Common and easy, but takes longer to bubble.
- Whole Wheat Flour: Nutrient-rich, speeds up growth, can be mixed with white flour.
Water: You can use tap water, but it contains chlorine, which can affect yeast growth. To remove chlorine, boil and cool the water until it reaches room temperature (around 85°F or 30°C).
- Filtered or spring water is also a good option.
- Avoid cold or sparkling water, as it can disrupt yeast growth. If your home is cool, slightly warm water (up to 85°F or 30°C) is ideal.
Understanding starter and discard
As you follow this recipe, you’ll come across two important terms: starter and discard. Here’s what they mean:
- Starter: The mix of flour and water that contains natural bacteria and wild yeast. Once developed (usually by Day 8), it’s ready to use for baking, like in my easy sourdough sandwich loaf recipe.
- Discard: When you feed a sourdough starter, you add fresh flour and water to help it grow. To keep it healthy and prevent it from becoming too large, a portion is removed before feeding—this is the discard.
Why You Need to Discard
While Building Your Starter (Day 2-7)
- The natural bacteria feed on the sugars in the flour, creating bubbles.
- When they run out of food, some die, and a brown liquid called hooch forms.
- Adding fresh flour gives the bacteria new food, helping them stay strong so they can help the dough rise.
At this stage, the discard is not usable, so it’s best to throw it away. Avoid pouring sourdough starter discard down the sink, as it can clog your pipes. Instead, you can seal it in a bag and place it in the regular trash.
Ongoing Maintenance (Day 8 and Beyond)
- Discarding is still important once your starter is ready for baking. It keeps the starter active and balanced.
- You don’t need to discard as often as when building, but depending on how often you use it, you may need to discard and feed it weekly.
At this stage, you can save the discard if you choose and use it in special recipes that don’t need it for rising but still add that great sourdough flavor and texture, like my sourdough discard raisin quick bread.
Visual Instructions
These visual instructions help you see the process. You can also find the full printable recipe with instructions and ingredients at the end of the post.
- The 100g measurements are based on weight, which is the most accurate way to measure ingredients.
- If you prefer using cups, 100g of white bread flour is approximately ¾ cup,
- 100g of water is just under ½ cup. However, for best results, I recommend using a kitchen scale for precise measurements
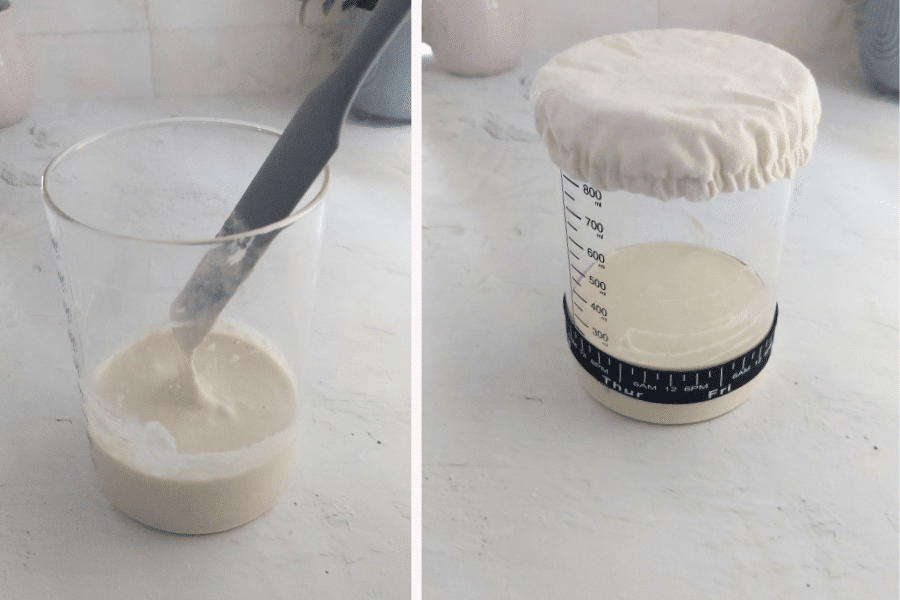
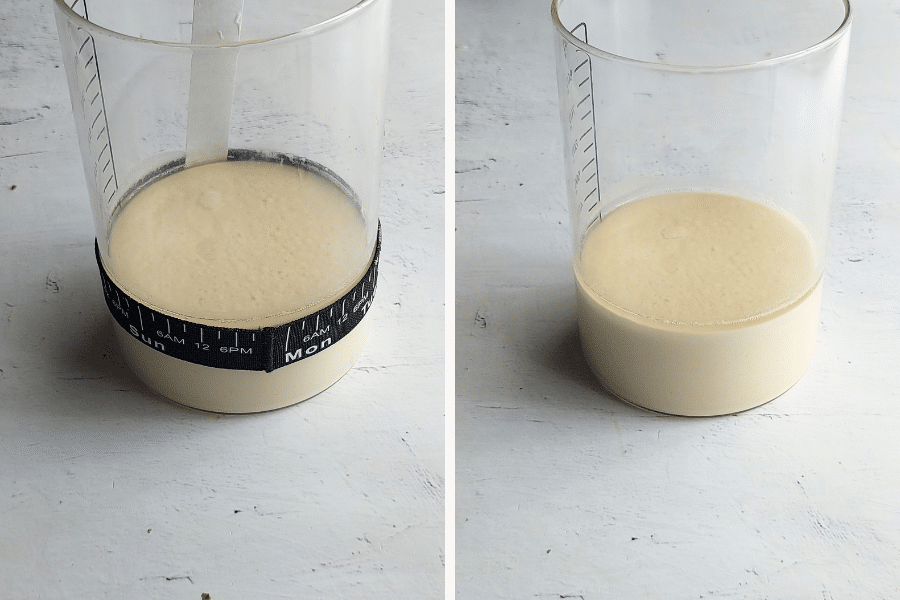
Day One
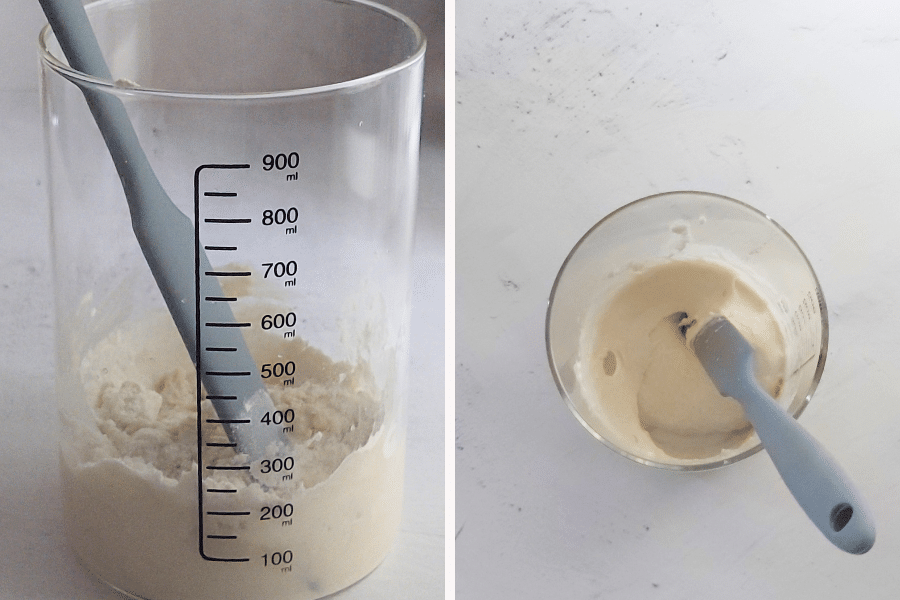
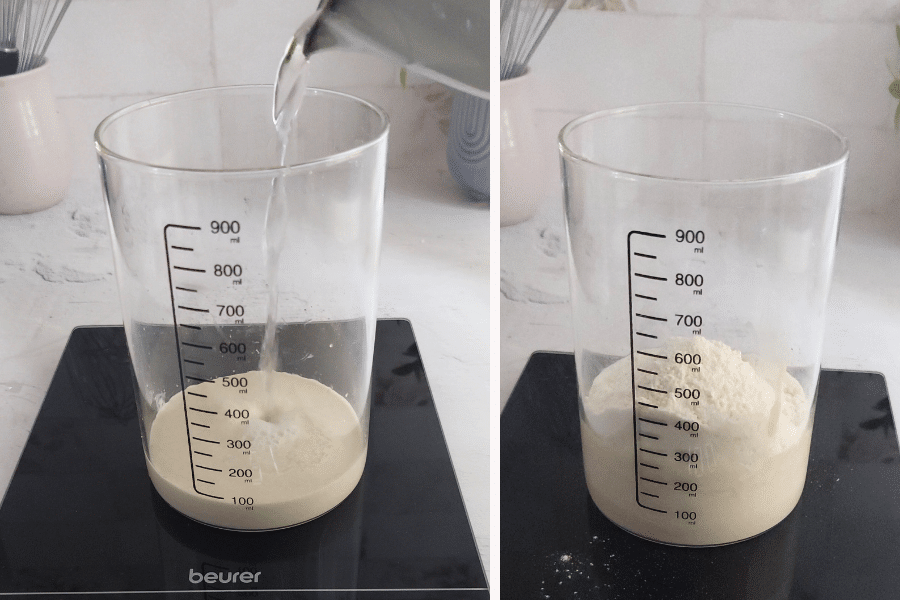
- In a clean jar, combine ¾ cup (100g) white bread flour and ½ cup (100g) water. Stir until fully mixed.
- Mark the mixture’s level on the jar using a rubber band, tape, or marker.
- This will help you track the rise over time.
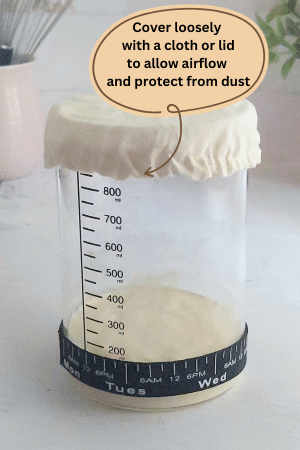
- Cover the jar loosely with a lid or cloth and leave it at room temperature (around 75-80°F or 24-27°C) for 24 hours.
- Do not put your starter in a warm oven to speed things up. It will grow too quickly, exhausting the yeast and causing it to stop growing, so you’ll have to start over.
Day Two : What to Expect

- After 24 hours from when you first mixed your starter, you should notice it has risen to about 1 ½ to 2 times its original size.
- Small bubbles will form, and the mixture will have a faint sour smell, signaling that fermentation is underway.
What to Do

Stir the mixture well. Discard about half (roughly 100g) of the starter from your jar
- Avoid pouring sourdough starter discard down the sink, as it can clog your pipes.
- Instead, the best method is to throw it in the compost bin, as it's organic material.
- If composting isn't an option, you can seal it in a bag and place it in the regular trash.
Add ¾ cup (100g) white bread flour and ½ cup (100g) water to the remaining mixture.
Stir until fully combined. Mark the new level of the mixture with your rubber band, tape, or marker.
Cover the jar loosely again and leave it at room temperature (75-80°F or 24-27°C) for the next 24 hours.
Day Three : What to expect
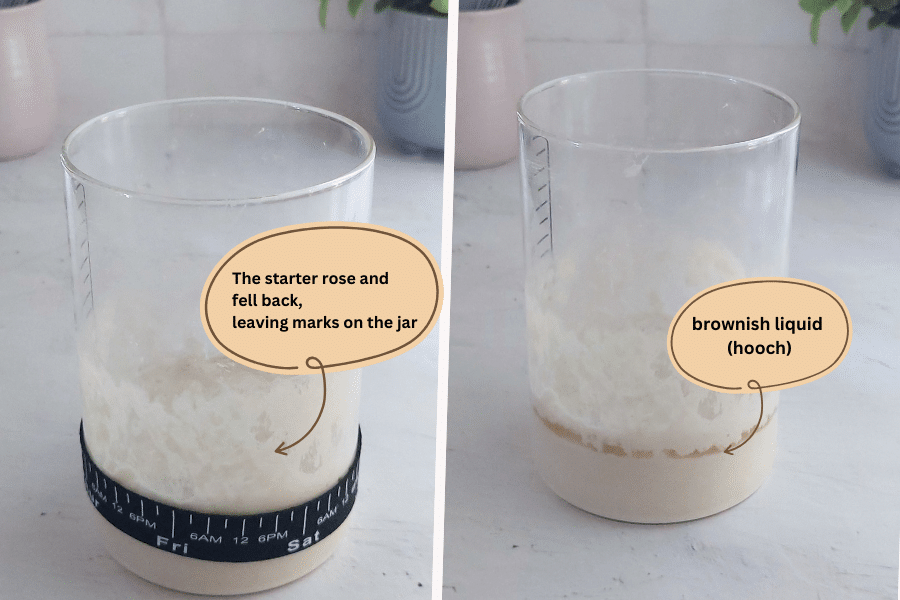
- Your starter should have risen and then fallen.
- If you missed it, you may notice marks on the side of the jar where the starter expanded and then shrunk back down.
- Small bubbles and a slightly sour smell are normal signs of fermentation.
- If you see a thin layer of brownish liquid (called hooch) on top, don’t worry. It means the starter is hungry and needs more flour and water.
What to do
- Stir the mixture well.
- Discard about half (roughly 100g) of the starter
- Add ¾ cup (100g) white bread flour and ½ cup (100g) water to the remaining mixture. Stir until fully combined.
- Mark the new level of the mixture with your rubber band, tape, or marker.
- Cover the jar loosely again and leave it at room temperature (75-80°F or 24-27°C) for the next 24 hours.
Day four: What to expect
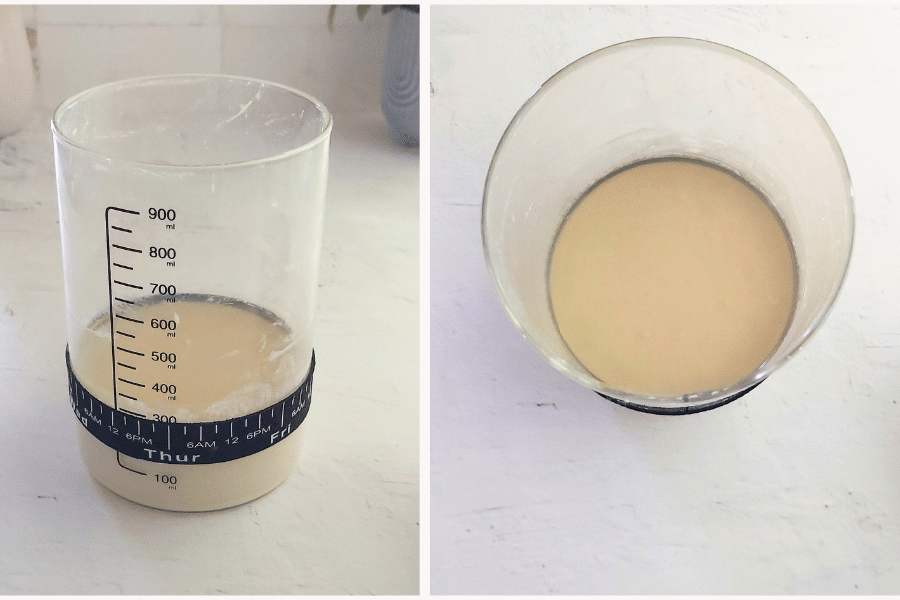
- During this time, your starter may appear watery and flat, but this can vary depending on its progress
- You’ll see few, if any bubbles on the surface or throughout the starter.
- Don’t lose hope, continue feeding your starter and it will soon show signs of life.
- The aroma of your starter will also evolve during this process, at this point it may smell like cheese or yogurt.
This is the "quiet phase" where the yeast and bacteria are settling. Don't worry, it's normal, and it just means your starter is still working hard but needs more time and feeding.
With consistent care, you’ll see bubbles and rising activity in a few days
What to do
- Pour out any brownish liquid (hooch) that forms to help prevent your starter from becoming too watery.
- Discard about half of the starter (around 100g).
- Add ¾ cup (100g) of white bread flour and ½ cup (100g) of water to the remaining starter. Stir until it’s fully mixed.
- Mark the new level of the mixture with a rubber band, tape, or marker.
- Cover the jar loosely and leave it at room temperature for another 24 hours.
What to expect in the next 24 hours:
Over the next 24 hours, your starter may still look flat with little to no rise. It might form more hooch (brownish liquid on the surface) which is completely normal. Don't worry, this just means your starter is still working and needs time.
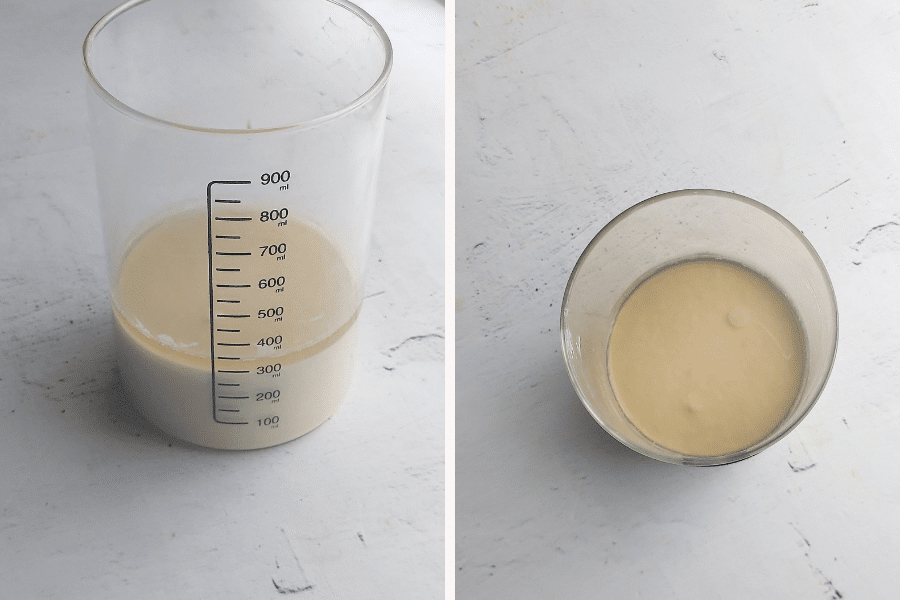
Day five: What to expect
Over the next 24 hours, your starter may still look flat with little to no rise. It might form more hooch, which is completely normal. Don't worry, this just means your starter is still working and needs time.
What to do
- Pour out any brownish liquid (hooch) that forms to help prevent your starter from becoming too watery.
- Discard about half of the starter (around 100g).
- Add ¾ cup (100g) of white bread flour and ½ cup (100g) of water to the remaining starter. Stir until it’s fully mixed.
- Mark the new level of the mixture with a rubber band, tape, or marker.
- Cover the jar loosely and leave it at room temperature for another 24 hours.
Day six: What to expect
- If your starter still looks similar to Day 4 and 5 (flat with little to no rise or a thin layer of hooch on top), don’t worry, it’s common for some starters to take extra time to develop.
- The mixture may have small bubbles and a faint sour smell but might not yet show significant rise.
- This is part of the process, and with consistent care, your starter will become active soon.
What to do
- Once again, pour out any brownish liquid (hooch) that forms to help prevent your starter from becoming too watery.
- Discard about half of the starter (around 100g).
- Add ¾ cup (100g) of white bread flour and ½ cup (100g) of water to the remaining starter. Stir until it’s fully mixed.
- Mark the new level of the mixture with a rubber band, tape, or marker.
- Cover the jar loosely and leave it at room temperature for another 24 hours.
Day seven: What to expect
- Your starter is beginning to show stronger activity.
- After feeding, you may notice that the starter rises significantly within 4-6 hours and then begins to fall back down
- This rise and fall indicate that the yeast and bacteria are becoming more active, producing gas, and fermenting the mixture.
- Bubbles may be visible throughout, and the texture should feel light and airy.
What to do
- Discard about half of the starter (around 100g).
- Add ¾ cup (100g) of white bread flour and ½ cup (100g) of water to the remaining starter. Stir until it’s fully mixed.
- Mark the new level of the mixture with a rubber band, tape, or marker.
- Cover the jar loosely and leave it at room temperature for another 24 hours.
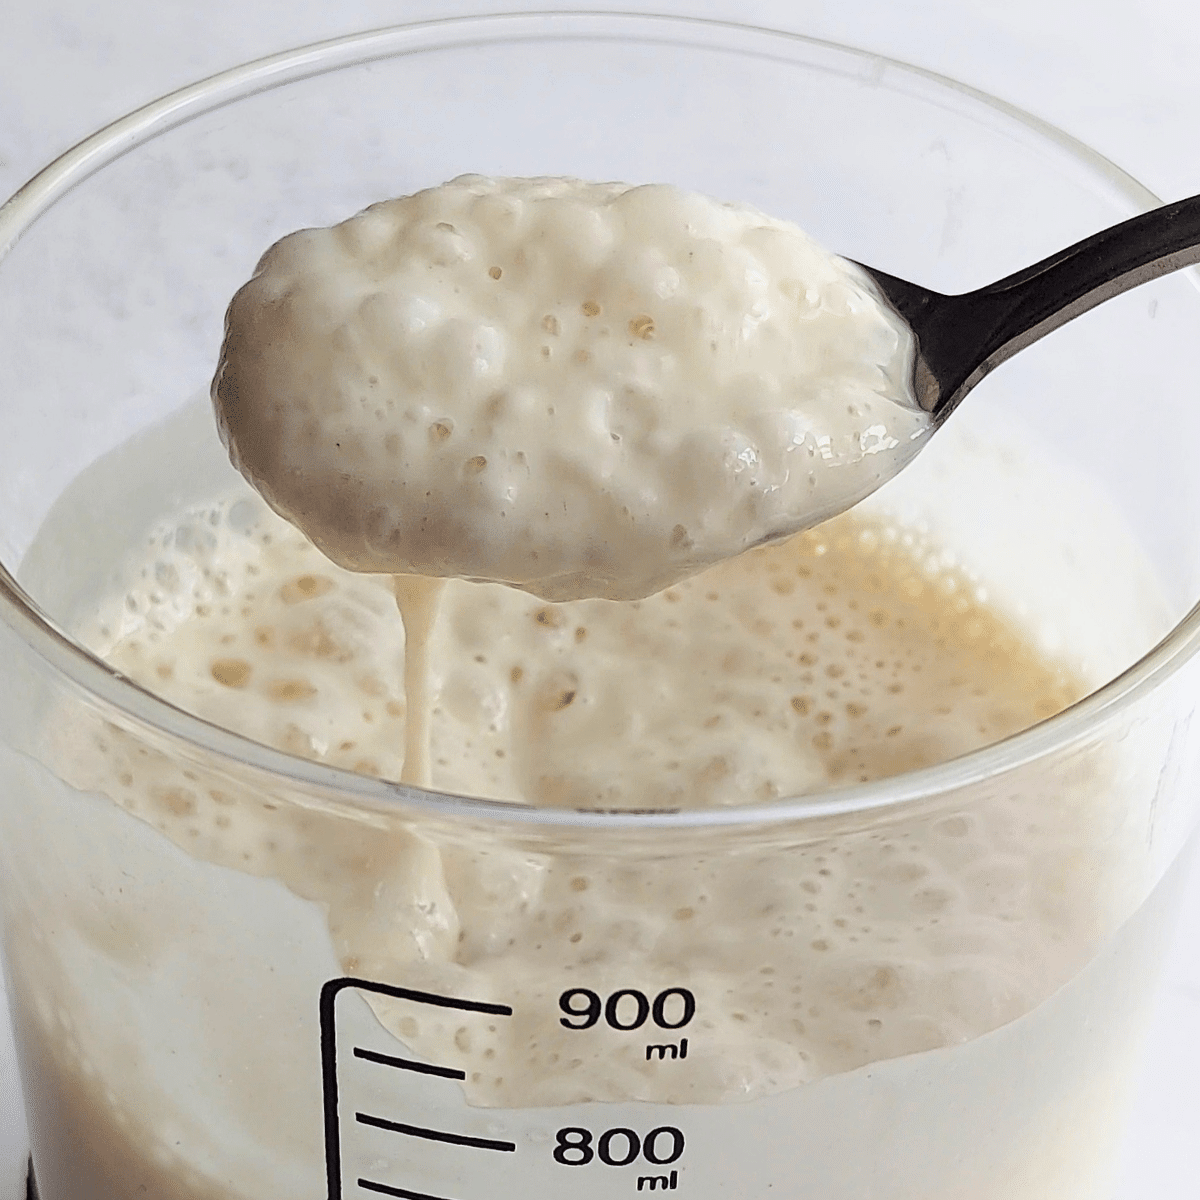
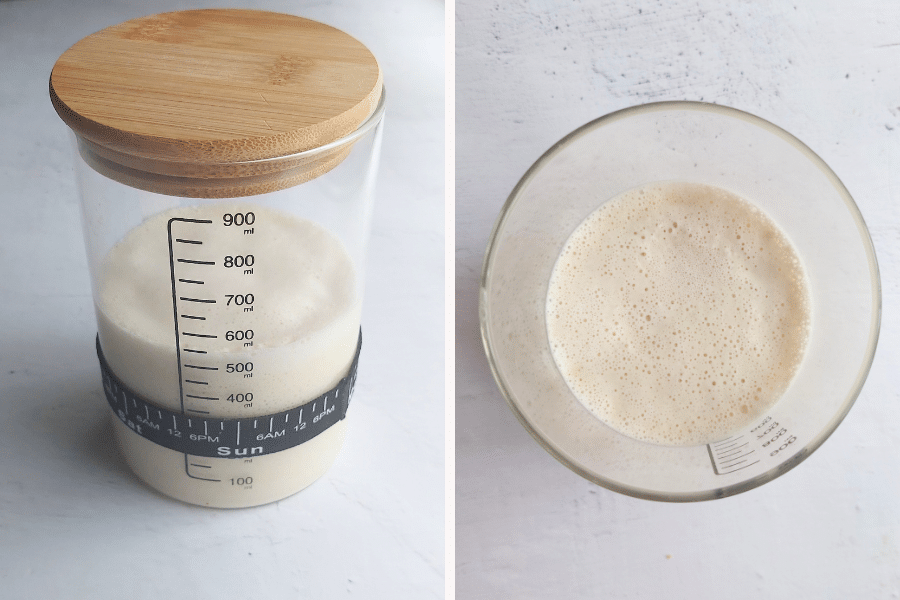
Day eight: What to expect
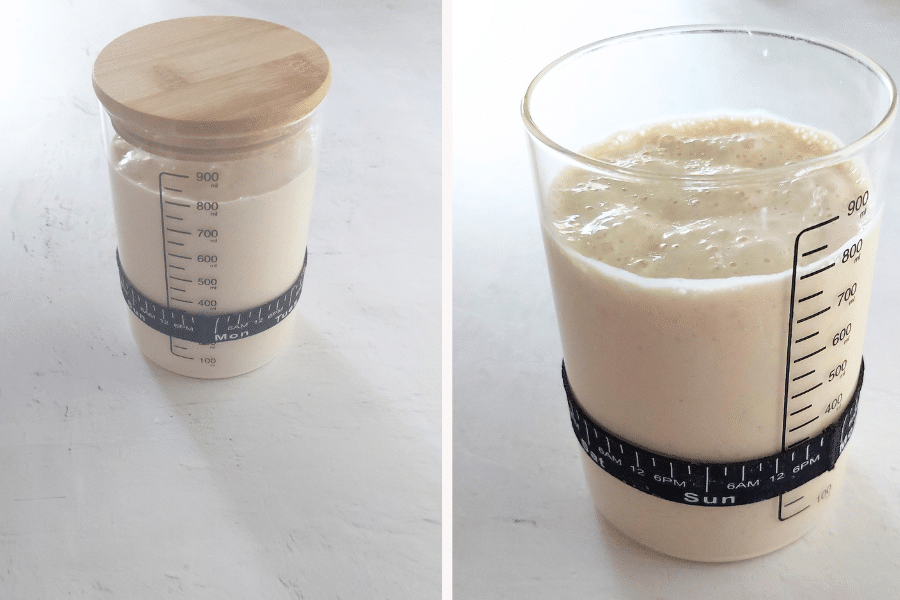
- After feeding your starter on Day 7 and waiting 24 hours, your starter should show strong, consistent activity.
- It will likely double or even triple in size within 8 hours of feeding. You’ll see bubbles throughout the mixture.
- The texture will be light and airy. The aroma will be tangy, and your starter should feel spongy, elastic, and easy to stir with visible bubbles.
- It will no longer be dense or pasty, signaling that the fermentation process is well-established and your starter is maturing properly.
What to do
- Check the Rise: When your starter is ready, it should rise, get bubbly and puffy, roughly doubling in size within 4-8 hours.
- After that it should start to fall back down. It should smell sour but pleasant. This is a good sign that it’s ready to bake
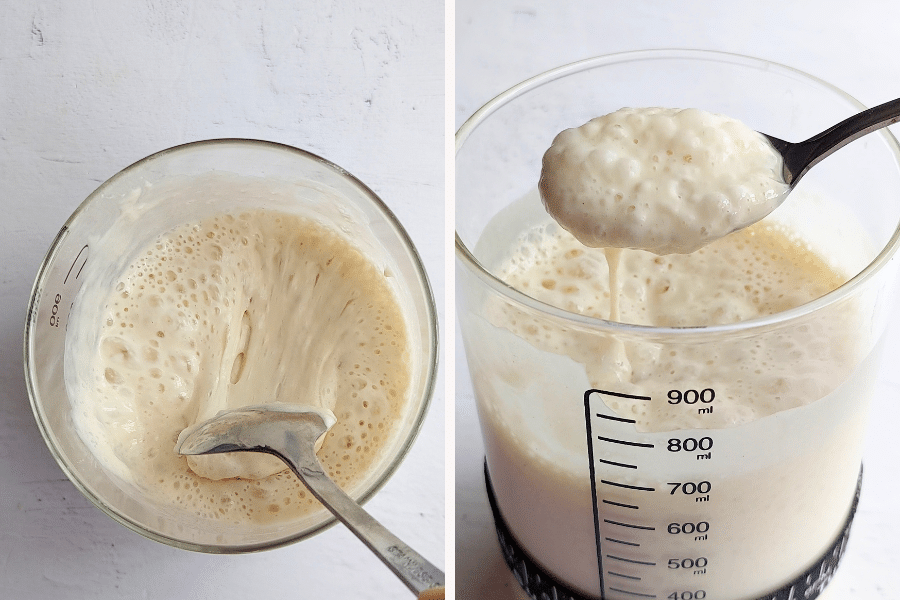
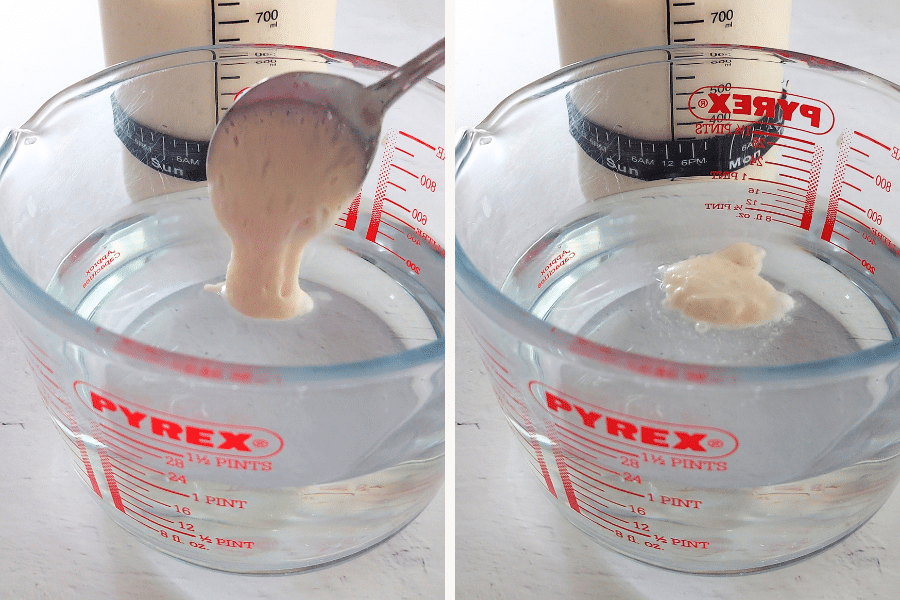
- Float Test (Optional): To test the readiness of your starter, you can do the float test. Simply drop a spoonful of the starter into a glass of water.
- Your starter should float for at least a few seconds, ideally 10-15 seconds.
- If it sinks quickly, it might need more time or another feeding. If it floats steadily, it's ready to use for baking.
- All Set for Baking? If your starter passes the float test and has a nice rise, it's ready to bake! Give it a go with my super easy Sourdough Sandwich Bread recipe.
- If your starter isn’t ready by day 8, keep feeding it as you have been. It might take a little longer depending on things like the flour you use and the temperature in your kitchen.
Caring for your ready-to-use sourdough starter
Once your sourdough starter is active and ready, it's easy to keep it happy and healthy.
- If you bake frequently (daily or every other day): Keep your starter at room temperature, discarding and feeding it every 24 hours.
- If you bake less frequently (weekly): Store your starter in the fridge and feed it once a week.
The following steps show you how to care for your active starter, whether you feed it daily on the counter or weekly in the fridge.
Step 1: Discard – Stir and remove half (about ½ cup or 100g) of your starter.
Step 2: Feed – After discarding, feed the remaining starter with:
- ¾ cup (100g) white bread flour
- ½ cup (100g) water
- Stir to mix.
- Mark the level with a rubber band, tape, or marker, and cover the jar loosely.
Step 3: Store
- In the fridge (for weekly baking): After feeding, you can immediately place the starter in the fridge, where it will ferment slowly.
- On the counter (for daily baking): Keep it at room temperature. If feeding daily, it will typically take 4–6 hours to become bubbly and double in size. The yeast will be active, and you’ll see the starter grow in volume.
When you're ready to bake
A timeline for using your starter
- Feed Your Starter
This applies to both refrigerated and room-temperature starters. If your starter is in the fridge, it’s not necessary to bring it to room temperature before feeding.
- Discard – Remove half (about ½ cup or 100g) of your starter.
- Feed – After discarding, feed with ¾ cup (100g) white bread flour and ½ cup (100g) water.
- Once your starter has doubled in size and is bubbly
- After about 4-6 hours, your starter should be bubbly and doubled in size—this means it’s ready to use. It will stay at this size for about 1-2 hours before it begins to slowly fall, but remember that you want to use it before it starts to fall.
- When it's at its highest point, scoop out the amount you need for your recipe. No need to stir—just scoop from the top.
- Keep in mind that the timing can vary depending on factors like temperature, flour type, and starter strength. A warmer kitchen may cause it to rise and fall a bit faster.
- Feed your starter after using it in a recipe
- Once you’ve used your starter in a recipe, it’s best to feed it within a few hours.
- If you don’t have time right away, try to feed it before the next 12 hours are up to keep it healthy and active.
Since different recipes use different amounts of starter, always feed the remaining starter with an equal amount / weight of flour and water to match the amount of starter you removed.
For example
- If you used about ½ cup (100g) of starter in your recipe, then feed with ¾ cup (100g) of flour and ½ cup (100g) of water.
- If you used about ¼ cup (60g) of starter in your recipe, then feed with ½ cup (60g) of flour and ¼ cup (60g) of water.
No need to discard any here, as you've already used a portion in your recipe.
- Use this guideline to always adjust the flour and water amounts accordingly based on the amount of starter you removed.
- Store Your Starter
- In the fridge: Discard and feed once a week.
- At room temperature: Continue feeding daily.
Use the same amounts (formula) for discarding and feeding as outlined above.
Storing your sourdough starter in the fridge
- Storing your sourdough starter in the fridge slows down its growth, reducing the need for frequent feedings.
- While room temperature causes faster fermentation, the cooler fridge temperature allows for feeding just once a week.
- This is ideal for those who bake less often, keeping your starter alive and ready without becoming too sour or growing too quickly.
Keeping your jar clean
- To keep your sourdough jar clean, scrape the sides with a spatula after each feeding, discard some starter, and wipe the rim with a paper towel.
- For a deeper clean, transfer the starter to another container, wash the jar with warm water and soap, then return the starter to the cleaned jar.
- This helps maintain a healthy environment for your starter, prevents contamination, and makes it easier to track its growth and health.
Recipes to try with your new starter
Printable recipe card
Sourdough Starter Recipe
- ¾ cup (100g) white bread flour (per feeding) (Total: ~800g (6 cups) over 8 days (see note 1)
- ½ cup (100g water (per feeding) (see note 2)
The 100g measurements are based on weight, which is the most accurate way to measure ingredients.
If you prefer using cups, 100g of white bread flour is approximately ¾ cup and 100g of water is just under ½ cup.
However, for best results, I recommend using a kitchen scale for precise measurements
Day One
- In a clean jar, combine ¾ cup (100g) white bread flour and ½ cup (100g) water. Stir until fully mixed.
- Mark the mixture’s level on the jar using a rubber band, tape, or marker. This will help you track the rise over time.
- Cover the jar loosely with a lid or cloth and leave it at room temperature (around 75-80°F or 24-27°C) for 24 hours.
Day Two
- What to Expect: After 24 hours, the mixture should have risen 1 ½ to 2 times its original size.
- Small bubbles may form, and it will have a faint sour smell, signaling fermentation.
- What to Do: Stir the mixture well and discard about half (roughly 100g) of the starter.
- Add ¾ cup (100g) white bread flour and ½ cup (100g) water to the remaining mixture. Stir until fully combined.
- Mark the new level of the mixture.
- Cover the jar loosely again and leave it at room temperature (75-80°F or 24-27°C) for another 24 hours.
Day Three
- What to Expect: The starter should rise and fall, leaving marks on the jar.
- Small bubbles and a slightly sour smell are normal.
- A thin layer of brownish liquid (hooch) may form on top, which indicates hunger.
- What to Do: Stir the mixture well and discard about half (roughly 100g) of the starter.
- Add ¾ cup (100g) white bread flour and ½ cup (100g) water to the remaining mixture. Stir until fully combined.
- Mark the new level of the mixture.
- Cover the jar loosely again and leave it at room temperature for another 24 hours.
Day Four - Six
- What to Expect: The starter may appear watery and flat but don’t lose hope!
- The aroma may change to a cheesy or yogurt-like scent.
- Hooch may form on the surface—pour it off to prevent excess moisture.
- What to Do (each day): Discard about half (100g) of the starter.
- Add ¾ cup (100g) white bread flour and ½ cup (100g) water. Stir until fully mixed and mark the new level.
- Cover the jar loosely and leave it at room temperature.
Day Seven
- What to Expect: Stronger activity—after feeding, the starter should rise significantly within a few hours and then fall back down.
- The texture should feel airy and light with visible bubbles.
- What to Do: Discard about half (100g) of the starter.
- Add ¾ cup (100g) white bread flour and ½ cup (100g) water.
- Stir until fully mixed and mark the new level.
- Cover the jar loosely and leave it at room temperature.
Day Eight onwards
- What to Expect: A mature starter will double or triple in size within 6-8 hours of feeding.
- The texture will be light, airy, and spongy with visible bubbles. It will have a tangy aroma.
- What to Do:
- Check the Rise:. When your starter is ready, it should rise and get puffy, roughly doubling in size within 4-6 hours. After about 12 hours, it should start to fall back down. It should smell sour but pleasant. This is a good sign that it’s ready to bake.
- Float Test (Optional): To test the readiness of your starter, you can do the float test. Simply drop a spoonful of the starter into a glass of water.Your starter should float for at least a few seconds, ideally 10-15 seconds.If it sinks quickly, it might need more time or another feeding. If it floats steadily, it's ready to use for baking.
- All Set for Baking? If your starter passes the float test and has a nice rise, it's ready to bake! Give it a go with my super easy Sourdough Sandwich Bread recipe.
- If your starter isn’t ready by day 8, keep feeding it as you have been. It might take a little longer depending on things like the flour you use and the temperature in your kitchen.
- Flour: You can use any flour to make your sourdough starter, and all of them will work. Once your starter is ready, you can use it to bake with any flour you choose.
- White Bread Flour: Best for beginners, helps the starter grow quickly.
- All-Purpose Flour: Common and easy, but takes longer to bubble.
- Whole Wheat Flour: Nutrient-rich, speeds up growth, can be mixed with white flour.
- Water: You can use tap water, but it contains chlorine, which can affect yeast growth. To remove chlorine, boil and cool the water until it reaches room temperature (around 85°F or 30°C).
- Filtered or spring water: is also a good option.
- Avoid cold or sparkling water, as it can disrupt yeast growth. If your house is cool, slightly warm water (up to 85°F or 30°C) is ideal.
Patience: Starters develop at different speeds, so don’t worry if yours takes a little longer.
- Don’t try to rush it by placing it in a place that’s too warm, like near a heater, in direct sunlight, or in a hot oven.
- These spots can get too hot, which can exhaust the yeast and slow the process.
- Instead, keep your starter in a warm, but not hot, spot, like on your kitchen counter, away from drafts and direct heat.
Consistency: Try to feed your starter at the same time every day.
See the post above for more information on:


Leave a Reply