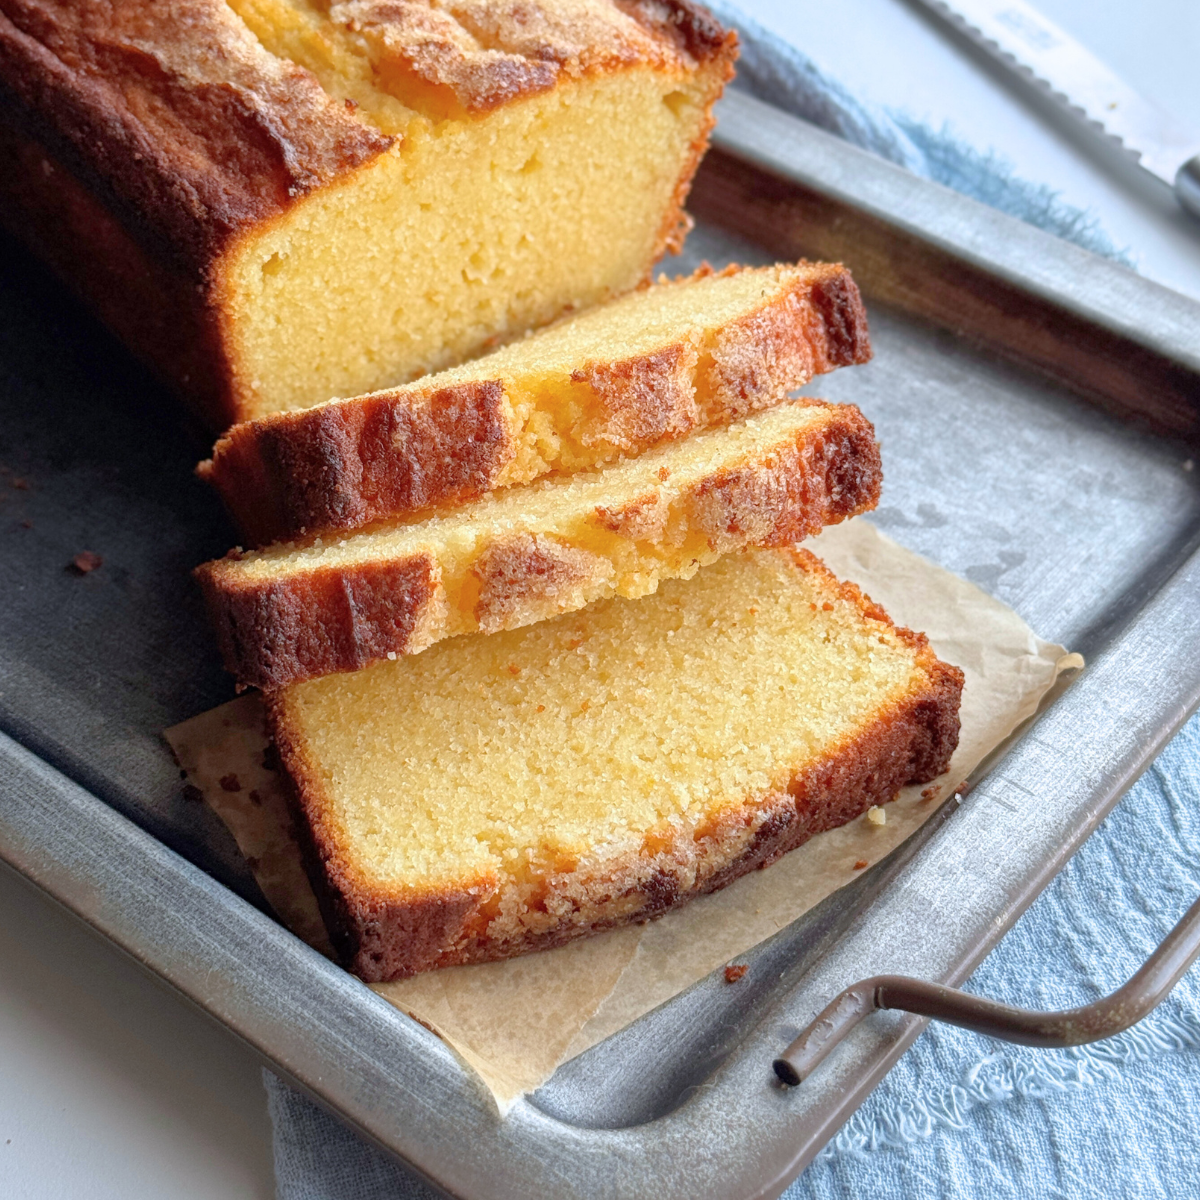
You’ll want to cut into this cake the second it cools, and honestly, I won’t blame you.
This Sour Cream Pound Cake is rich, buttery, and topped with a crackly sugar crust that’s impossible to ignore. It’s the kind of cake that looks simple... until you taste it.
Sour cream pound cake
This pound cake starts with melted butter. And that makes things easier.
You don’t need to get the butter out early or plug in a mixer. Just a bowl, a whisk, and a short list of ingredients: butter, sugar, eggs, flour, and sour cream.
The batter’s easy to mix by hand, baking up to a soft, tender loaf with a crisp sugar crust on top.
It’s the sort of cake that feels right any time of day. A slice with coffee in the morning, a little treat in the afternoon, or dressed up with berries and cream for dessert.
How to make Sour cream pound cake
These are the visual steps. For the full recipe with exact measurements, scroll to the recipe card at the bottom of this post
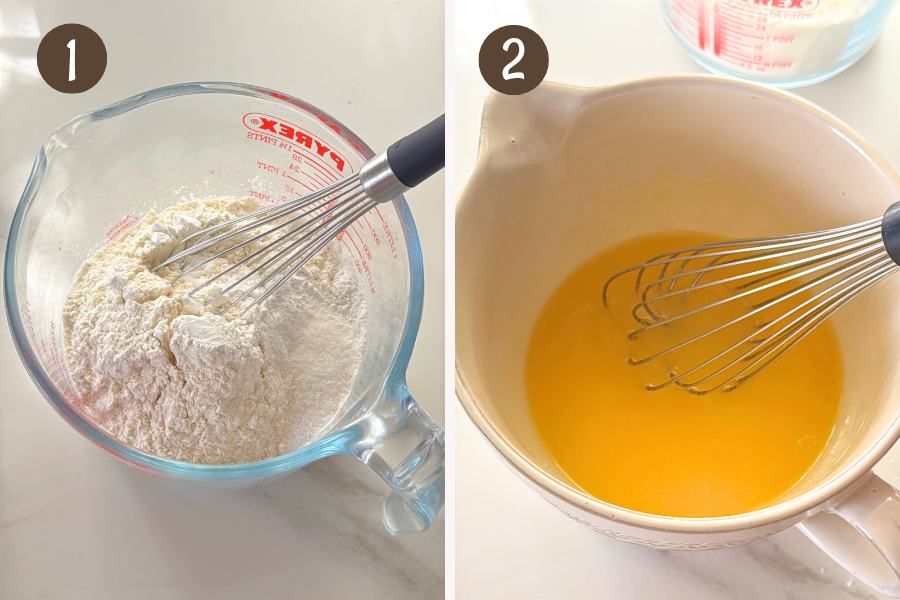
- Mix the dry ingredients: In a medium bowl, whisk together the flour, baking powder, and salt. Set aside.
- Mix the wet ingredients: In a separate large mixing bowl, whisk together the melted butter and sugar. Then whisk in the eggs one at a time until smooth
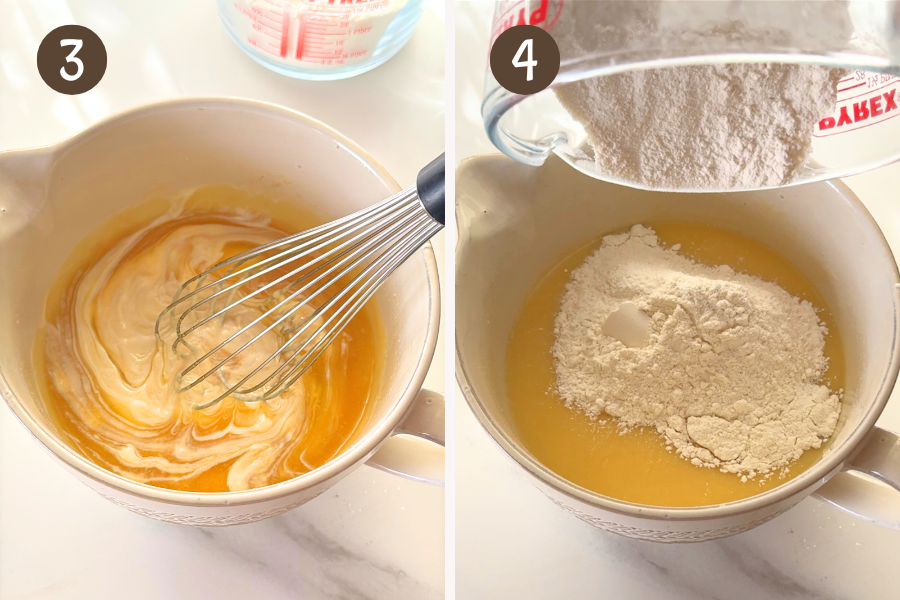
- Add sour cream and vanilla extract: Whisk until smooth.
- Add the dry ingredients (flour mixture) to the bowl.
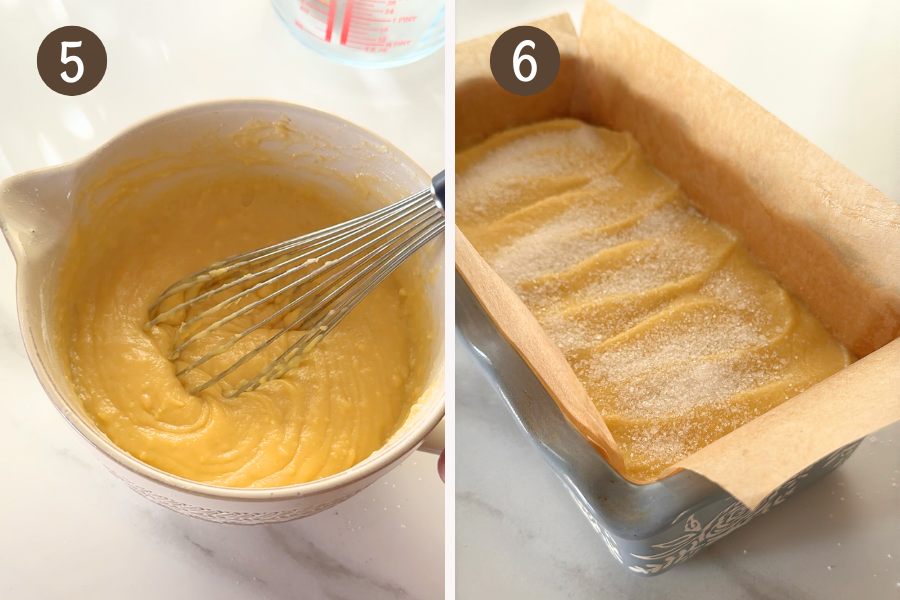
- Whisk or stir just until the flour is blended in: the batter should look mostly smooth, and a few small lumps are fine.
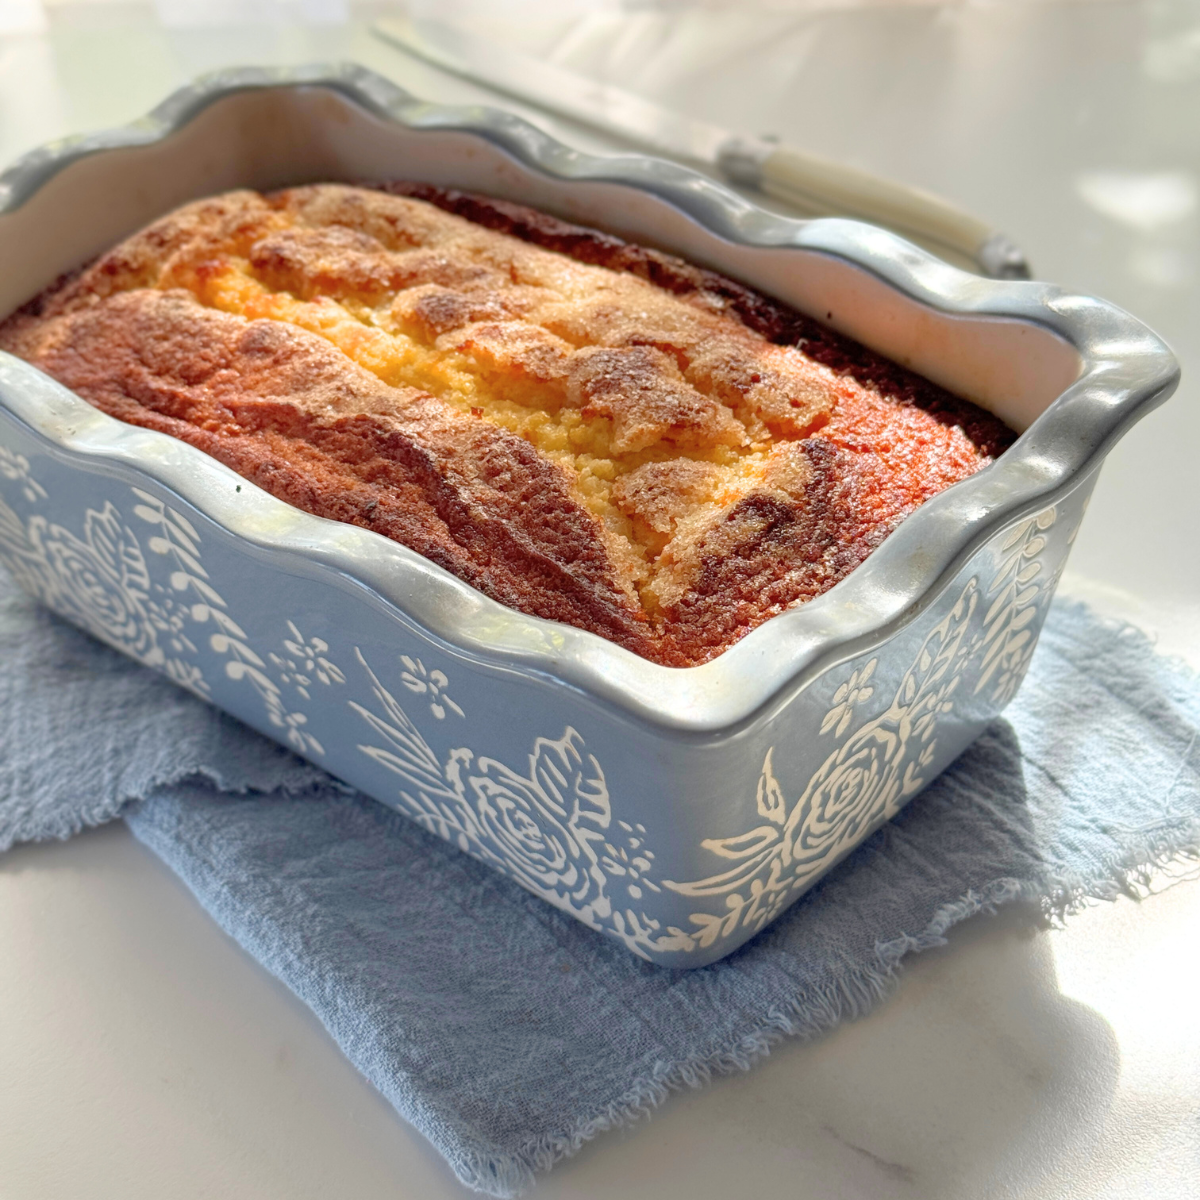
- Bake: Pour the batter into the prepared loaf pan, smooth the top (or create gentle ridges for texture), and sprinkle evenly with the 2 tablespoons of sugar. Bake for 50–55 minutes, or until a skewer inserted into the center comes out clean.
Recipe tips
- Line the pan with tall parchment to prevent over-browning and make it easy to lift out.
- Melt the butter gently, don’t let it boil. Let it cool slightly before mixing in the sugar.
- Warm up cold eggs by placing them in a bowl of warm water for 5–10 minutes. Room temperature eggs mix more evenly and help the batter stay smooth.
- Tent with foil after about 25 minutes of baking if the top is browning too quickly. Make sure the foil doesn’t touch the batter, and remove it for the last 10–15 minutes.
- Check early: start testing around 45 minutes, as ovens vary.
- Cool completely before slicing Letting the cake cool gives it time to set fully. If you slice too soon, steam trapped inside can make the crumb dense or gummy, and the sugar crust is more likely to break away instead of staying crisp. It’s worth the wait.
Watch how to make it
Recipe
Sour Cream Pound Cake with Sugar Crust
Dry Ingredients
- 2 cups (240g) all-purpose flour (plain flour)
- 2 level teaspoons baking powder
- 1 teaspoon salt
Wet Ingredients
- 1 cup (225g) unsalted butter, melted (just until liquid) and slightly cooled
- 1 cup (200g) white granulated sugar
- 2 large eggs
- 1 cup (240g) sour cream
- 1 teaspoon vanilla extract
Topping
- 2 Tablespoons (25g) white granulated sugar, for sprinkling on top
- Prepare the pan: Grease and line a 9x5 inch (23 x 13cm) loaf pan with parchment paper (baking paper) , letting the edges rise about 2 inches (5 cm).
- Start preheating the oven to 350°F (175°C), or 160°C fan, about 8-10 minutes before the cake goes in. The oven can get too hot if left on much longer.
- Mix the dry ingredients: In a medium bowl, whisk together the flour, baking powder, and salt. Set aside
- Mix the butter and sugar: In a separate large mixing bowl, whisk the melted, cooled butter and sugar until well combined.
- Whisk in the eggs one at a time until the mixture is smooth.
- Whisk in the sour cream and vanilla extract until the batter is creamy and well combined.
- Mix in the dry ingredients: Add the flour mixture to the bowl and stir until just combined. The batter should look mostly smooth. It's fine if there are a few small lumps, don’t overmix.
- Pour the batter into the prepared loaf pan and smooth the top, or create gentle ridges with a spatula, like I did. The sugar crust bakes up beautifully either way, but ridges give it a little extra texture.Sprinkle the top evenly with the 2 Tablespoons of sugar.
Bake and Cool
- Bake for 50–55 minutes, or until a skewer inserted in the center comes out clean. Start checking around 45 minutes, as baking times may vary.
- If the top begins to brown too quickly during baking, loosely tent it with foil after about 25 minutes. Remove the foil during the last 10–15 minutes so the top can crisp up. Be sure the foil doesn’t touch the batter.
- Let the cake cool in the pan for 10–15 minutes. Then lift it out using the parchment paper and place on a wire rack.
- Cool completely before slicing so the cake sets fully (no gooey texture) and the crust doesn’t break away when you cut it.
Storage
- Store the cooled cake in an airtight container at room temperature for up to 3 days.
- To freeze, wrap tightly in plastic wrap and foil. Freeze for up to 2 months. Thaw at room temperature while still wrapped.
- Make sure the butter is just melted, not hot or bubbling. Let it cool for about 5 minutes before mixing with the eggs.
- Cool completely before slicing Letting the cake cool gives it time to set fully. If you slice too soon, steam trapped inside can make the crumb dense or gummy, and the sugar crust is more likely to break away instead of staying crisp. It’s worth the wait.
- Visual guide: See the post above for the step-by-step photos.
Want even more delicious recipes? Subscribe free to receive new post notifications emailed to you. Or follow along on Facebook, Pinterest, and Instagram. If you love sharing recipes please come and join my All about cooking and baking Facebook group or Subscribe to my YouTube channel


Leave a Reply