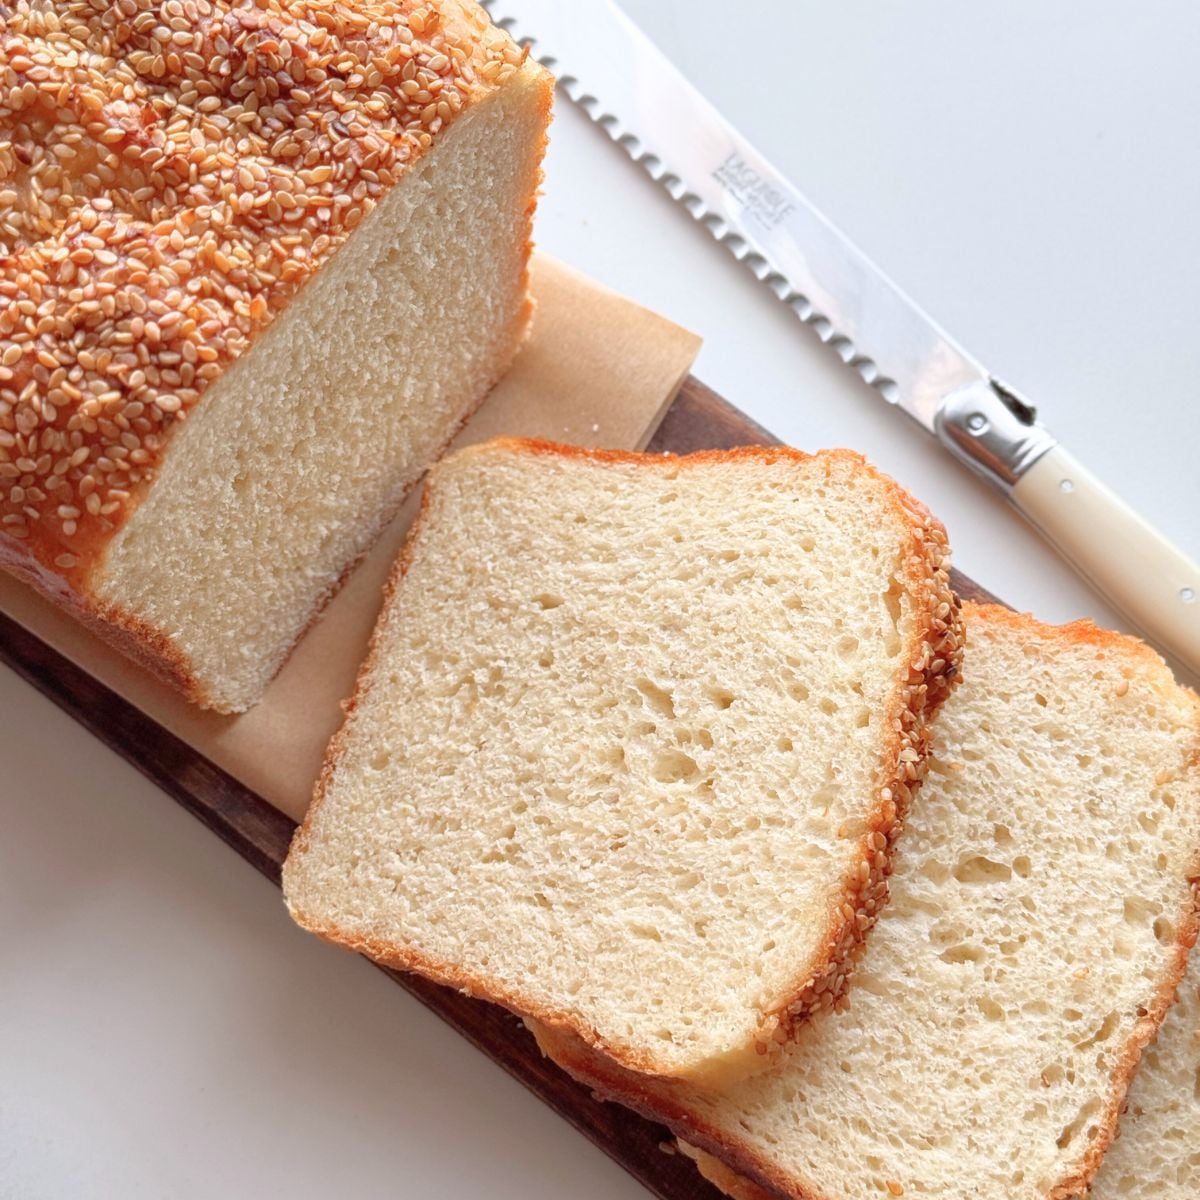
This easy no-knead buttermilk bread is made with basic ingredients and bakes into a soft homemade loaf.

Step by step photos: No Knead Buttermilk Bread
These visual instructions help you see the process. You can also find the full printable recipe with ingredient amounts and instructions at the end of the post.

- Mix the dry ingredients: In a large bowl, whisk together the flour, instant dry yeast (also called instant or rapid-rise yeast), sugar, and salt.
- Add the liquids: Pour in the room-temperature buttermilk and warm water (105–110°F / 40–43°C, warm to the touch, not hot). Stir with a spoon or spatula until a sticky dough forms.
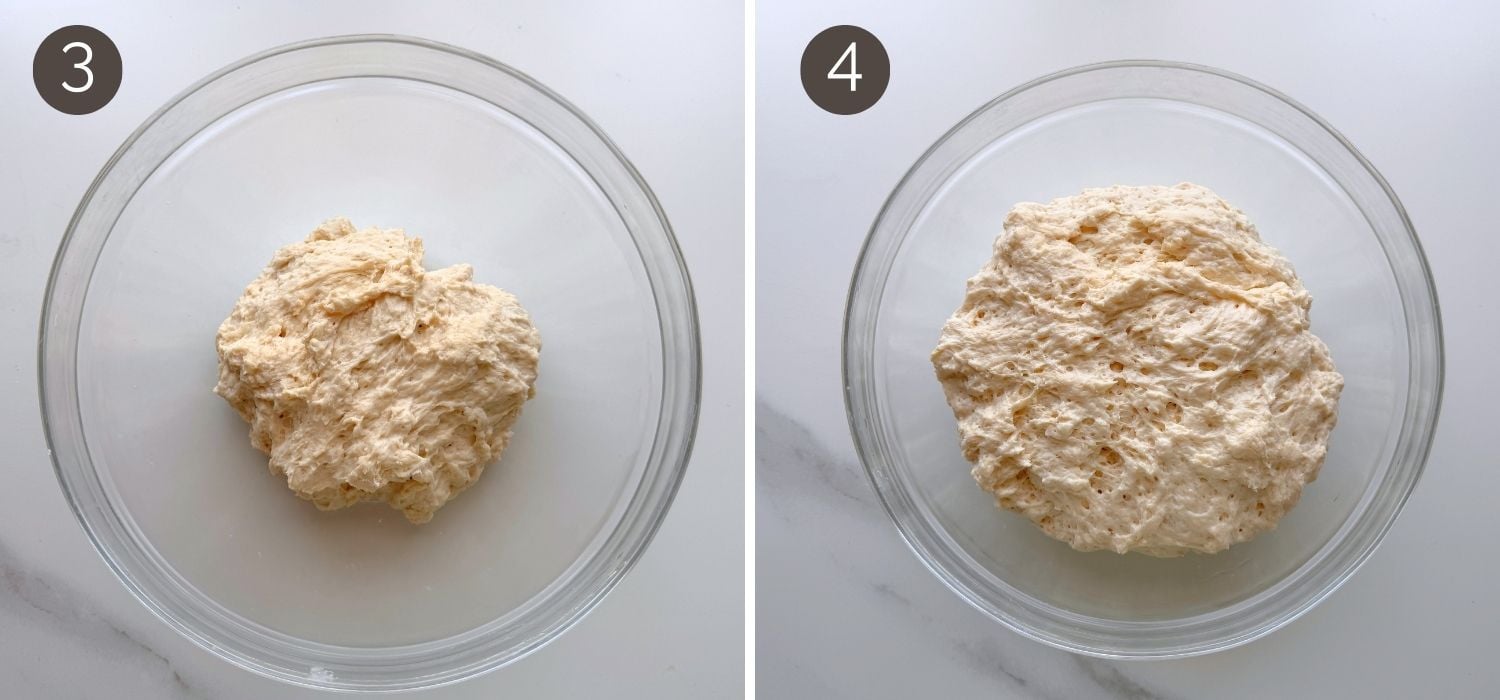
- The dough will look rough and sticky. This is normal.
- Cover the bowl with a kitchen towel or plastic wrap and let the dough rise for 45–60 minutes, or until roughly doubled in size.
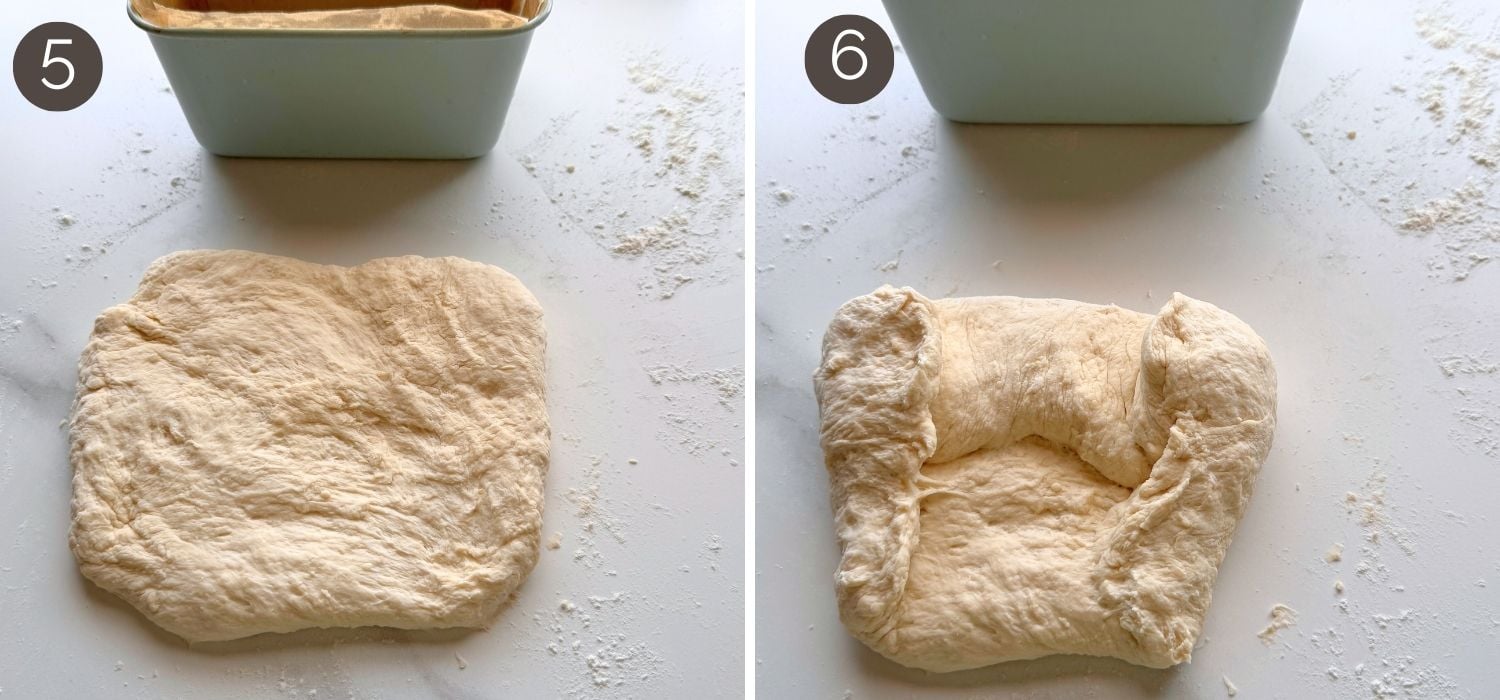
- Lightly flour your work surface and gently turn the dough out and press it out to a square shape
- Fold all four sides of the dough inward toward the center to seal it.

- Pinch to seal, then roll lightly into a loose log.
- Second rise: Place the dough into a lined loaf pan, seam side down, and gently press to fit. Cover loosely and let rise for 30 minutes.
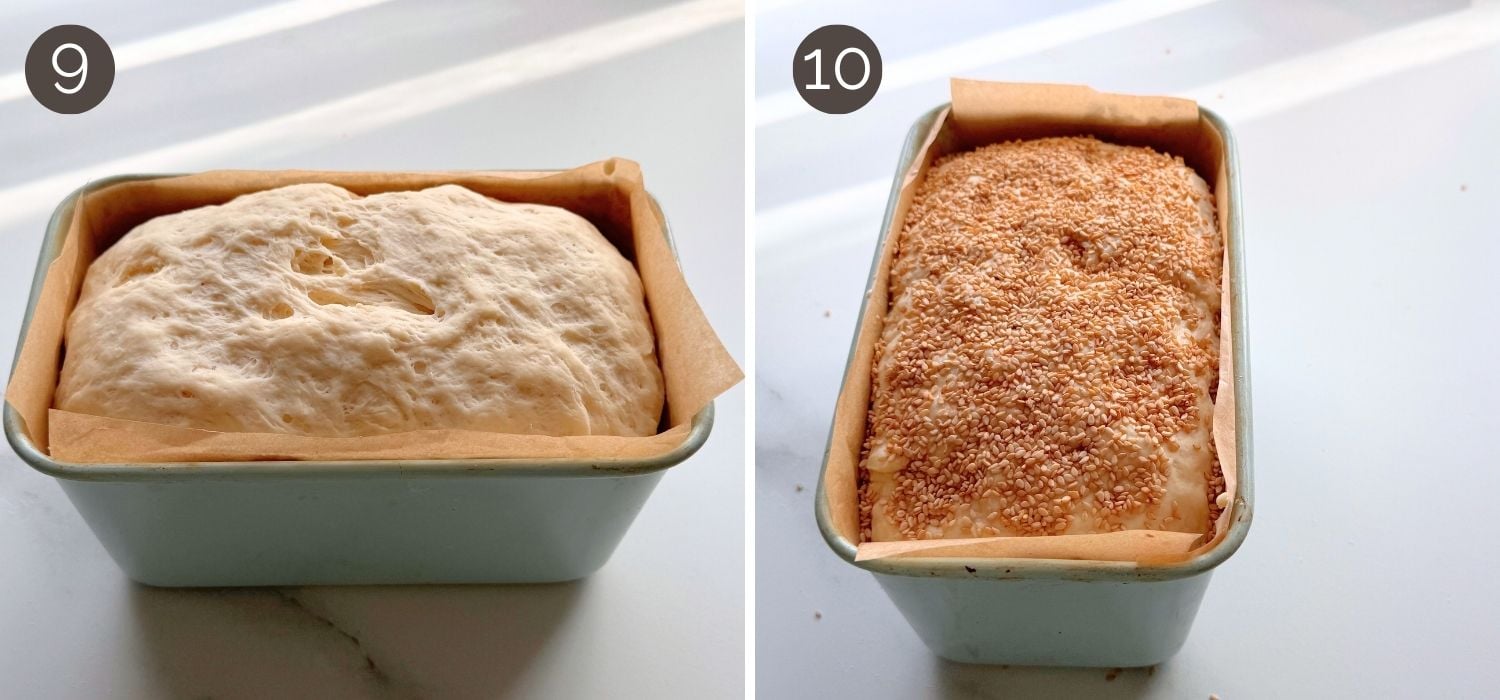
- Once the dough has risen close to the top of the pan, it’s ready to bake as is. An uneven or stretched surface is normal and will bake out.
- Optional seed topping: Brush lightly with milk or water and sprinkle with sesame seeds. Gently press so they stick.
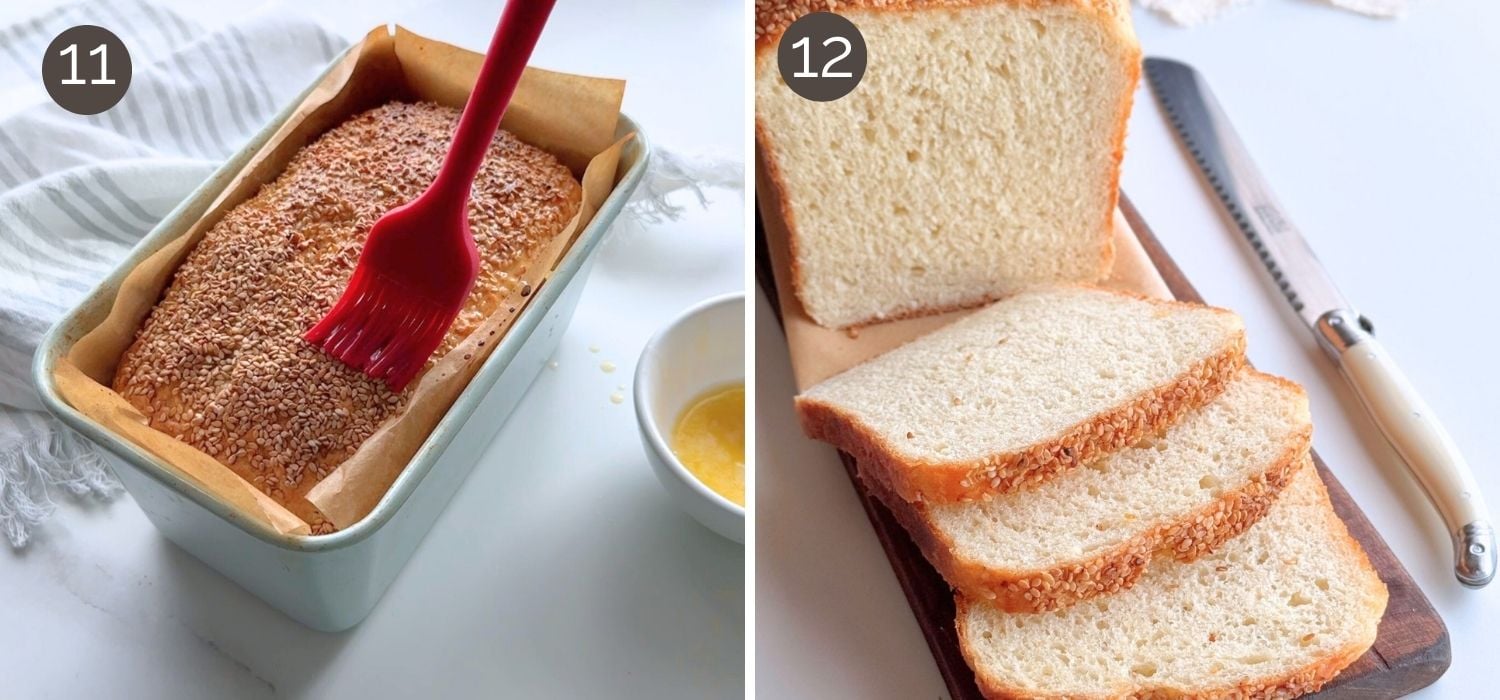
- Once baked, remove the loaf from the oven and leave it in the pan for 10 minutes. While still in the pan, brush the top with melted butter. If topped with sesame seeds, dab gently instead of brushing to avoid moving them.
- Remove the loaf from the pan and cover loosely with a kitchen towel while warm to help soften the crust. Let cool for 30–40 minutes before slicing.
Storing
- Room temperature: Once completely cooled, store the bread in an airtight container or bread bag at room temperature for up to 2 days. It’s softest on the day it’s baked.
- Toasting: By day 2, the bread loses some of its softness, making it ideal for toasting.
- Freezing: Slice the bread once cooled, wrap well, and freeze for up to 2 months. Frozen slices are best used for toasting, rather than serving fresh.
Ingredient tips
- Yeast type: Use instant dry yeast (also called instant yeast or rapid-rise yeast).
- Buttermilk temperature: Use room-temperature buttermilk. If it’s cold from the fridge, microwave it for a few seconds until just lukewarm.
- Buttermilk substitute: Plain, unsweetened yogurt can be used instead of buttermilk. Stir it smooth before measuring.
- Water temperature: The water should be warm, not hot — about 105–110°F / 40–43°C. Hot water can weaken the yeast.
Dough, rising and baking tips
- How to cover the dough during the second rise in the pan: Cover the pan loosely with a clean kitchen towel so the dough has room to rise without sticking.
If using plastic wrap, lightly grease it with oil or melted butter and drape it loosely over the pan, do not seal it tightly.
- Uneven or stretched surface before baking: If the dough looks uneven or slightly stretched on top after the second rise in the pan, don’t worry. This is normal for soft no knead dough and the loaf will fill out as it bakes.
- For a softer crust: The crust will be crisp straight from the oven. Brushing the loaf with melted butter and covering it with a kitchen towel while warm softens it into a golden, softer bread.
- Cooling before slicing: Let the bread cool for 30–40 minutes before slicing to help it stay soft and slice neatly.
Watch how to make No Knead Buttermilk Bread
Recipe
No-Knead Buttermilk Bread
servings12 slices
Made with basic ingredients and baked into a soft homemade loaf.
Ingredients
- 3¼ cups (400 g) all-purpose / plain flour
- 3 teaspoons (10 g) instant yeast (also called rapid-rise yeast)
- 3 teaspoons (12 g) white granulated sugar
- 1 teaspoon salt
- 1 cup (240 ml) buttermilk, room temperature (or plain yogurt)
- ½ cup (120 ml) warm water (warm to the touch, not hot - about 105–110°F / 40–43°C)
Instructions
- Mix the dough: In a large bowl, whisk together the flour, instant yeast, sugar, and salt.
- Pour in the buttermilk and warm water. Stir until a sticky dough forms.
- First rise: Cover the bowl and let the dough rise for 45–60 minutes, or until roughly doubled in size.
- Shape: Lightly flour your work surface. Turn the dough out and gently press it into a square.
- Fold and seal: Fold all four sides inward toward the centre to seal. Pinch the seams together, then roll lightly into a loose log.
- Second rise: Place the shaped dough into a greased or lined 9×5-inch (23×13 cm) loaf pan, seam side down.
- Gently press to fit the pan, cover loosely, and let rise for 25–30 minutes, until close to the top of the pan.
- Plain or seeded top: For a plain loaf, do not brush the surface before baking.For a seeded top, lightly brush the surface with milk or water, sprinkle with sesame seeds, and gently press so they stick.
- Preheat the oven: About 10 minutes before baking, preheat the oven to 350°F (180°C) or 325°F (160°C fan).
- Bake for 25–30 minutes, until golden and the loaf sounds hollow when tapped on top.
- Once baked, remove the loaf from the oven and leave it in the pan for 10 minutes. While still in the pan, brush the top of the bread with melted butter.
- If you topped with sesame seed, then dab gently instead of brushing to avoid moving the seeds.
- Remove from the pan and cover loosely while warm. Let cool for 30–40 minutes before slicing.
Nutrition
Serving: 1slice | Calories: 149kcal | Carbohydrates: 29g | Protein: 5g | Fat: 1g | Saturated Fat: 0.5g | Polyunsaturated Fat: 0.2g | Monounsaturated Fat: 0.3g | Cholesterol: 2mg | Sodium: 217mg | Potassium: 92mg | Fiber: 2g | Sugar: 2g | Calcium: 29mg | Iron: 2mg
Hungry for more?
Sign up for my free newsletter to get emails about new recipes .And don't forget to follow me on YouTube, Facebook, Pinterest, and Instagram for all the latest deliciousness.


Leave a Reply