French Puff Pastry cookies (Palmiers) are a simple yet elegant treat made with just two ingredients: puff pastry and sugar.
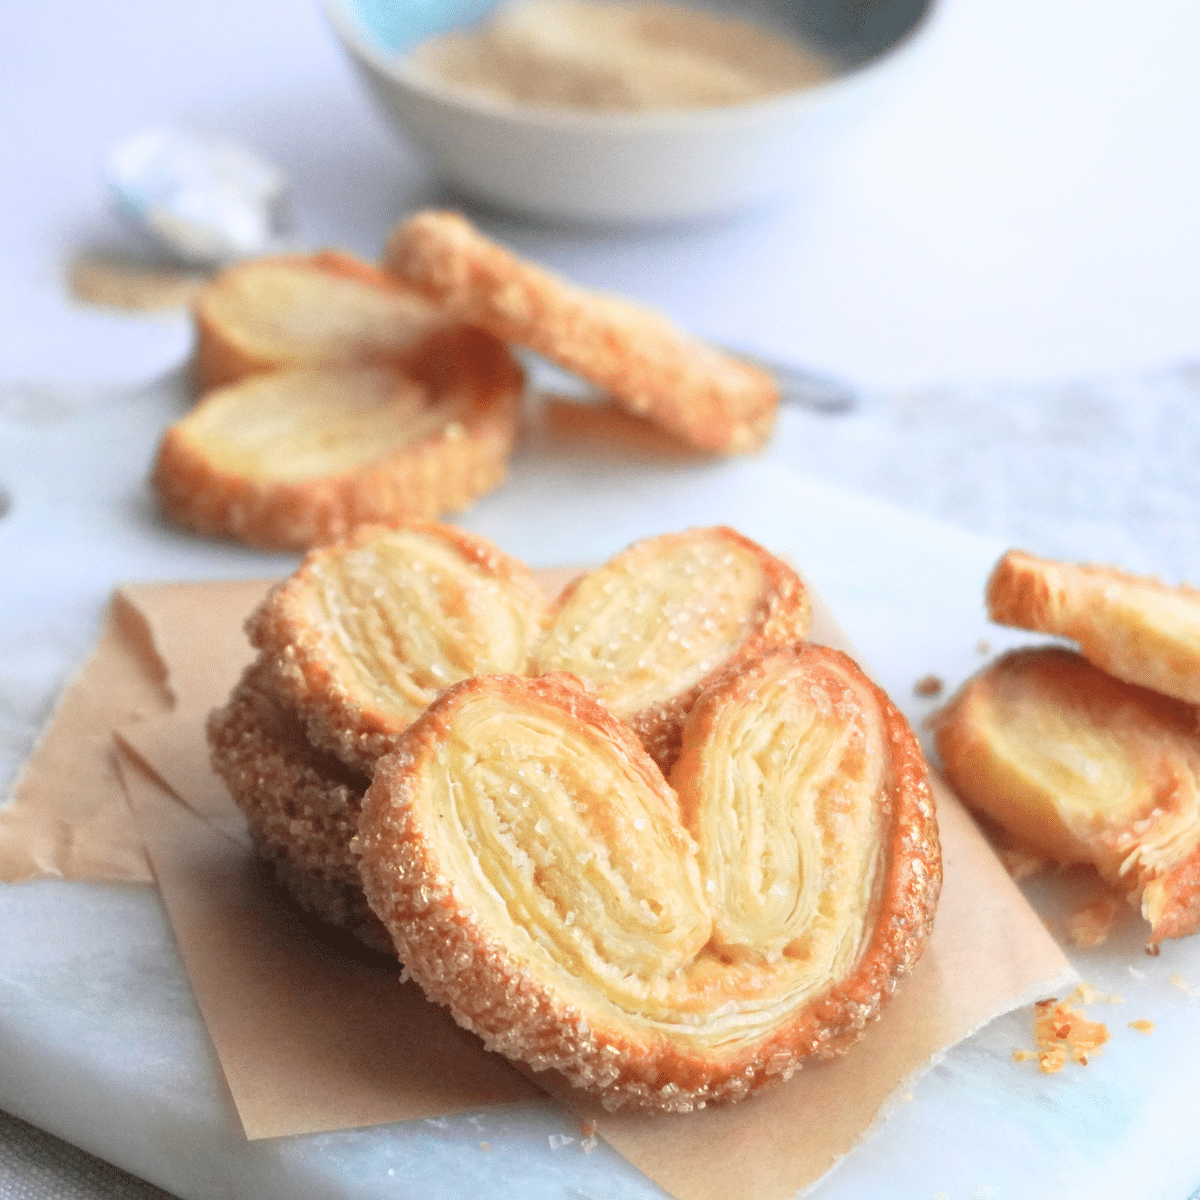
These crisp, caramelized pastries have a delicate, flaky texture and are perfect for a light snack or a sweet addition to coffee or tea.
Known for their signature heart shape, palmiers are a classic French treat that's super easy to make.
Visual Instructions
These visual instructions help you see the process. You can also find the full printable recipe with instructions and ingredients at the end of the post.
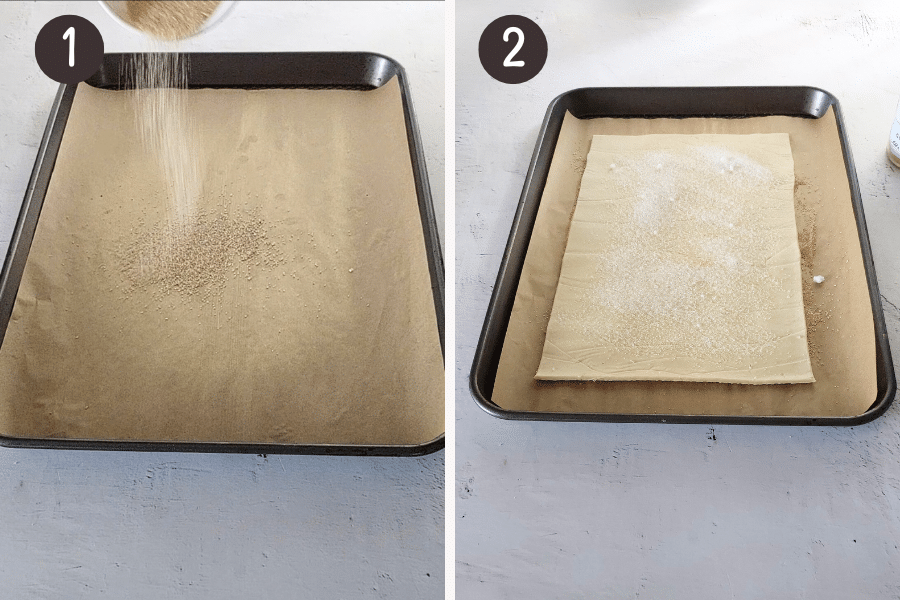
- Sprinkle ¼ cup of sugar onto a parchment-lined baking sheet.
- Place the puff pastry on top and press gently so the sugar sticks. Then sprinkle the remaining sugar over the pastry and press it in with the back of a spoon.
I used brown sugar on the outside for a caramelized look and white granulated sugar inside. You can mix or use just one type.
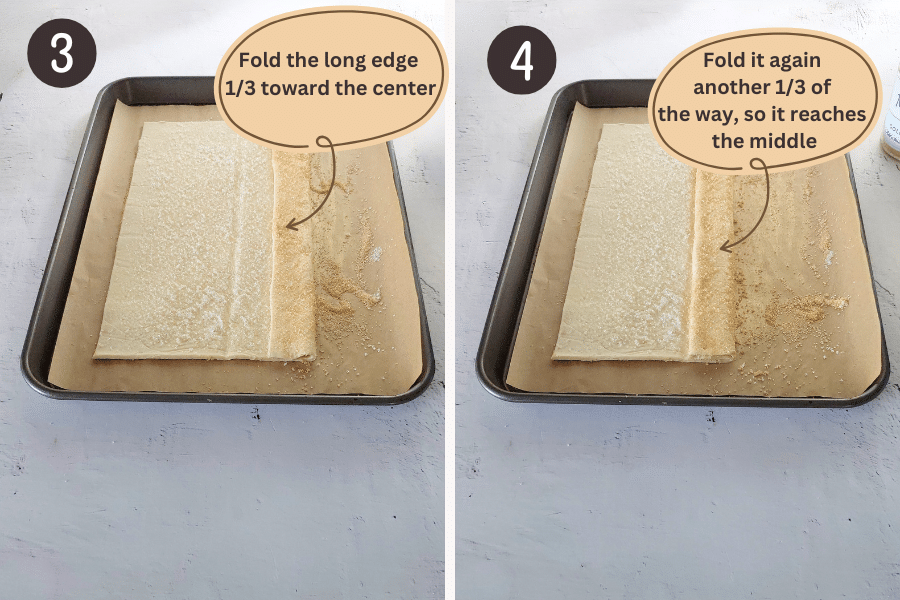
- Take one long edge and fold it ⅓ of the way toward the center.
- Fold it again another ⅓ of the way, so it reaches the middle.
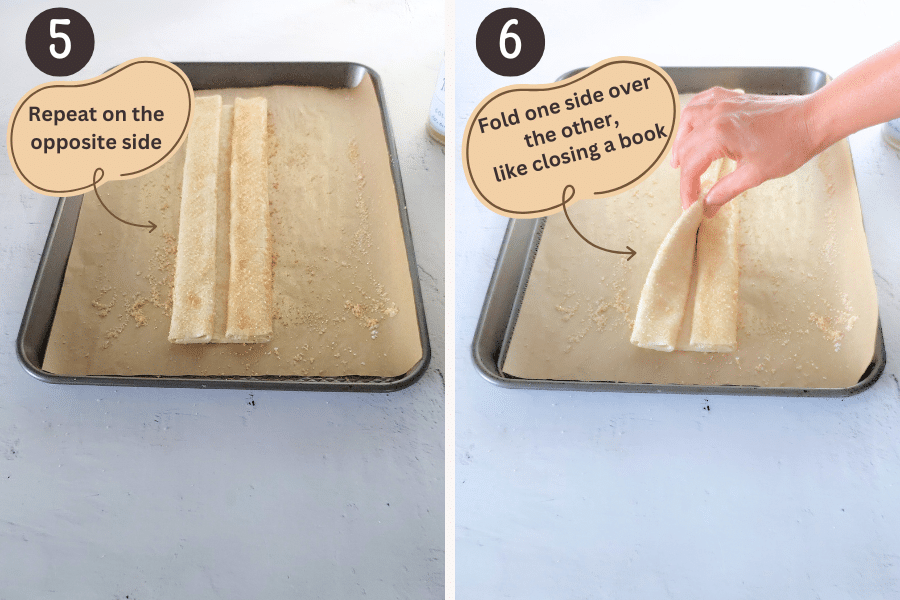
- Repeat on the Other Side: Fold the opposite long edge ⅓ of the way toward the center. Fold it again so both sides meet in the middle.
- Final Fold: Fold one side over the other, like closing a book. Gently press to help it stay together.
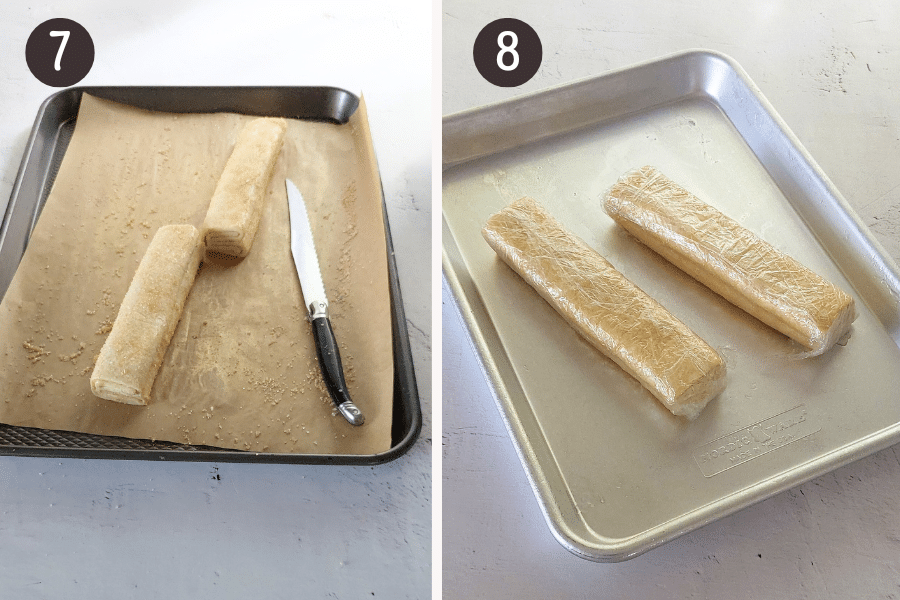
- If the full length is tricky to handle, cut it in half before wrapping.
- Wrap each half in plastic wrap and freeze for 30 minutes to firm up for easy, neat slicing. Chilling also helps the pastries hold their shape while baking and become flakier.
You can store one half in the freezer for up to two months if you don’t want to bake both at once.
- Preheat the oven to 425°F (220°C) for regular ovens, or 400°F (200°C) for fan-assisted ovens. Place the oven rack in the middle position.
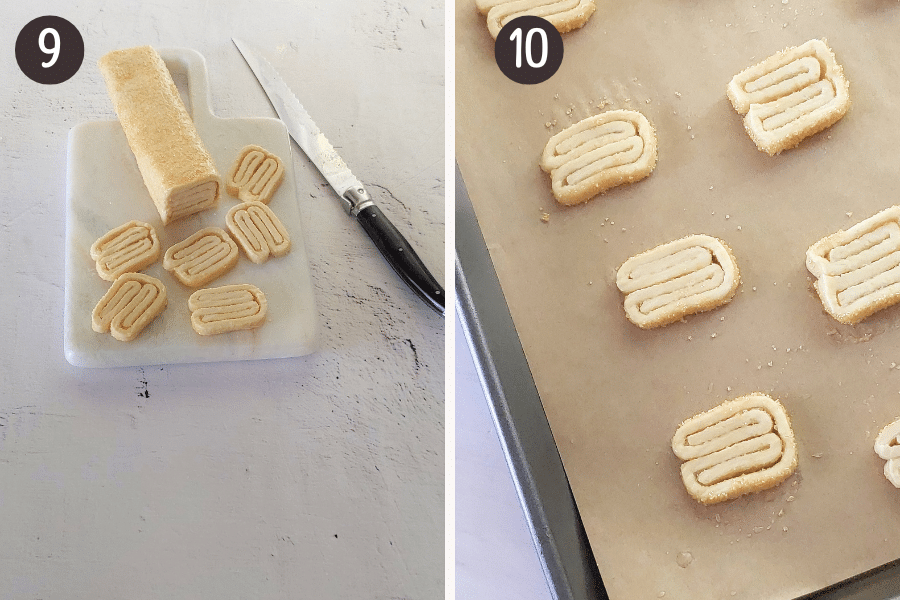
- Use a sharp knife to cut the pastry into ½-inch (1.25 cm) thick pieces.
- Place slices on a baking tray, leaving about 1 inch (2.5 cm) of space between each slice.
Baking
Why chill before slicing and baking? This helps the pastries hold their shape and creates flakier layers.
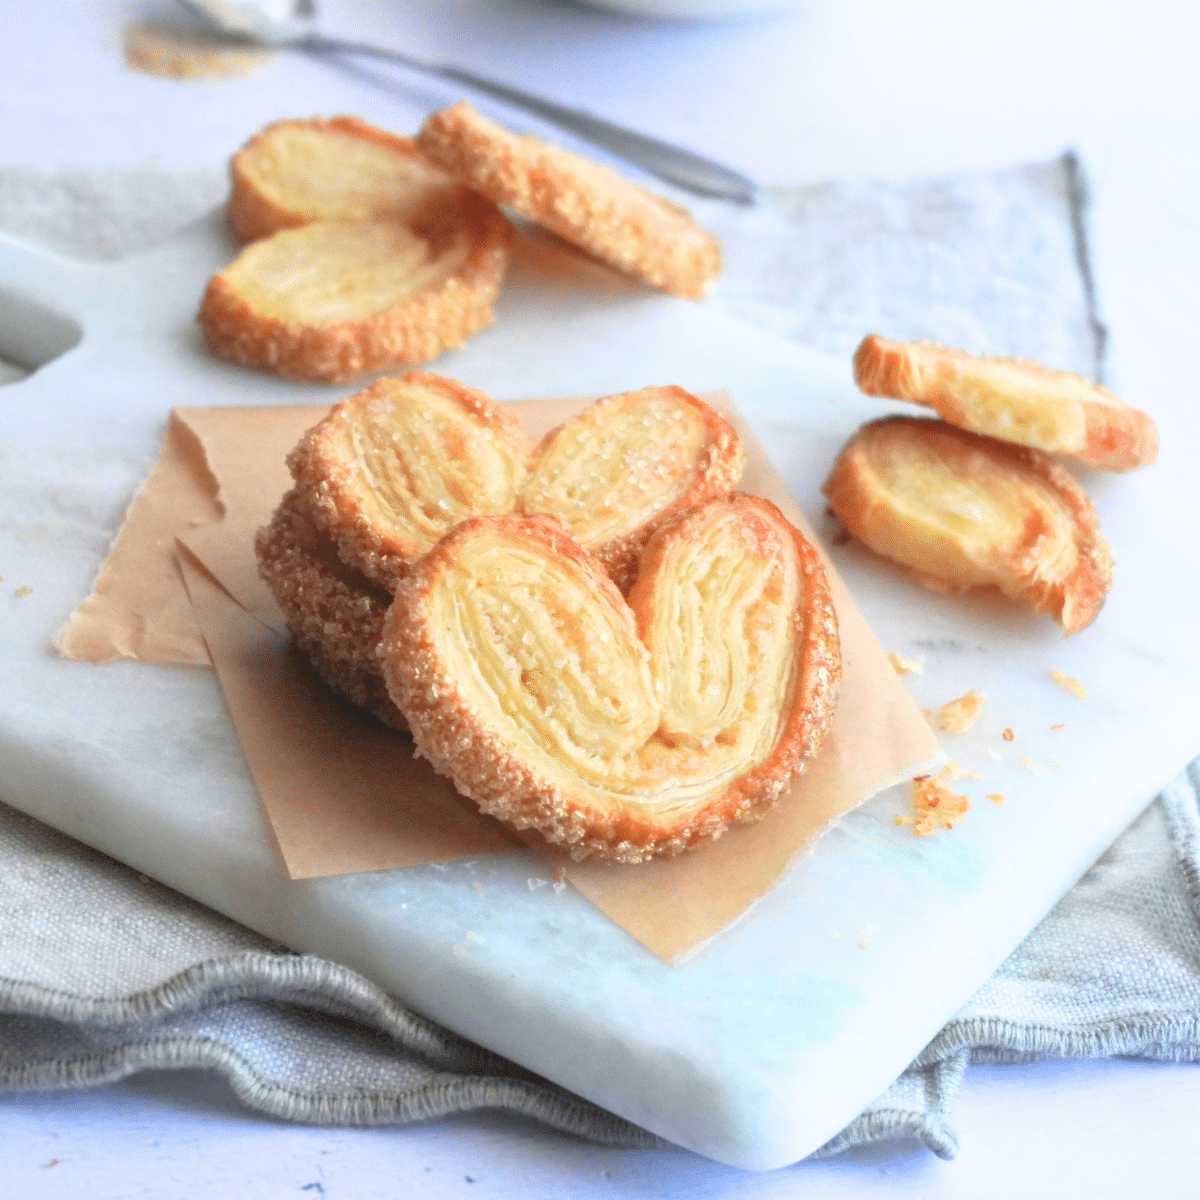
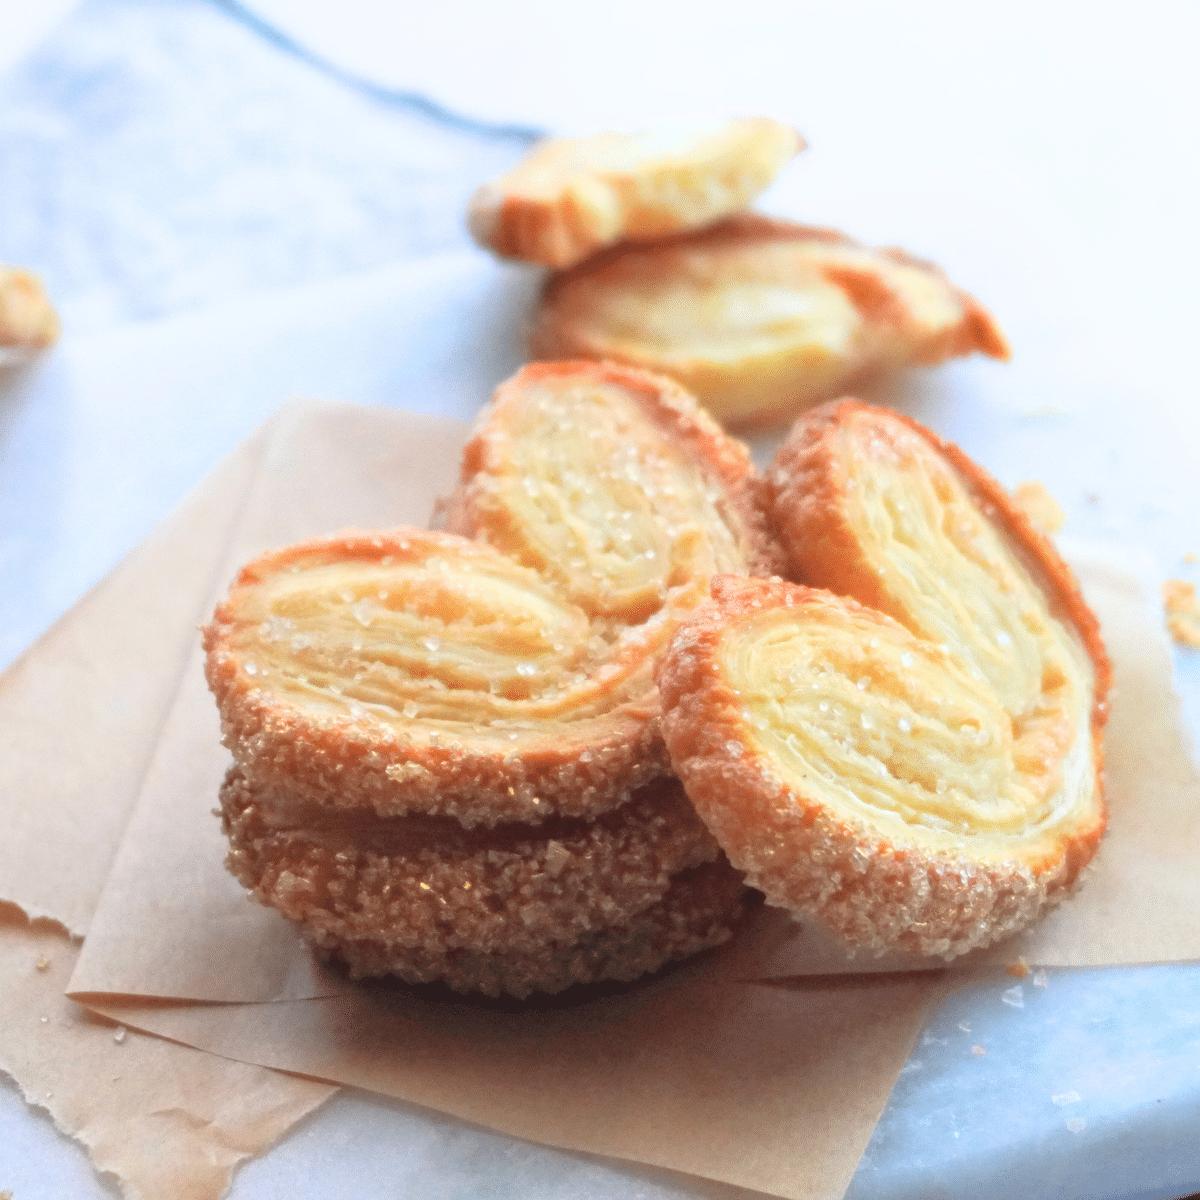
There's no need to open them up before baking. They’ll spread and form a heart shape as they bake. Bake for 15-20 minutes, or until golden and crispy.
Thickness affects crispiness
The difference in thickness affects the texture and crispiness of the palmiers
- Thicker slices (½-inch / 1.25 cm): These will have more layers, resulting in a chewier, slightly more dense texture. They’re still crisp on the outside but a bit softer inside.
- Thinner slices (¼-inch / 0.6 cm): These will bake faster and become more crisp, giving you a lighter, crunchier texture throughout.
Oven temperature
- If you're concerned about over-browning, you can preheat your oven to 375°F (190°C) for fan-assisted ovens or 400°F (200°C) for regular ovens.
- This will still give you a golden, crispy texture while being a bit gentler on the pastry.
Freezing for later
- If you'd like, you can freeze one half of unbaked pastry for up to 2 months. When you're ready to bake
- Remove the frozen half from the freezer and let it sit at room temperature just until it’s soft enough to slice. Bake at 425°F (220°C) for regular ovens, or 400°F (200°C) for fan-assisted 20-25 minutes, or until golden and puffed.
- It's a great way to have a quick treat ready whenever you want one
Storage
- Store baked and cooled palmiers in an airtight container at room temperature for up to 3 days.
- However, they’ll be crispest the day they're baked, so the sooner you enjoy them, the better 😋
Recipe
French Puff Pastry Cookies (Palmiers)
- 1 sheet puff pastry (about 16 x 7 inches / 40 x 18 cm (thawed but still cold) (see note 1)
- ½ cup 100 g sugar (granulated or brown), divided (see note 2)
- Optional: Ground cinnamon
- Sprinkle ¼ cup of sugar onto a parchment-lined baking sheet.
- Lay the puff pastry on top of the sugar, pressing gently so the sugar sticks.
- Sprinkle the remaining sugar over the pastry and press it in with the back of a spoon.
Fold the Pastry (First Fold)
- Take one long edge and fold it one-third (⅓) of the way toward the center. If any sugar stays on the parchment instead of sticking to the pastry, just scoop it up with your fingers and press it back on.
Fold again
- Fold it again another one-third (⅓) of the way, so it reaches the middle.
Fold the other side
- Repeat the same steps on the other side: fold the opposite long edge one-third (⅓) of the way toward the center, and then fold it again so both sides meet in the middle.
Final fold
- Fold one side over the other, like closing a book. Gently press to help it stay together.
Chill
- If the full length of the pastry is difficult to handle, cut it in half before wrapping.
- Wrap each half in plastic wrap and freeze for 30 minutes to firm up for easy, neat slicing. Chilling also helps the pastries hold their shape while baking, creating flakier layers.
- Note: You can store one half in the freezer for up to a month if you don't want to bake both at once. (See note 3)
Preheat the Oven
- Preheat the oven to 425°F (220°C) for regular ovens, or 400°F (200°C) for fan-assisted ovens. (See note 4) Place the oven rack in the middle position.
- Don’t leave the baking sheet in the oven while preheating.Placing the pastries on a hot baking sheet can cause the sugar to melt or caramelize too quickly, potentially burning the pastries.It’s best to place them on a cool baking sheet before baking.
Slice
- Use a sharp knife to cut the pastry into ½-inch (1.25 cm) thick pieces. (See note 5)
Arrange and bake
- After slicing or handling, ensure the pastry is still cold and hasn’t warmed up too much. If it gets too warm, the pastry may lose its shape or not puff properly. Place the slices on a baking sheet lined with parchment paper.
- Leave about 1 inch (2.5 cm) of space between each slice. There's no need to open up before baking, they'll spread and form a heart shape as they bake.
- Bake for 15-20 minutes, or until golden and crispy.
Storage
- Once baked and cooled store in an airtight container at room temperature for up to 3 days. They’ll be crispest the day they’re baked, so the sooner you enjoy them, the better 😋
Scroll up to see the step-by-step photos! I’ve included them above to help you follow along and make the recipe perfectly every time you try it. Just scroll up to check them out! 😊
- Puff Pastry: Puff pastry can be delicate, so ensure it’s completely thawed but remains cold when you're working with it. If it hasn’t fully thawed, it may crack or break.
- Sugar: For a caramelized look, use brown sugar on the outside and white granulated sugar inside. You can also mix the sugars or use just one type, depending on your preference.
- Freezing for later: You can freeze one half of unbaked pastry for up to 2 months. When you're ready to bake, remove it from the freezer and let it sit at room temperature until it's soft enough (but still cold and firm) to slice.
- Oven Temperature: If you're concerned about over-browning, reduce the temperature to 375°F (190°C) for fan-assisted ovens or 400°F (200°C) for regular ovens. This will give you a golden, crispy texture while being a bit gentler on the pastry.
- Thickness affects texture and crispiness:
- Thicker slices (½-inch / 1.25 cm) will have more layers, resulting in a chewier texture with a crisp exterior.
- Thinner slices (¼-inch / 0.6 cm) bake faster and become more crisp throughout, creating a lighter, crunchier texture.


Leave a Reply