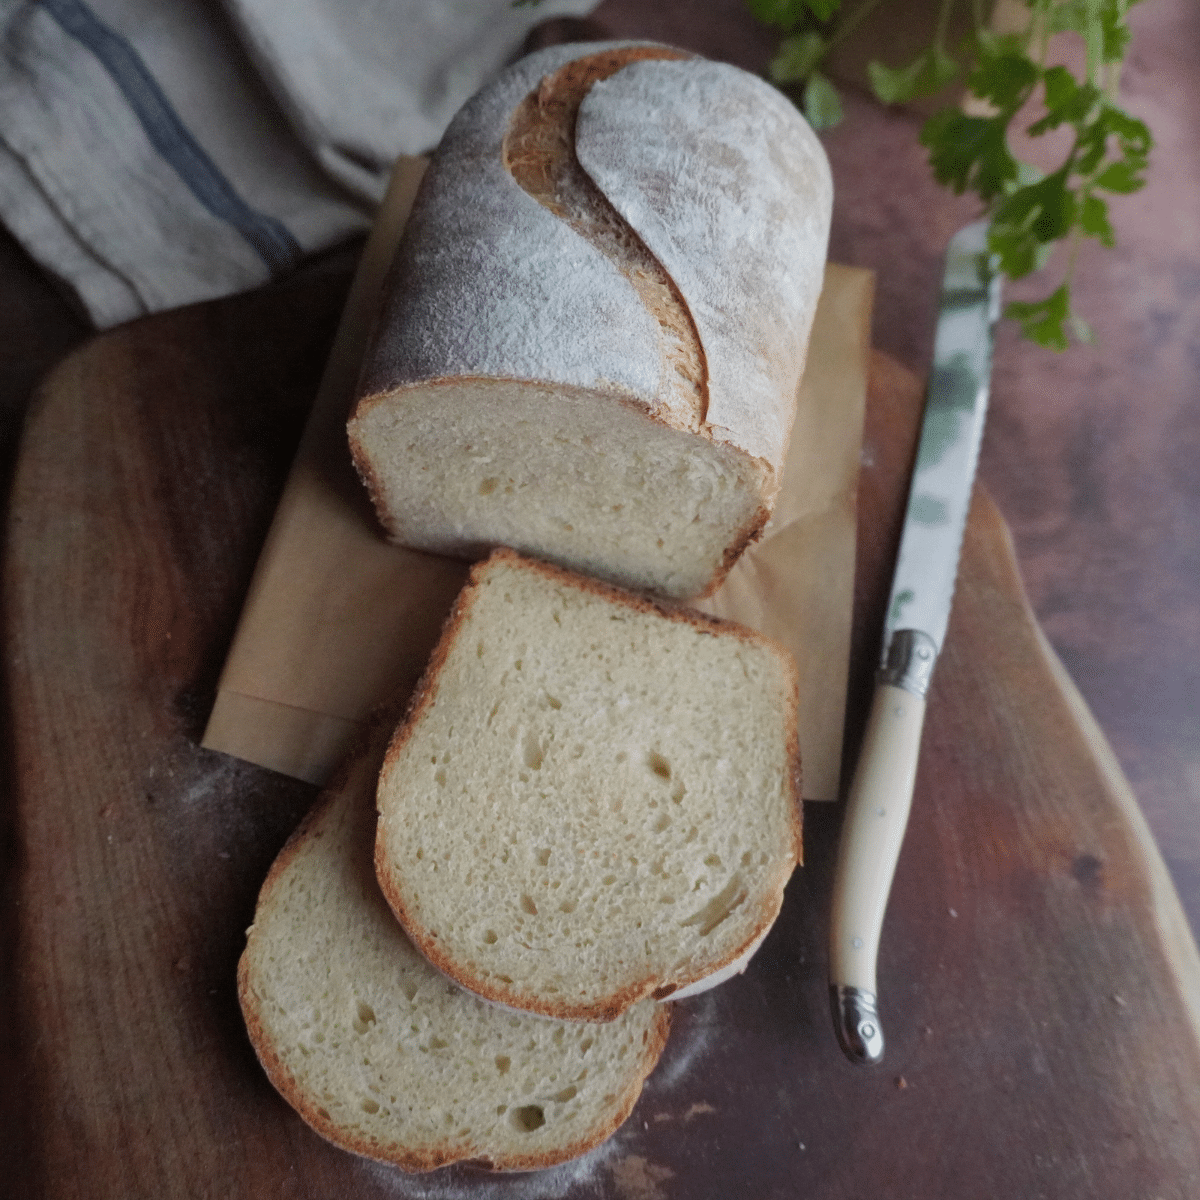
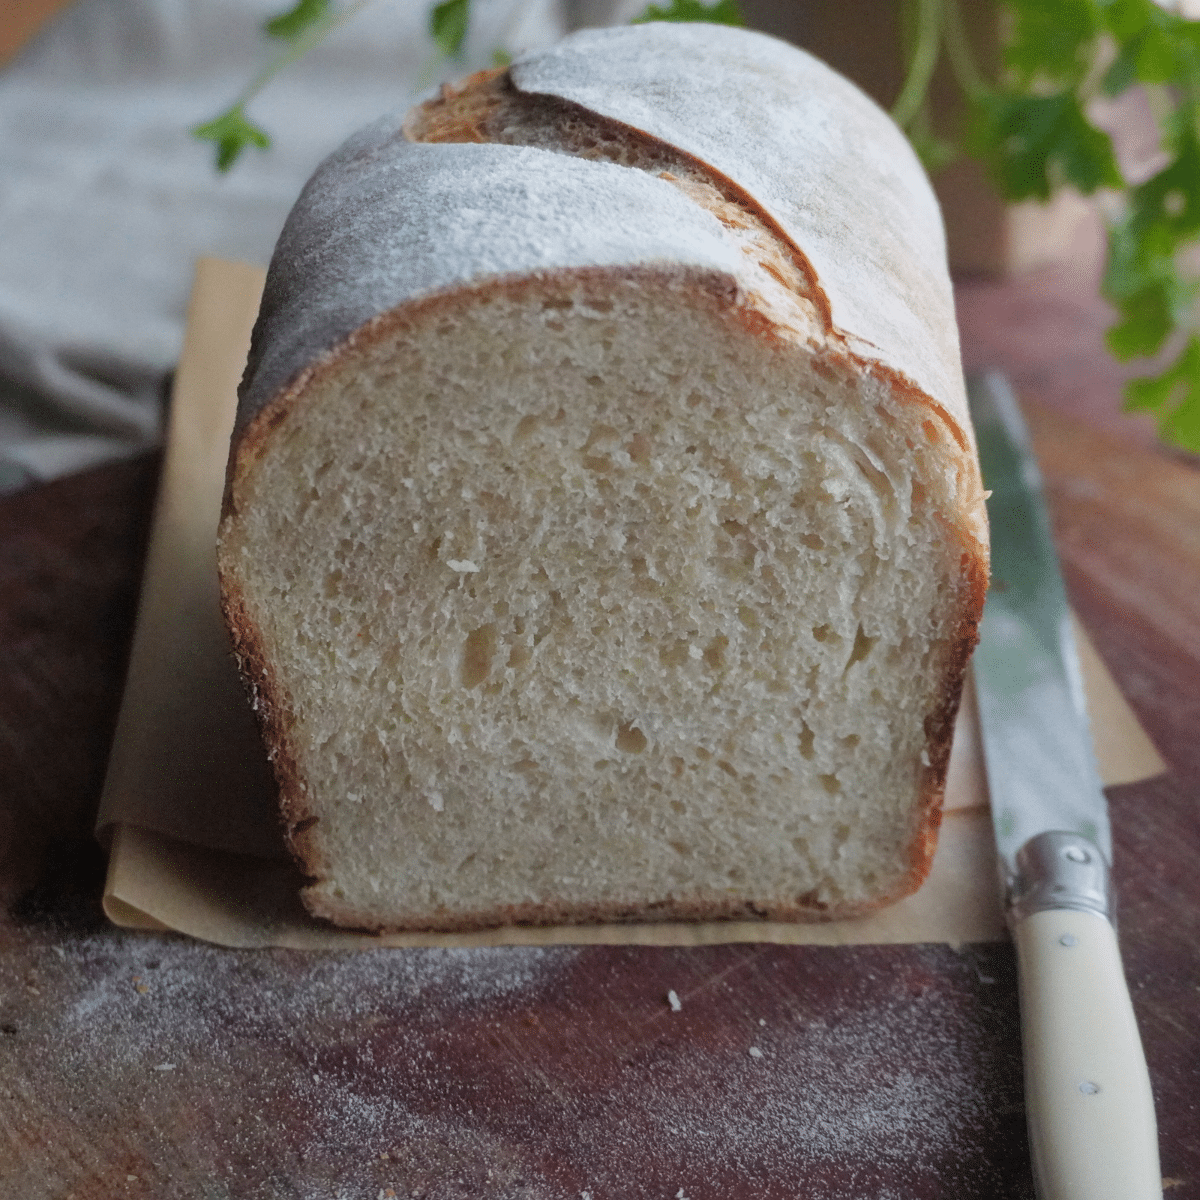
This Easy Sourdough Sandwich Bread is perfect for beginners. With just a few simple ingredients, you’ll have a delicious loaf that’s great for sandwiches, toast, or enjoying on its own.
You can let the dough rise overnight for extra flavor or bake it the same day. Either way, it’s easy to make.
If you’re new to sourdough, you can get my easy sourdough starter recipe here
Visual Instructions
These visual instructions help you see the process. You can also find the full printable recipe with instructions and ingredients at the end of the post.
Prepare the starter
You can find full instructions for making your starter here
Make sure your homemade sourdough starter is active, bubbly, and has doubled in size after being fed before baking.
Note: It can take anywhere from 2 to 4 hours for the starter to double, depending on how warm your kitchen is (ideally 75-80°F / 24-27°C)
Make the dough
- 5 minutes to mix + 30 minutes resting of dough
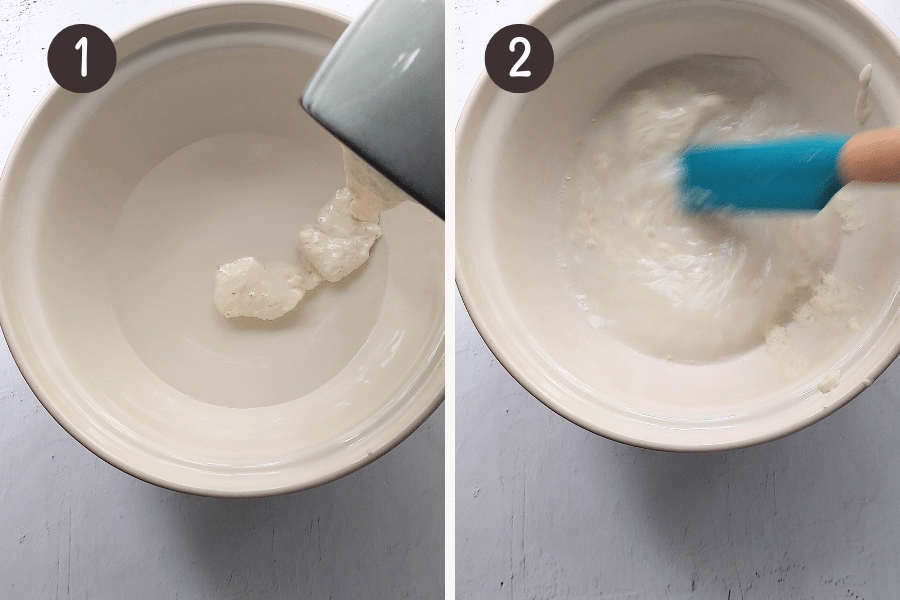
- In a large mixing bowl, combine ½ cup (100g) active sourdough starter and 1 cup (250ml) lukewarm water.
- Mix until combined
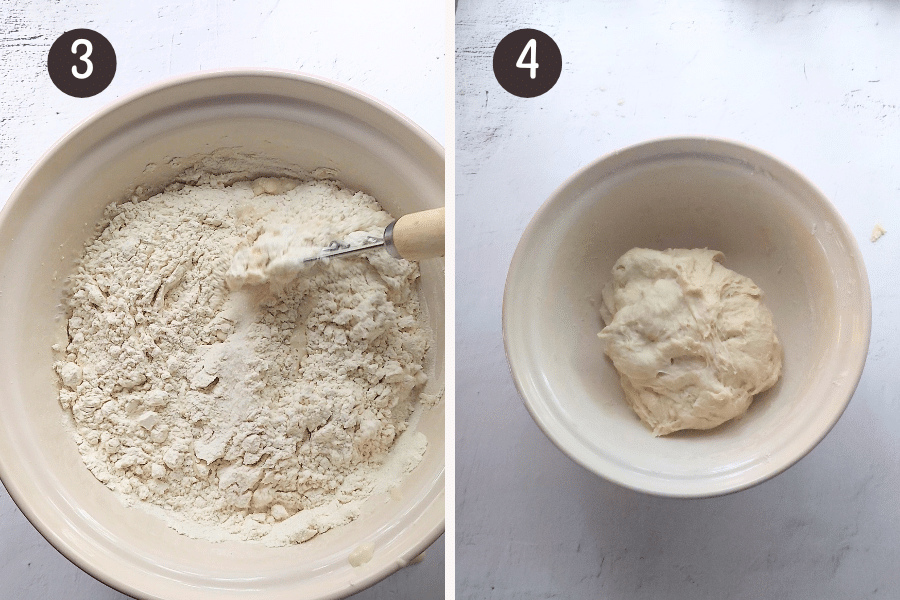
- Add 4 cups (500g) white bread flour, 1 tablespoon (20g) white granulated sugar and 2 teaspoons (10g) salt. Mix with a dough whisk or your hands until a soft dough forms.
- Cover the bowl and let the dough rest for 30 minutes.
Knead and leave to rise
- 5 minutes to knead + 3 hours rise time

- After 30 minutes, knead the dough by hand or with a stand mixer fitted with a dough hook for 5-7 minutes, until it’s smooth. Then, transfer it to a clear container or bowl, marking the dough’s starting height with a rubber band to track its rise.
- Cover and let the dough rest at room temperature (21-23°C / 70-74°F) for about 3 hours, or until it doubles in size.
Shape the dough
10 minutes to shape + Overnight Rise Time (Proofing)
(Instructions below if you prefer same-day baking)

- Gently turn out the dough onto a lightly floured surface. Press the dough into a square that’s about 9 inches (23 cm) wide.
- Fold the bottom half of the dough up halfway.
- Fold the top down over the bottom half.
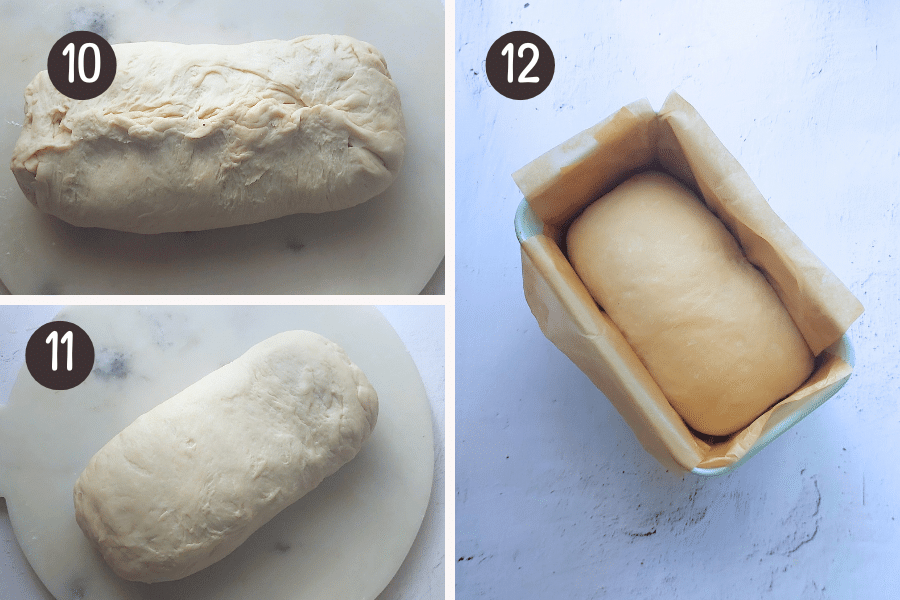
- Fold the ends in and pinch the seams to seal.
- Turn the loaf over so the seam is on the bottom.
- Place it seam side down in a greased, lined loaf pan, tucking the ends if needed. Handle gently to keep it airy.
Overnight proofing (rising)
Cover the loaf loosely and place it in the fridge overnight to proof. This helps the dough rise slowly, improving flavor and texture.
For same-day baking, see the instructions in the recipe card below.
Bake
- 15-20 minutes to preheat oven + 40 minutes baking time
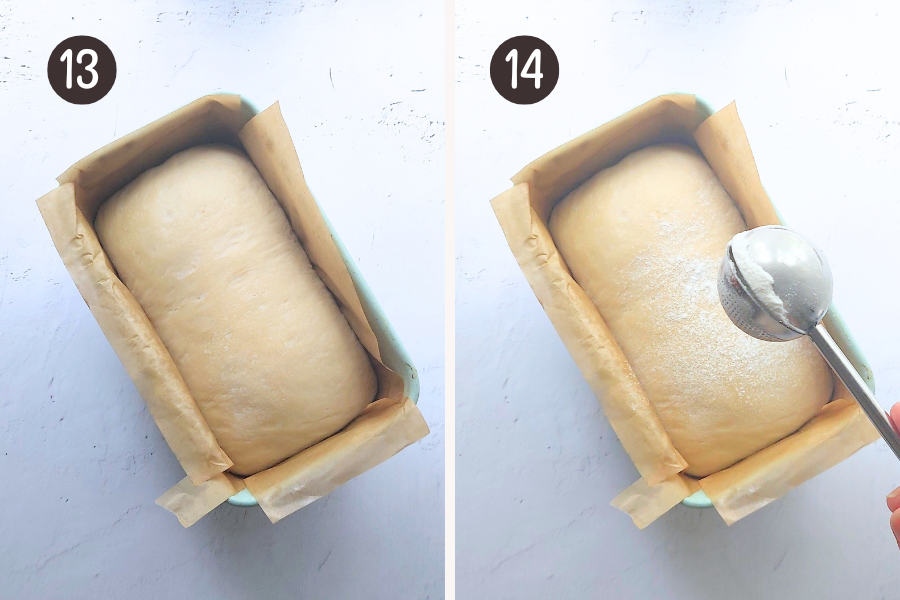
- In the morning, take the dough out of the fridge, it should have doubled in size.
- You can leave it plain or lightly dust it with rice or bread flour for better scoring contrast (optional).
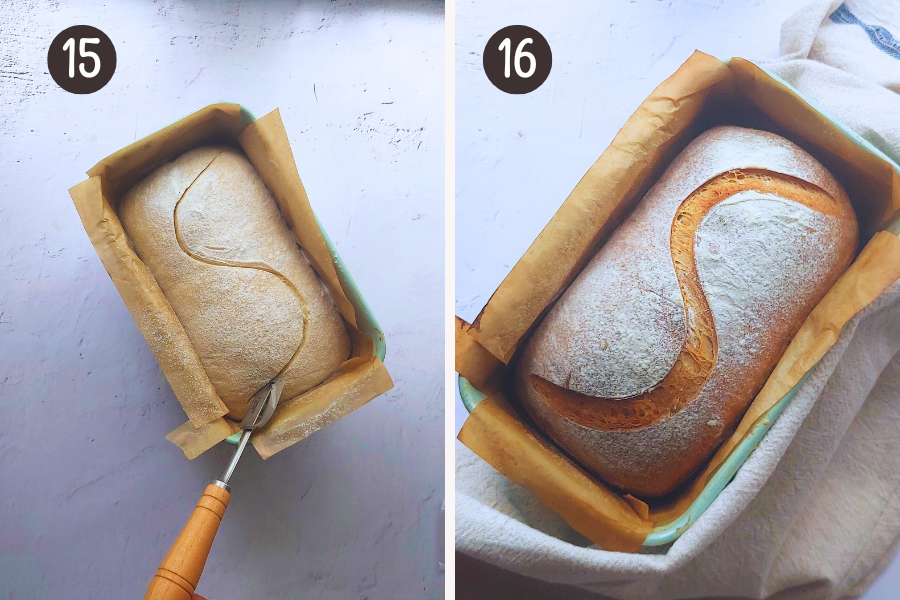
- Using a sharp knife or razor blade, carefully make a cut that's ¼ to ½ inch (0.6 to 1.3 cm) deep cut along the top of the dough, either straight from end to end or in an S pattern. Let the dough sit at room temperature for 20 minutes while you preheat the oven.
- Preheat the oven to 375°F (190°C). Bake for 35-40 minutes, or until golden brown. If the top of the bread browns too quickly, you can loosely cover it with foil.
To check if baked
- The bread should sound hollow when tapped on top.
- If using a thermometer, the internal temperature should be 190-200°F (88-93°C).
- Let the bread cool in the pan for 5-10 minutes, then transfer it to a wire rack to cool completely. Use a sharp bread knife for even slices—allowing your sourdough sandwich loaf to fully cool completely (ideally 1 hour) is key for the best results.
Scoring: Cuts in the dough
- Scoring means making cuts on the top of the dough before baking. It helps the bread expand evenly, preventing it from tearing or bursting. It also gives the bread a neat, decorative finish.
- For this loaf, a single line down the center works best, or you can try an S-shape for a slightly different look. Perfect for sandwich or rustic loaves
- Use a sharp knife, bread lame, or razor blade to score the dough. Cold, refrigerated dough makes the best cuts, so score overnight dough while it’s still cold. For same-day dough, let it rise fully before scoring; it might be softer, but as long as it has risen properly, you’ll still get great results.
- For best results, make a ¼ to ½ inch (0.6 to 1.3 cm) deep cut along the top of the dough
👩🍳 Same day baking option
If you prefer to bake the bread the same day, after shaping the dough, place it in the greased and lined loaf pan.
- Cover it loosely and let it rise at room temperature for 2 to 3 hours, or until the dough has puffed up and doubled in size.
- Same-day baking won’t develop as deep a flavor as overnight proofing, but it will still result in a lovely loaf with good texture.
Recipe
Easy Sourdough Sandwich Bread for Beginners
- ½ cup (100g) active sourdough starter (fed, doubled in size, and bubbly)
- 1 cup (250ml) lukewarm water (75-80°F / 24-27°C)
- 4 cups (500g) white bread flour (see note 1 for alternate flours)
- 1 tablespoon (20g) white granulated sugar
- 2 teaspoons (10g) salt
Baking schedule
- Overnight: This dough rises overnight and takes about 10-12 hours to rise. Start the day before and bake the next day.
- Same day: If you're baking the same day, the total rise time will be about 3 hours. Start in the morning and bake in the afternoon or evening. While the dough won't have the same depth of flavor as one overnight, it will still result in a delicious loaf.
Make sure your sourdough starter is ready
- Before you begin, ensure your sourdough starter is bubbly and has doubled in size after feeding. This usually takes 2 to 4 hours, depending on your kitchen temperature (ideally 75-80°F / 24-27°C). If you don’t have a starter yet, find full instructions for making one here.
Make the dough (5-minute mix + 30-minute rest)
- In a large bowl, combine ½ cup (100g) active sourdough starter and 1 cup (250ml) lukewarm water
- Add 4 cups (500g) white bread flour, 1 tablespoon (20g) white granulated sugar and 2 teaspoons (10g) salt. Mix everything together with a dough whisk or your hands until combined to form a soft dough.
- Cover the bowl and let the dough rest for 30 minutes. During this resting time, the flour absorbs the water, making the dough softer and easier to handle.
Knead and first rise (5-minute knead + 3-hour rise)
- Knead the dough for 5 -7 minutes until it becomes smooth and no longer sticky.
- Place the dough in a clear container or bowl, marking the dough’s starting height with a rubber band or piece of tape.
- Cover the bowl with a cloth or plastic wrap and let the dough rise at room temperature (70-74°F / 21-23°C) for about 3 hours, or until it has doubled in size.
Shape the dough (10-minute shaping + overnight rise)
- (For same-day baking, see note 2 below.)
- Grease and line a 9x5-inch (23x13 cm) loaf pan with parchment paper.
- Turn the dough onto a lightly floured surface. Press the dough into a square that’s about 9 inches (23 cm) wide.
- Fold the bottom of the dough upward, then fold the top down over it.
- Fold in the ends and pinch them together to seal the dough.
- Place the dough seam-side down in the prepared loaf pan.
- Cover the loaf pan loosely with a cloth and refrigerate overnight. The slow rise will help develop flavor and texture.
Score the dough (see note 3)
- The next morning, remove the dough from the fridge. It should have doubled in size.
- Using a sharp knife or razor blade, carefully make a cut that's ¼ to ½ inch (0.6 to 1.3 cm) deep cut along the top of the dough, either straight from end to end or in an S pattern
- Let the dough sit at room temperature for 20 minutes while you preheat the oven.
Bake
- Position the oven rack in the middle and preheat the oven to 375°F (190°C).
- Bake for 35-40 minutes, or until golden brown. If the top of the bread browns too quickly, you can loosely cover it with foil.
To check if baked
- The bread should sound hollow when tapped on top.
- If using a thermometer, the internal temperature should be 190-200°F (88-93°C).
- Let the bread cool in the pan for 5-10 minutes, then transfer it to a wire rack to cool completely. Use a sharp bread knife for even slices—allowing your sourdough sandwich loaf to fully cool completely (ideally 1 hour) is key for the best results.
Storage
- Room temperature: Store the cooled bread in a paper or cloth bag, or a bread box for up to 3 days
- Freeze: You can freeze the entire loaf unsliced or sliced.Sliced: Slice the bread and separate the slices with parchment paper to prevent them from sticking together. Wrap the loaf tightly in plastic wrap or foil, and place it in a freezer-safe bag. Store in the freezer for up to 3 months.Unsliced: Wrap the entire loaf tightly in plastic wrap or foil, and place it in a freezer-safe bag. Store in the freezer for up to 3 months.To defrost: Let the bread thaw at room temperature for a few hours, or toast slices directly from frozen.
If you’re new to sourdough, you can get my easy sourdough starter recipe here
- Flour Options: If you don’t want to use the same flour for your bread as you did for your sourdough starter, no worries! For example, even if your starter is made with bread flour, you can easily use all-purpose or whole wheat flour for your bread. Here are some great options:
- All-Purpose Flour: This will give your bread a lighter, softer texture.
- Whole Wheat Flour: This adds a nice nutty flavor and makes the bread a bit heartier.
- In this recipe, I used bread flour because it gives the bread that chewy, soft texture and helps it rise beautifully.
- Same-Day Baking Option: For same-day baking, skip the overnight rise and let the dough rise at room temperature in the loaf pan for 2-3 hours after shaping, until it doubles in size. Then, proceed with scoring and baking as directed.
- Scoring: Scoring means making cuts on the top of the dough before baking. It helps the bread expand evenly, preventing it from tearing or bursting.
- Use a sharp knife, bread lame, or razor blade to score the dough.
- Cold, refrigerated dough makes the best cuts, so score overnight dough while it’s still cold. For same-day dough, let it rise fully before scoring; it might be softer, but as long as it has risen properly, you’ll still get great results.
Scroll Up for the STEP by STEP Photos: Don’t miss the process shots in the post above. Simply scroll up the post to find them. Those were created especially for you so that you can make the recipe perfectly every single time you try it
Hungry for more?
Sign up for my free newsletter to get emails about new recipes .And don't forget to follow me on YouTube, Facebook, Pinterest, and Instagram for all the latest deliciousness


Leave a Reply