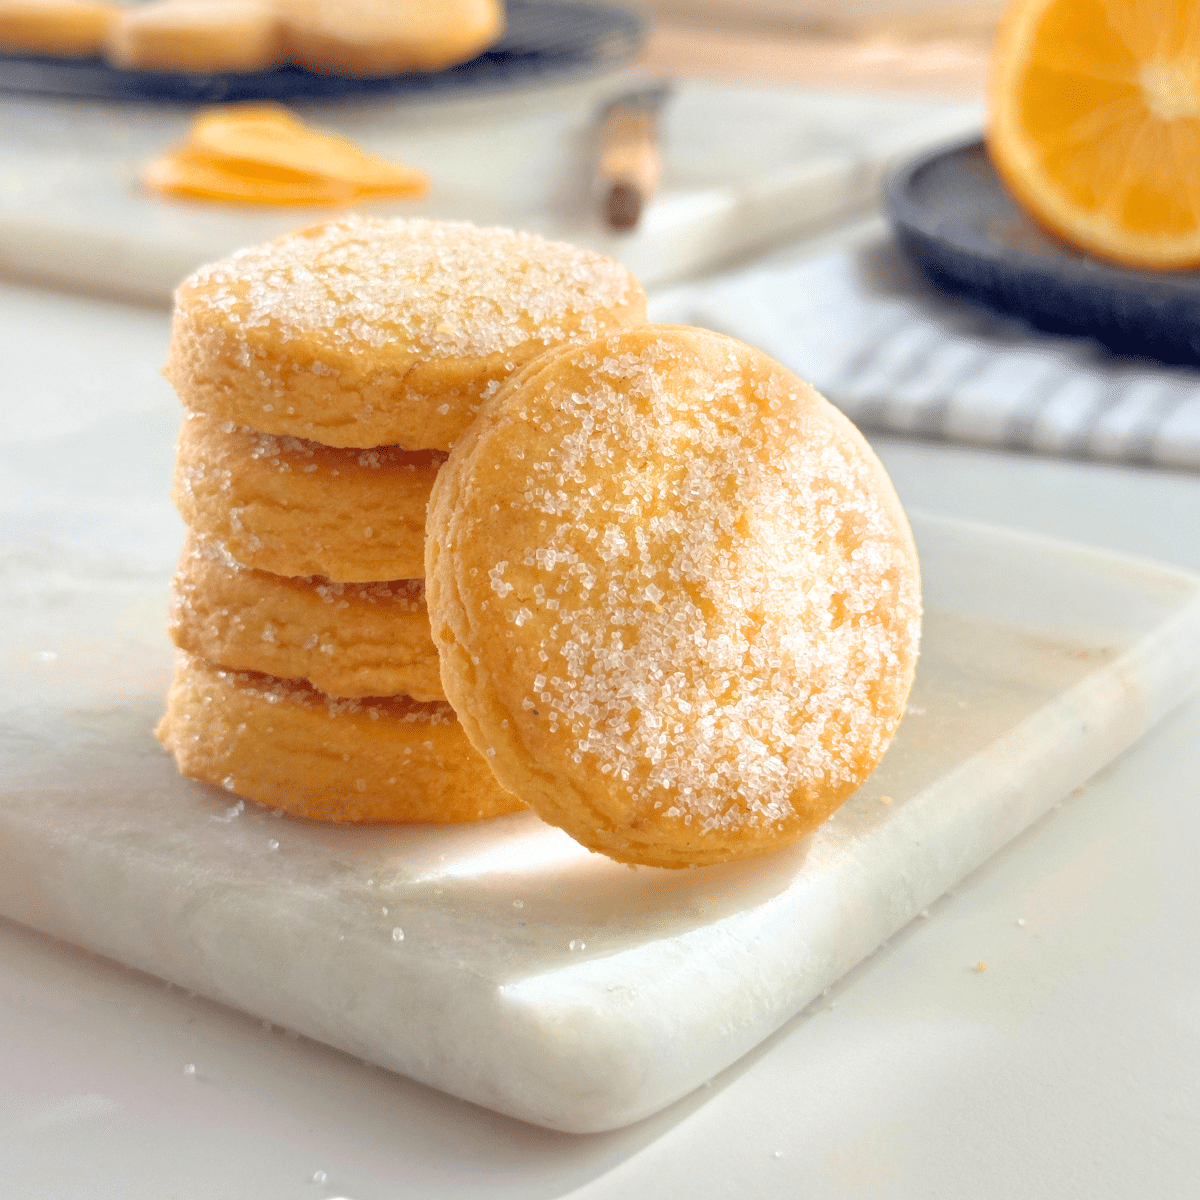
These Easy Orange Butter Cookies are crisp, buttery, and full of fresh orange zest. The dough mixes up quickly and holds its shape as it bakes without spreading. Just a simple cookie that’s perfect for cut-outs of any shape, whatever the occasion.
Ingredients
- ½ cup (100 g) granulated sugar – plus extra for coating (optional)
- 3 tablespoons (12 g) finely grated orange zest – from 2 to 3 oranges
- ¾ cup (170 g) cold salted butter – cut into cubes (get out of the refrigerator at least 15 minutes before using)
- 2½ cups (300 g) all-purpose flour (plain flour)
- ¼ teaspoon salt (or ½ teaspoon if using unsalted butter)
- Optional: orange food coloring gel (1-2 drops)
Visual Instructions
These visual instructions help you see the process. You can also find the full printable recipe with instructions and ingredients at the end of the post.
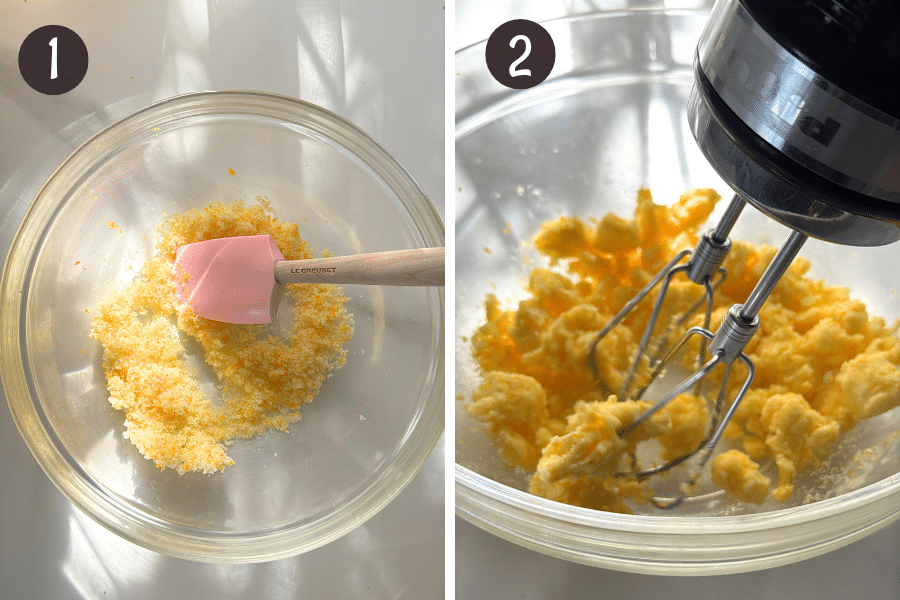
Step 1: Rub orange zest into the sugar using your fingertips until the sugar is lightly tinted and fragrant.
Step 2: Add the cold butter cubes and beat for 2–3 minutes until pale and fluffy.
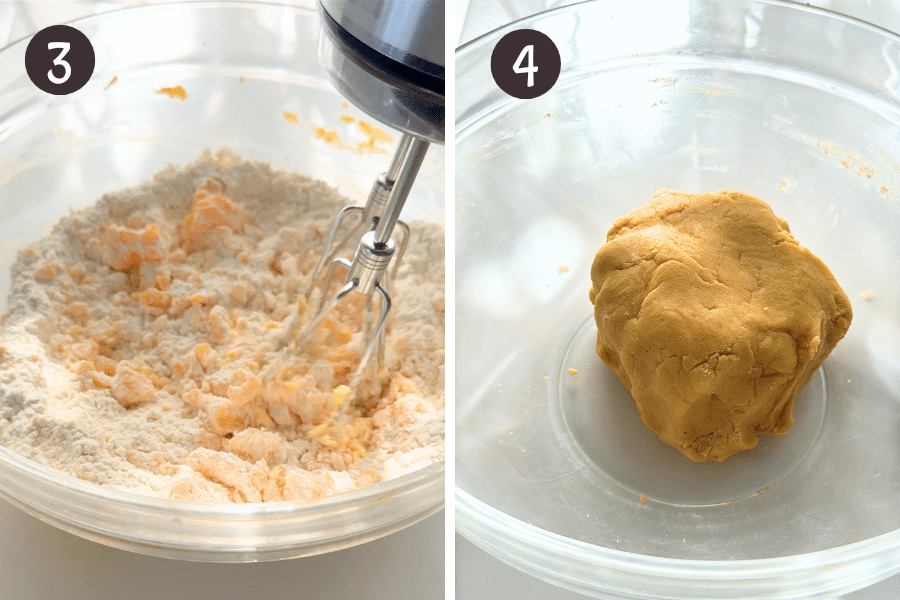
Step 3: Add flour and mix on low speed just to combine.
Step 4: Use your hands to shape the dough into a ball. Cover, and refrigerate for about 15 minutes, just until firm enough to roll.
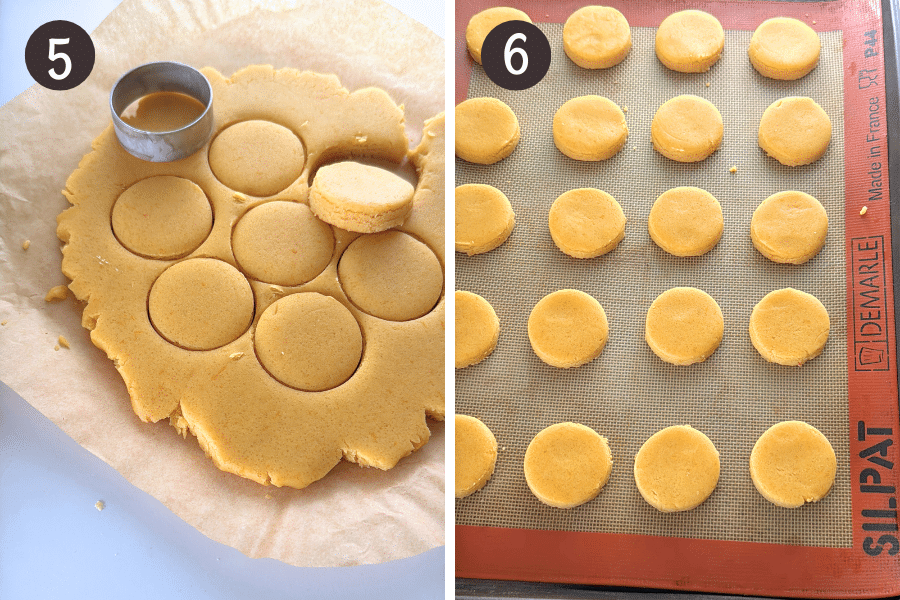
Step 5: Roll the dough between two sheets of parchment to about ½ inch (10–12 mm) thick. Cut into shapes. I used a 4½ cm (1¾-inch) round cutter and got about 20 to 24 cookies.
Step 6: Place the cookies on a lined baking tray, spaced evenly. They barely spread, so they’ll bake up the same shape and thickness you cut them.
Enjoy 💕
Recipe
Easy Orange Butter Cookies
- ½ cup (100 g) white granulated sugar
- 3 Tablespoons (12 g) finely grated orange zest, packed (use a fine grater or zester)
- ¾ cup (170 g) cold salted butter, cubed (take out of the fridge 15 minutes before using)
- 2½ cups (300) g all-purpose flour (plain flour)
- ¼ teaspoon salt (or ½ teaspoon if using unsalted butter)
- (Optional) 1 drop orange gel food coloring
- (Optional) Extra sugar for topping after baking
Cookie dough
- In a mixing bowl, rub the sugar and orange zest together with your fingertips until fragrant and tinted. If using food coloring, mix it in now.
- Add the cold, cubed butter and beat on low to medium speed for 2–3 minutes until pale and creamy.
- Add the flour and salt. Mix on low speed to just to combine. Then use your hands to shape the dough into a ball.
Chill the dough
- Wrap or cover, and refrigerate for 15 minutes, just until firm enough to roll.
Preheat and roll
- Remove the dough from the fridge. Preheat the oven to 350°F (175°C) or 160°C fan.
- While the oven heats, roll the dough between two sheets of parchment to about ½ inch (10–12 mm) thick.
- Cut into shapes. I used a 4½ cm (1¾-inch) round cutter and got 20–24 cookies.
Arrange and bake
- Line a baking tray with parchment or a silicone mat.
- Place cookies on the tray, spaced evenly. They barely spread, so they bake up in the same shape and thickness you cut.
- Bake for 15–20 minutes, or until the edges are lightly golden. Cookies may feel soft out of the oven but will firm up as they cool.
Sugar topping (optional)
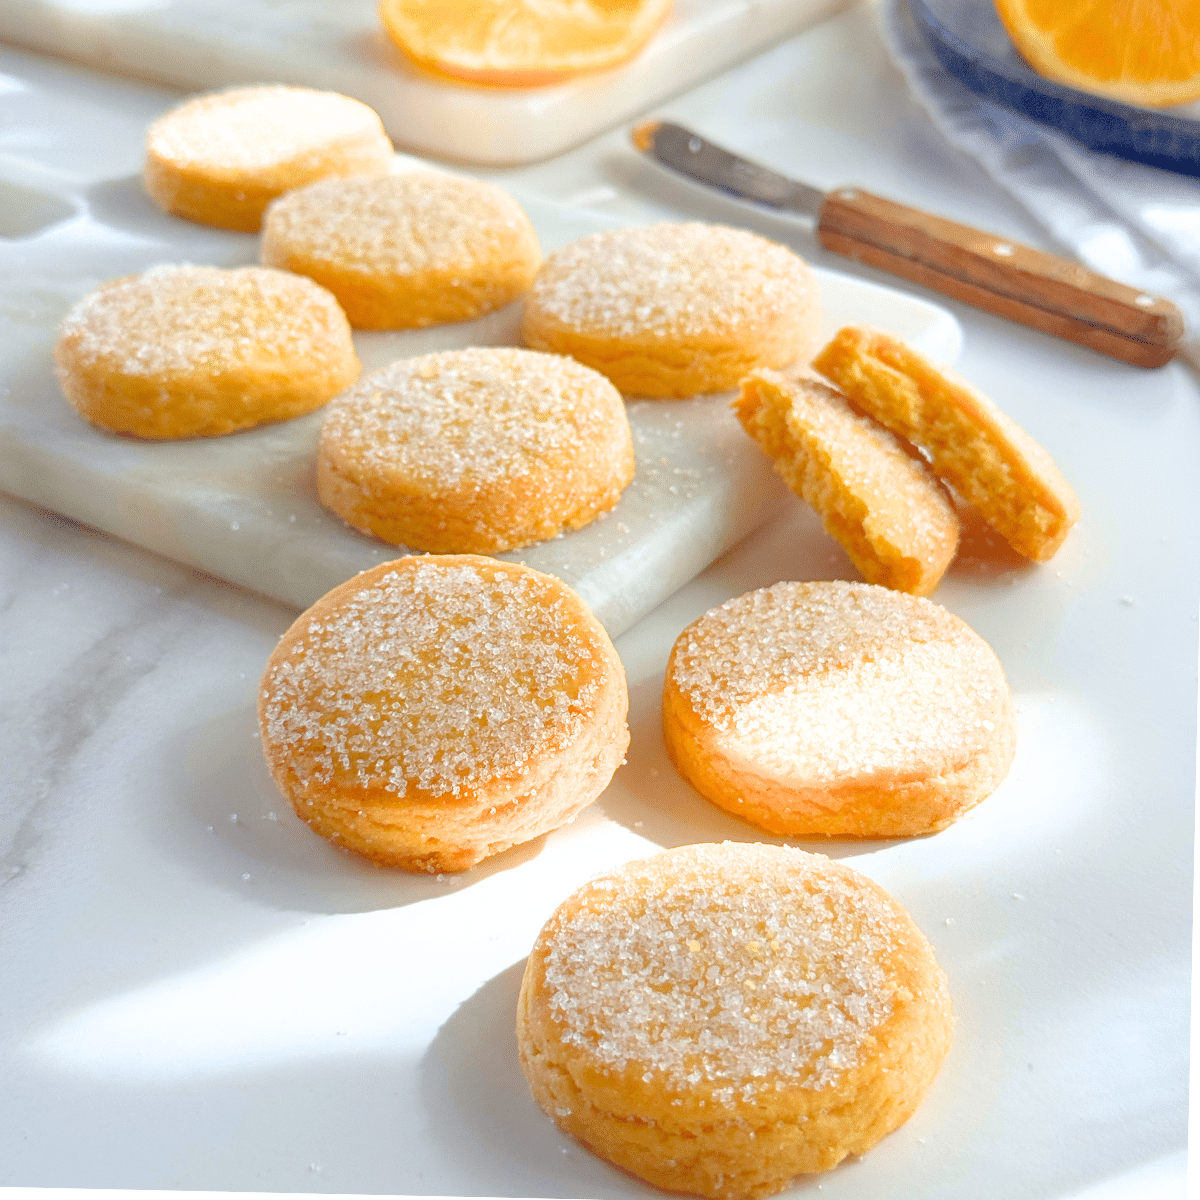
- As soon as they come out of the oven, dip the tops in sugar if you’d like a sparkly finish , it sticks only while the cookies are still hot.
- Be gentle when handling, as the cookies might still be soft at this stage but will crisp and firm up as they cool.
Storage
- Cool completely before storing in an airtight container at room temperature for up to 1 week.
- Cookies freeze well for up to 2 months. Thaw at room temperature.
- See step-by-step images above for visual guidance.
Rolling tip: Rolling between parchment prevents sticking and keeps the surface smooth without extra flour.
Cookie count: Makes about 20–24 cookies with a 4½ cm (1¾-inch) cutter.
Make-ahead: Dough can be prepared a day ahead and chilled.
For thinner cookies: Roll slightly thinner and reduce bake time by 1–2 minutes for a crisper cookie.
Hungry for more?
Sign up for my free newsletter to get emails about new recipes .And don't forget to follow me on YouTube, Facebook, Pinterest, and Instagram for all the latest deliciousness


Natalie says
These look amazing! I'm most certainly making these this weekend. Do you think I could substitute lemon in the future?
The Gardening Foodie says
Aw, thank you Natalie. That’s awesome, I hope you love them 🙂 And yes, lemon works great too. Just swap the zest, and add a bit of juice if you want extra tanginess.
Enjoy and happy baking 😊