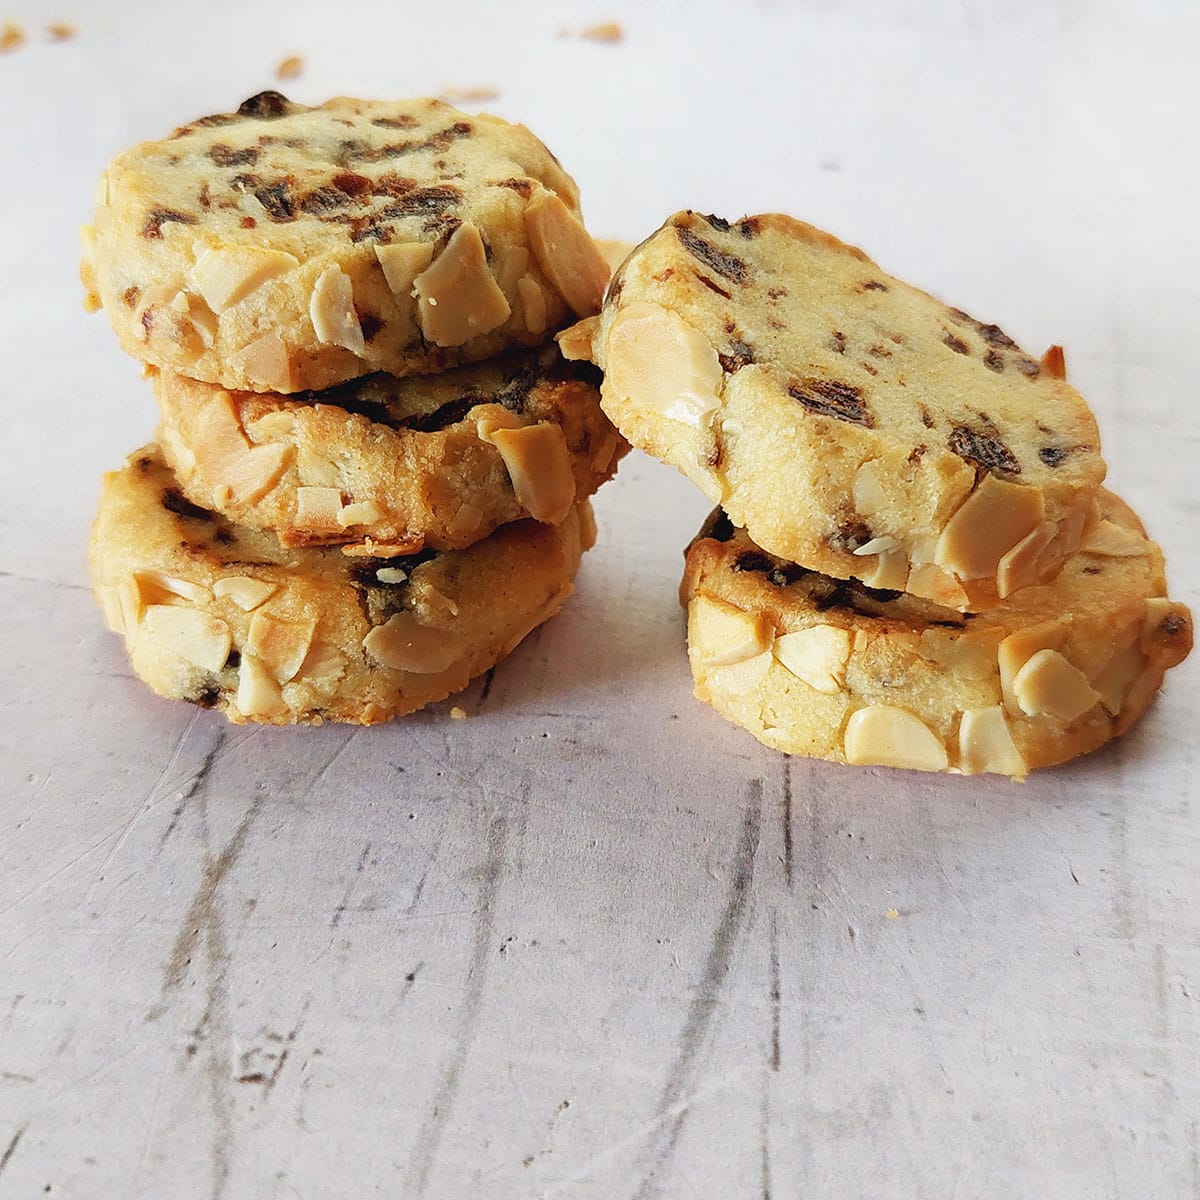
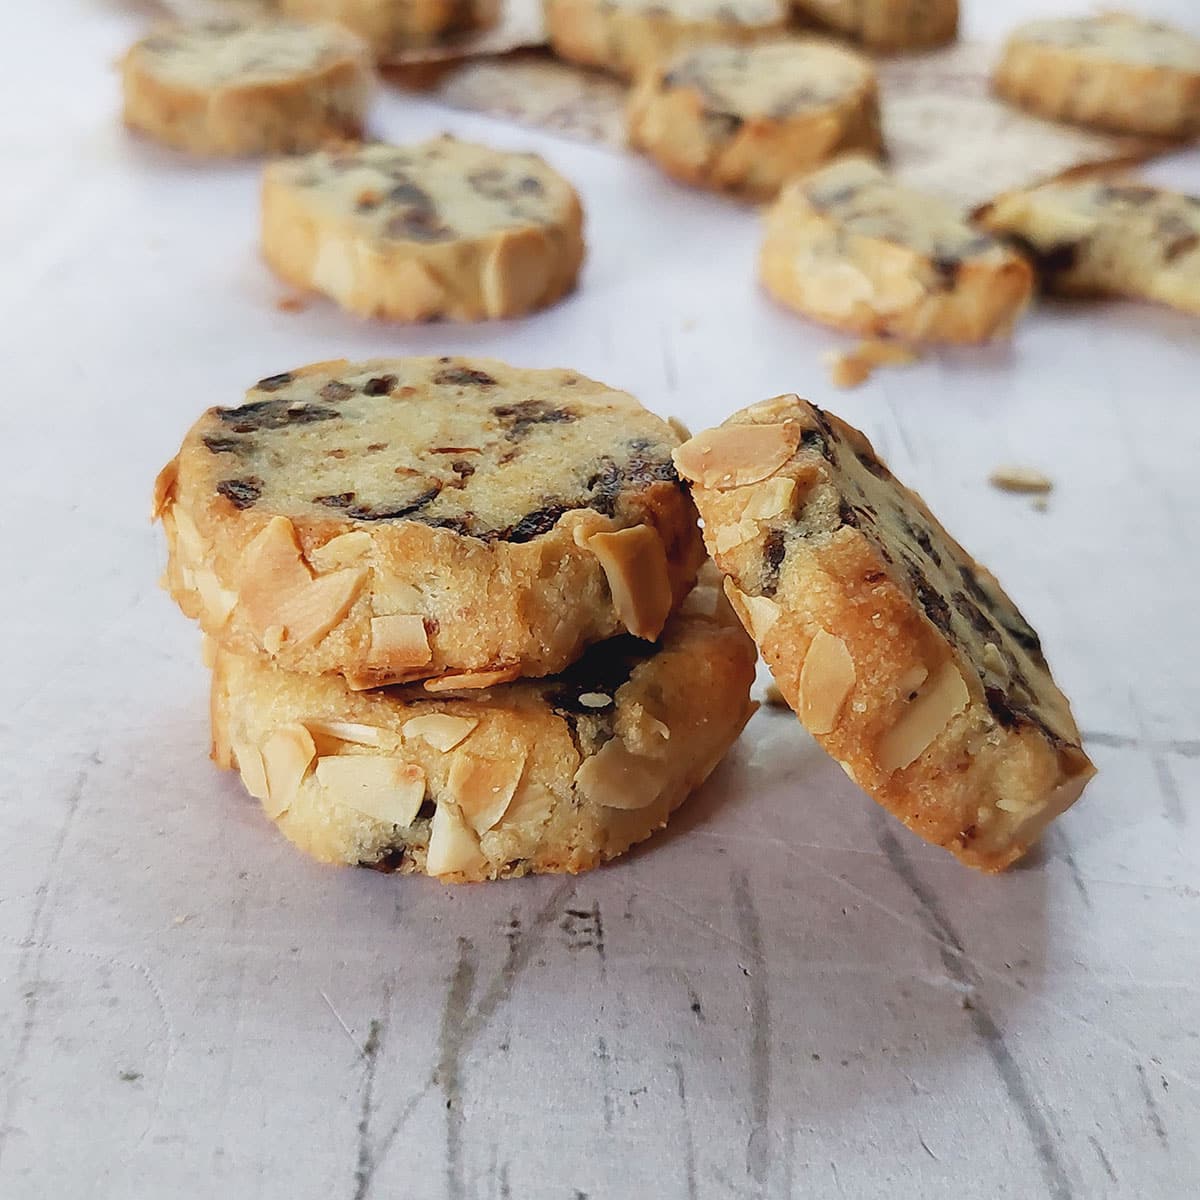
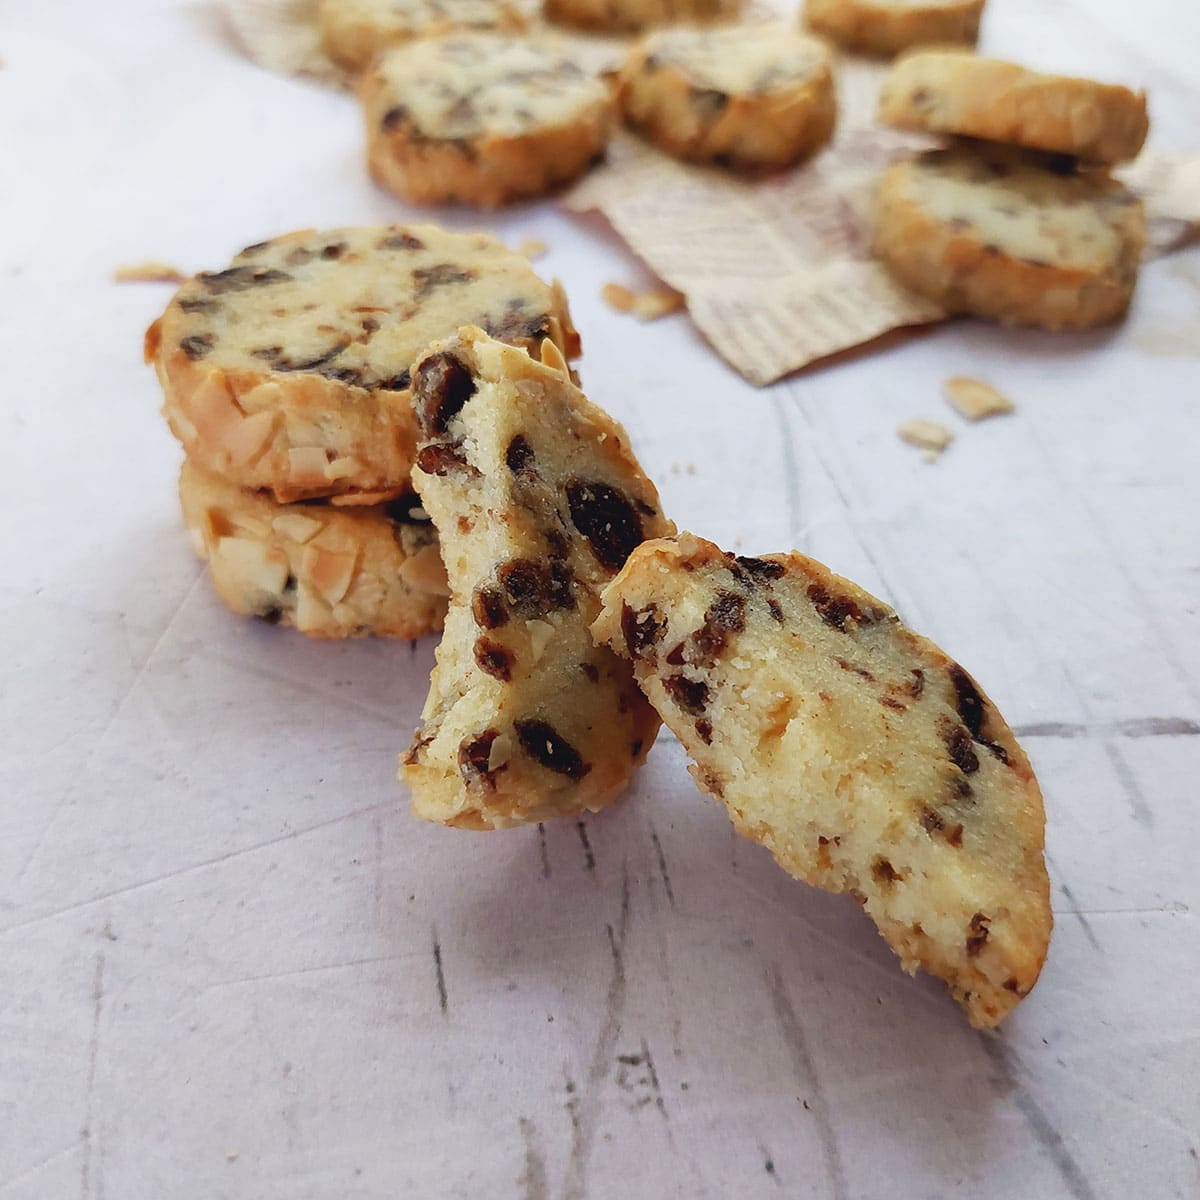
These Date Almond Butter Cookies are whipped up with just 6 simple ingredients, combining to make a cookie that's all buttery and crispy. Studded with sweet dates and a crunchy edge of almonds, enjoy these delicious cookies anytime for a snack or dessert.
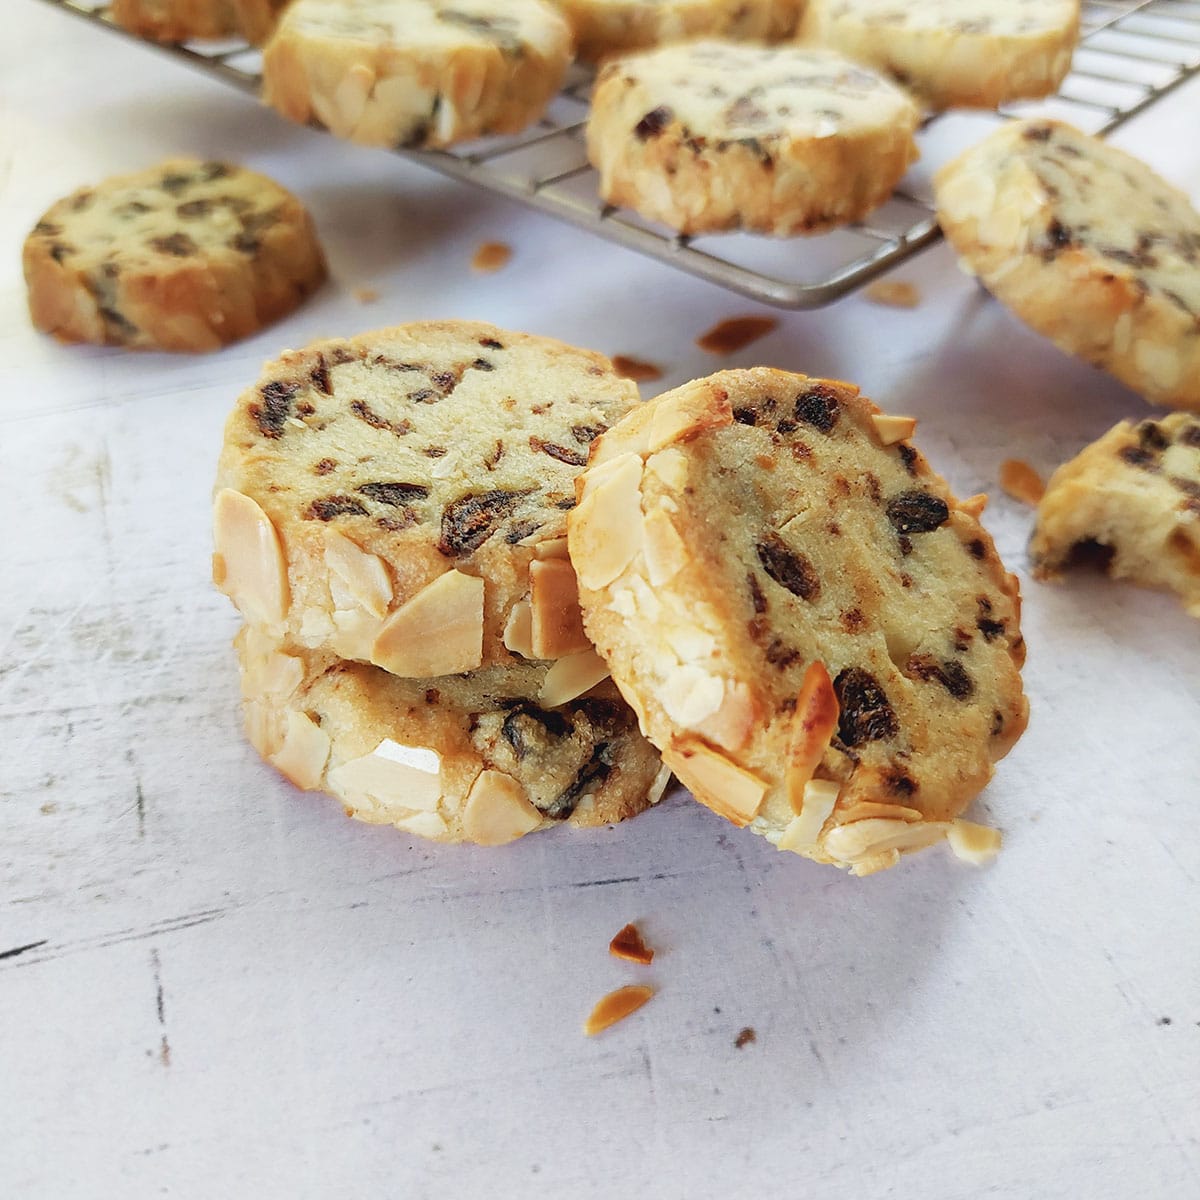
Date Almond Butter Cookies - 6 ingredients, Egg free
These cookies are super easy to make using just 6 ingredients. Butter, powdered sugar, vanilla extract, dates and almonds are all that's required to make these cookies.
Surprised by the few ingredients and simplicity? Trust me, the taste is absolutely incredible. Plus it's sure to become your new favorite once you try it.
Visual Instructions
Here are step by step pictures so you can see what the dough at each stage should look like.
The full printable recipe with amounts and instructions are at the end of this post.

- In a large bowl use a spatula to mix ½ cup (113g) butter and ½ cup (55g) powdered (icing) sugar until it turns pale in color and light in texture.
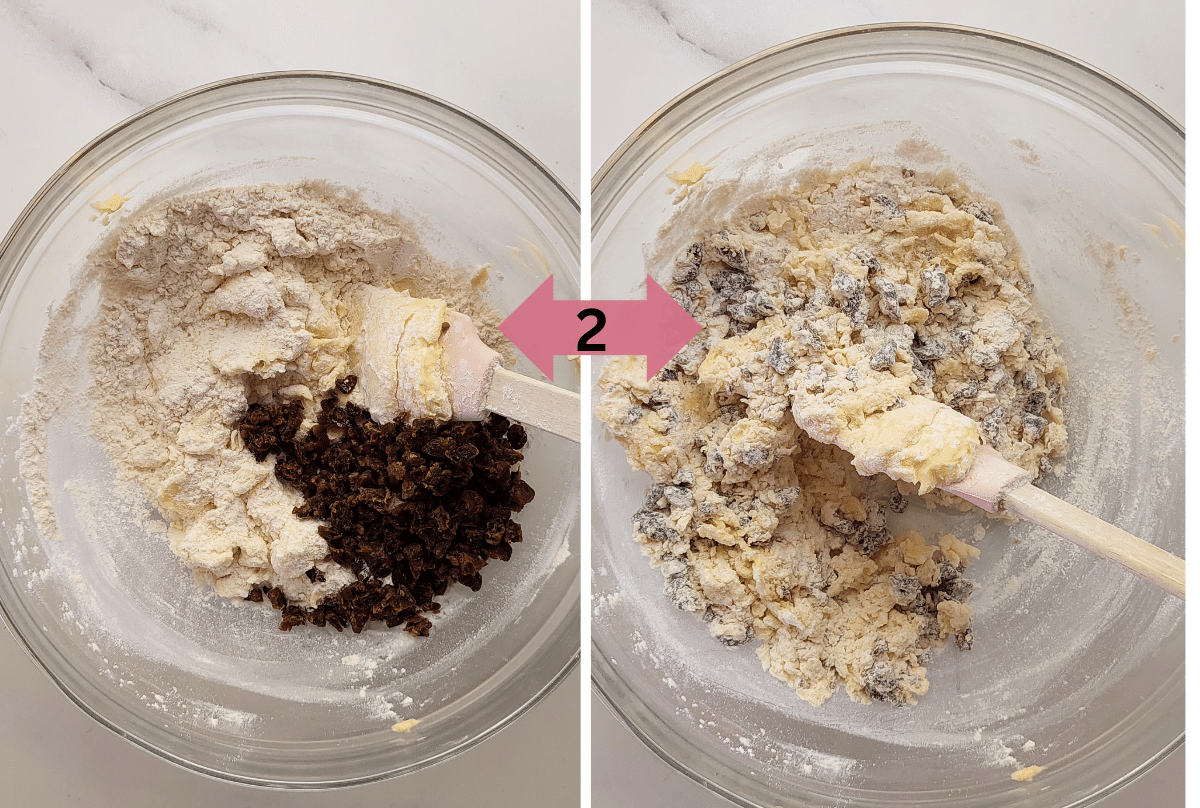
- Add 1 ⅛ cups (140g) all purpose flour (same as plain flour -UK) OR cake flour, ¼ teaspoon salt and ¾ cup (110g) chopped dates. - Mix to form a crumbly dough.

- Use your hands or a spatula to mix everything together until you have a soft dough. Divide the dough into 2 pieces.
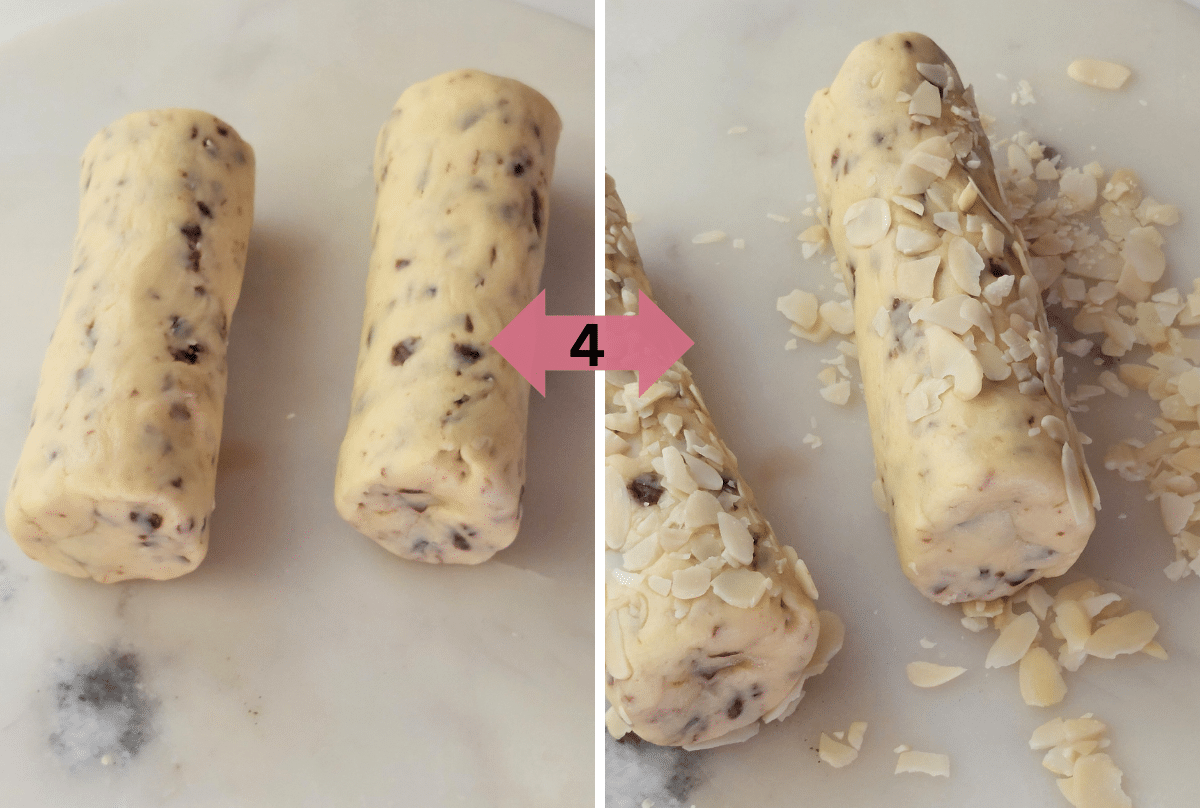
- Roll each into an 4-inch (10cm)-long log which is about 1 ¼ inch (3cm thick)
- Spread ⅓ cup (25g) flaked or chopped almonds on a plate. Roll each log in the almonds to coat.
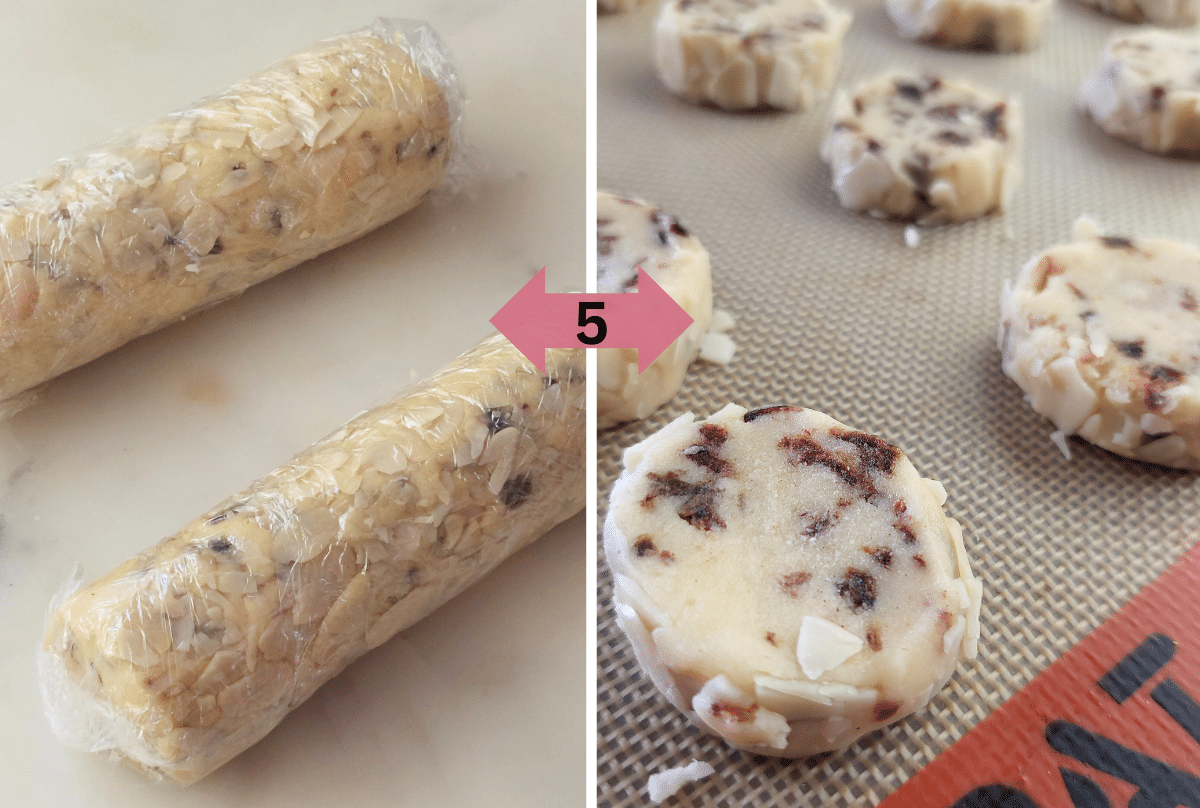
- Wrap each log in plastic wrap, and refrigerate for at least 30-45 minutes.
-
Tip : Make sure to coat the shaped logs with almonds before wrapping and chilling. The almonds stick more easily to the soft cookie dough
- Unwrap the logs, trim the ends if they’re uneven. Slice the logs into ¾ inch (1cm) thick rounds.
-
Note: Although the sliced rounds appear small, they expand during baking and become standard (approximately) 2 ¼ inch (5 ½ cm) cookies.
For larger cookies, skip the dough division. Instead, shape a thicker log and cut the cookies to your desired thickness. Just remember, baking time will vary based on the size and thickness of your cookies.
- Line a baking sheet with parchment paper or a baking silicone mat.
- Position the oven rack in the middle of the oven , and preheat it to 356° F / 180° C (160° C fan).
- Place the cut out rounds on the lined baking sheet, leaving about 2 inches (5cm) between each one. Bake for about 15 to 20 minutes.
-
Remember to rotate the baking sheet positions from front to back after 10 minutes (for evenly baked cookies)
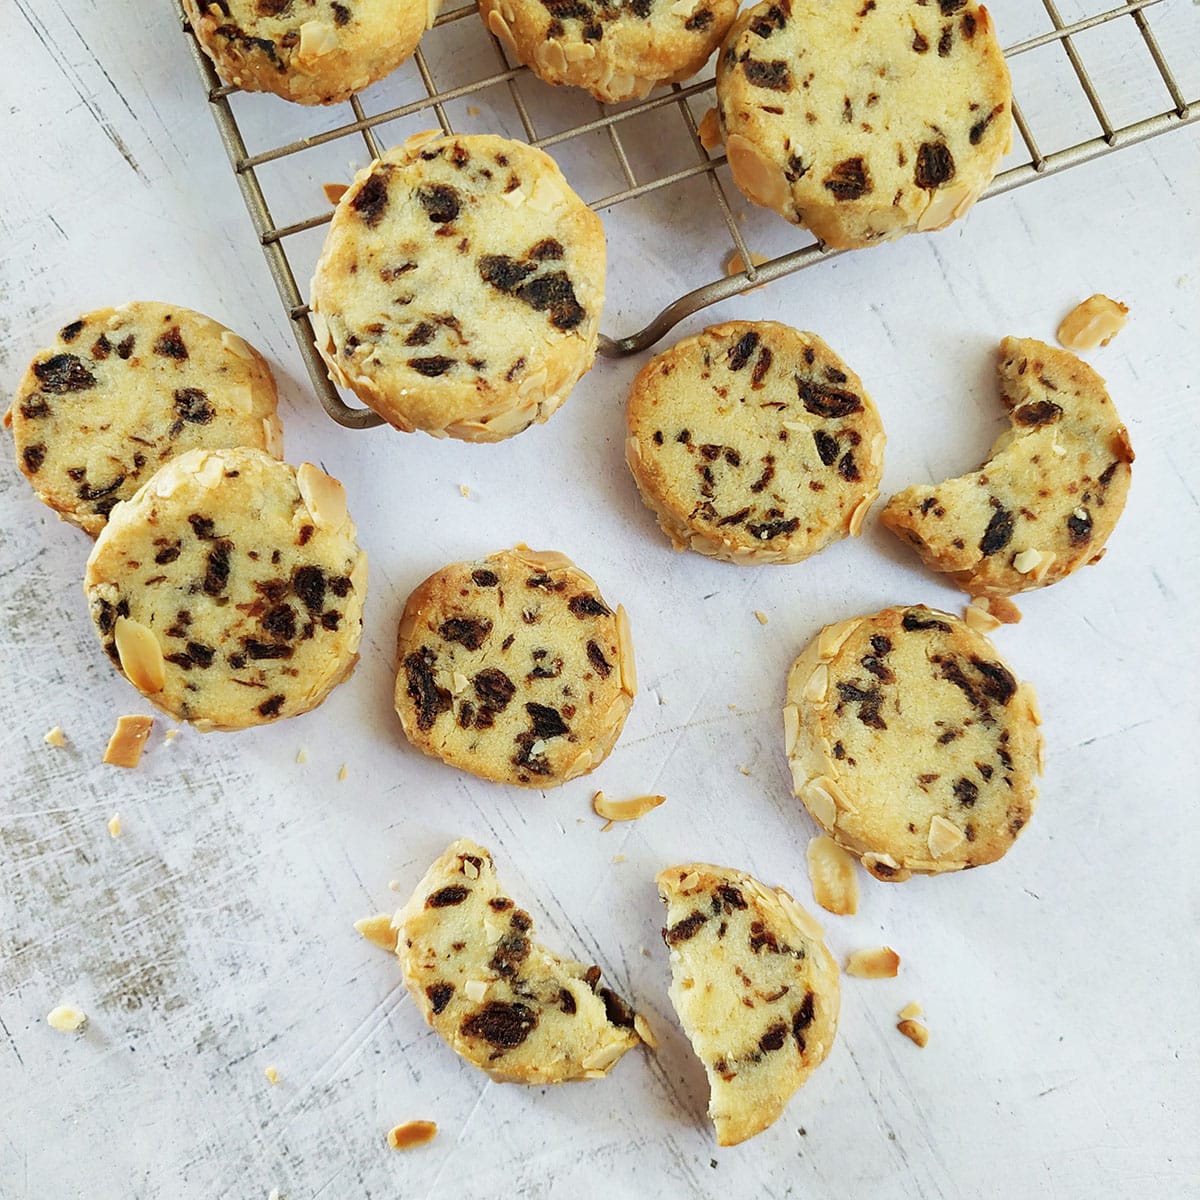
You're aiming for the cookies to have a firm edge and a golden brown bottom, while the tops will maintain a lighter color.
- Take the cookies out of the oven, let them rest on the baking sheet for 5 minutes (they might crumble if moved while hot), then carefully shift them to cooling racks. Remember, cookies get firmer as they cool.
Storage
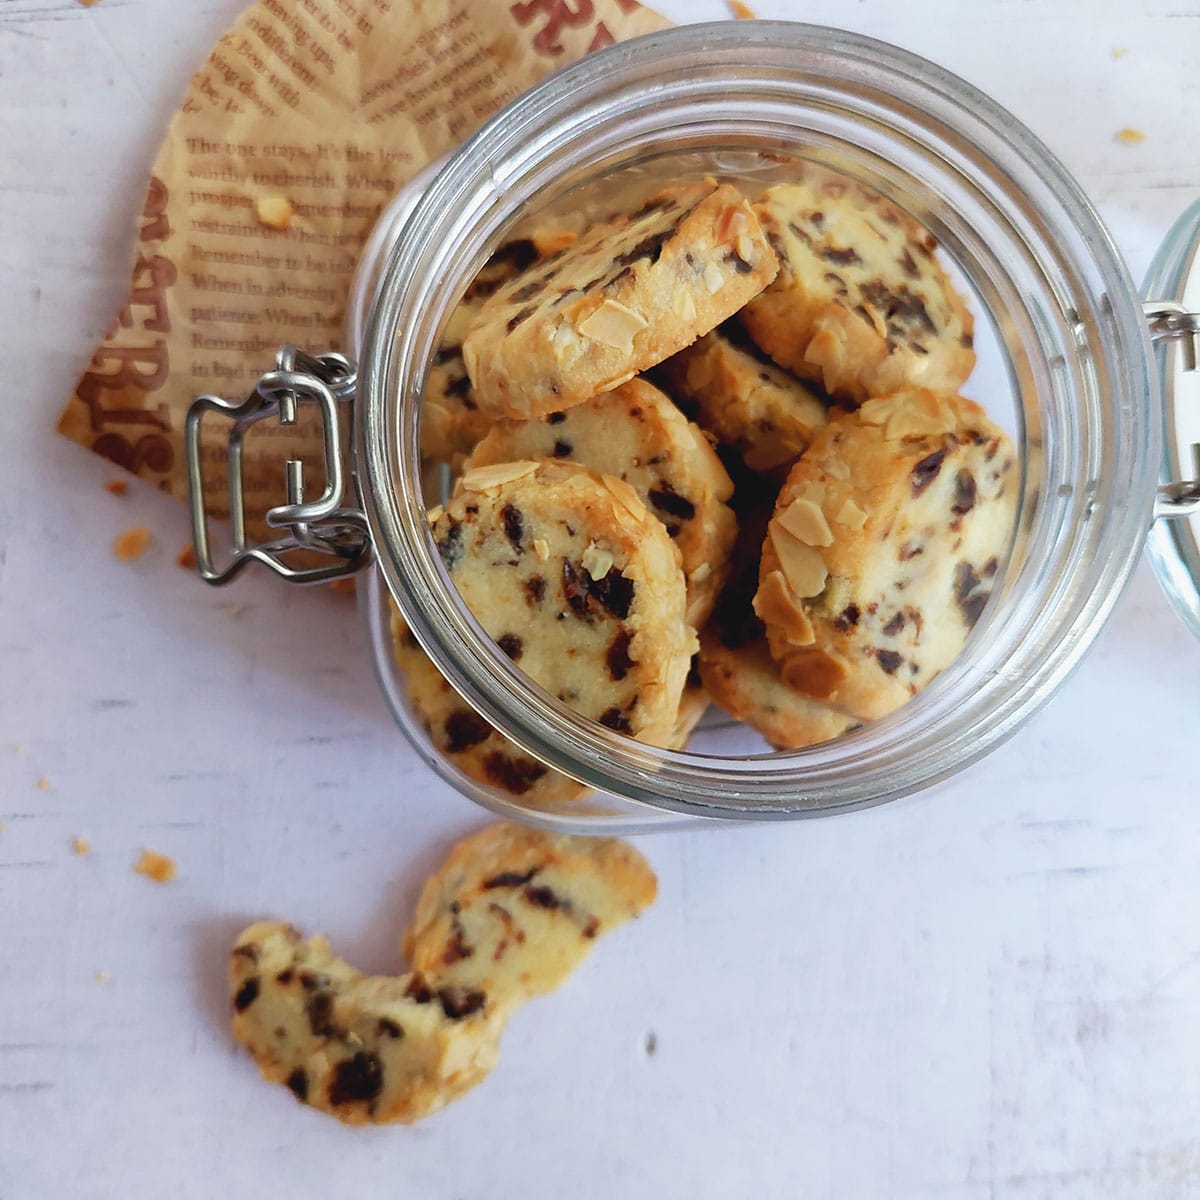
- Once completely cool, store the cookies in an airtight jar for up to 5 days.
Tips and frequently asked questions
- Ensure that your butter is softened to room temperature. Get it out of the fridge at least 1 hour before baking. All the ingredients are incorporated much easier and quicker in soft butter. This also prevents overworking the dough, which produces dense instead of crispy cookies.
- Do not skip the step of chilling the dough. This step cools and firms the log shapes making it easy to slice into disks.
- Remember to rotate the baking sheet positions from front to back after 10 minutes (for evenly baked cookies)You're aiming for the cookies to have a firm edge and a golden brown bottom, while the tops will maintain a lighter color.
- Adjust the baking time if cutting the cookies thinner or thicker than specified in the recipe
Recipe
Date Almond Butter Cookies - 6 ingredients, Egg free
- ½ cup salted butter, softened to room temperature (see note 1)
- ½ cup powdered (icing sugar) (sift before measuring)
- 1 ⅛ cups all purpose flour (same as plain flour -UK OR cake flour)
- ¼ teaspoon salt (add ½ teaspoon salt if using unsalted butter)
- ¾ cup chopped pitted dates
- ⅓ cup flaked or chopped almonds
To make the cookie dough
- In a large bowl use a spatula to mix the butter and powdered (icing) sugar until it turns pale in color and light in texture.
- Add all purpose flour (same as plain flour -UK) OR cake flour, salt and chopped dates. - Mix to form a crumbly dough.
- Use your hands or a spatula to mix everything together until you have a soft dough.
Divide and shape the dough into logs
- Divide the dough into 2 portions.
- Roll each into an 4-inch (10cm)-long log which is about 1 ¼ inch (3cm thick) (see note 2)
- Spread the flaked or chopped almonds on a plate. Roll each log in the almonds to coat. (see note 3)
Chill the shaped logs
- Wrap each log in plastic wrap, and refrigerate for at least 30-45 minutes. (see note 4)
Slice and bake
- Unwrap the logs, trim the ends if they’re uneven. Slice the logs into ¾ inch (1cm) thick rounds.
- Although the sliced rounds appear small, they expand during baking and become standard (approximately) 2 ¼ inch (5 ½ cm) cookies.
- Line a baking sheet with parchment paper or a baking silicone mat.
- Position the oven rack in the middle of the oven , and preheat it to 356° F / 180° C (160° C fan).
- Place the cut out rounds on the lined baking sheet, leaving about 2 inches (5cm) between each one. Bake for about 15 to 20 minutes.
- Remember to rotate the baking sheet positions from front to back after 10 minutes (for evenly baked cookies)
- Take the cookies out of the oven, let them rest on the baking sheet for 5 minutes (they might crumble if moved while hot), then carefully shift them to cooling racks. Remember, cookies get firmer as they cool.
Storage
- Once completely cool, store the cookies in an airtight jar for up to 5 days.
- I used salted butter for this recipe. If you use unsalted butter, make sure to use ½ teaspoon of salt when the recipe calls for it, instead of the ¼ teaspoon indicated.
- Get the butter out of the fridge at least 1 hour before baking. All the ingredients are incorporated much easier and quicker in soft butter.
- This also prevents overworking the dough, which produces dense instead of crispy cookies.
Want even more delicious recipes? Subscribe free to receive new post notifications emailed to you. Or follow along on Facebook, Pinterest, and Instagram. If you love sharing recipes please come and join my All about cooking and baking Facebook group or Subscribe to my YouTube channel

Teresa Stanley says
Can you freeze these cookies?
The Gardening Foodie says
Hi Theresa, absolutely, you can freeze either the baked cookies or the unbaked dough log.
To freeze the baked cookies: Simply place them in a freezer-safe bag or airtight container. When stored properly, they will remain fresh for up to 2 weeks in the freezer.
For the unbaked dough, you can shape it into logs, wrap them, and freeze for up to 1 month. When you're ready to bake, defrost the logs, slice, and proceed with the recipe.
Happy baking 😊
Teresa Stanley says
Thank you.
Ellen says
Could I add the almonds to the batter instead of rolling them?
The Gardening Foodie says
Hello Ellen, certainly, you have the option to include either chopped or flaked almonds in the batter.
My suggestion is to go with flaked almonds. Their thinner and flatter shape might make the slicing process easier, as they create a smoother surface on the dough, resulting in cleaner cuts.
I hope this helps🙂
Happy baking 🙂
Padmini Shastry says
Can I use almond flour instead of AP flour or cake flour?
Do I have to make any changes in the recipe for it?
The Gardening Foodie says
Hi Padmini, I haven’t tried almond flour in this recipe myself, so I’m not sure how it’ll turn out. Almond flour is denser and more moist than regular flour, so the cookies might spread more and have a different texture. If you want to give it a go, you could try reducing the butter a bit or adding a touch more almond flour to get the dough right. Just be aware of these changes, as the cookies might be a bit more delicate and have a different consistency.
Ellen L says
Thank you so much!
Najmunnisa says
The whole process of making the cookies is explained so beautifully, have to give it a try
Sahar says
Hi,
Thank you for the recipe. Can I shape it as normal cookies, not as a Log?
Regards,
The Gardening Foodie says
Hi Sahar, you're welcome and yes, you can absolutely shape the dough as regular cookies instead of a log.
For the best crisp and buttery texture, I recommend scooping the dough, rolling it into balls, and flattening slightly before baking. It’s an easy method that keeps the cookies tender and light.
You can also roll out the chilled dough and use a cookie cutter if you’d like shapes.
Just a note though, this method usually involves a bit more flour and handling, especially if you’re gathering and re rolling dough.
That extra working can make the cookies slightly firmer, or even tough if overdone.
Tougher texture usually happens when the dough is overworked, which develops more gluten and leads to a chewier or harder bite, something we want to avoid in this type of cookie.
And if you’re skipping the log, try pressing some flaked or chopped almonds on top before baking, it adds lovely crunch and looks pretty too 🙂
I hope this helps
Happy baking😊
Sahar says
Thank you so much for your reply; I will definitely try it.
Best regards,
The Gardening Foodie says
You're very welcome 🙂
Enjoy!
Elaine says
These biscuits are so good. Would the dough be ok in the fridge for a day or two before baking? Also could the recipe be adapted to use gluten-free flour?
The Gardening Foodie says
Hi Elaine, I'm so glad you’re loving this recipe 😊
Yes, the dough keeps really well in the fridge for up to 3 days. Just wrap it tightly so it doesn’t dry out. If it feels a bit firm when you’re ready to bake, let it sit at room temperature for 10–15 minutes before slicing.
As for a gluten-free version: yes, it should work. Just use a gluten-free all-purpose flour that’s labeled “1:1” or “cup-for-cup” replacement for regular flour. It’s best to choose one that includes xanthan gum or a binder (check the ingredient list on the back of the pack). This helps the dough hold together and reduces crumbling.
The texture might be slightly more tender or delicate, but the cookies should still bake up beautifully and hold their shape well, especially with the butter and dates doing a lot of the binding.
I hope this helps,
Enjoy and happy baking 😊
Elaine says
Thank you so much for your reply. Will continue to enjoy making your recipe. 😊
The Gardening Foodie says
So happy to help, Elaine 😊 Thank you and enjoy