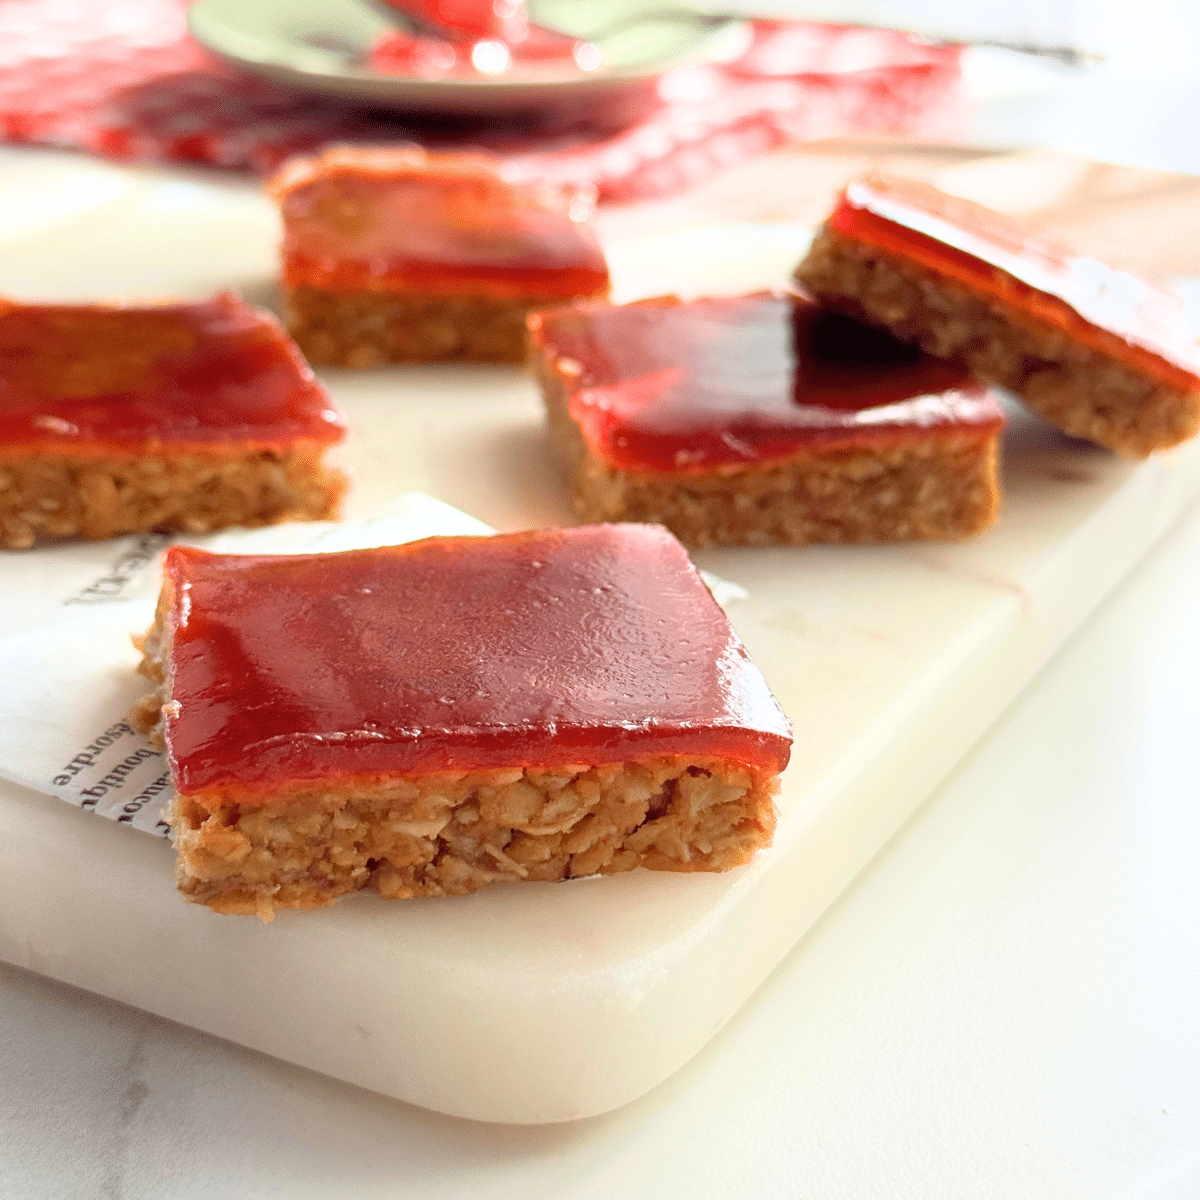
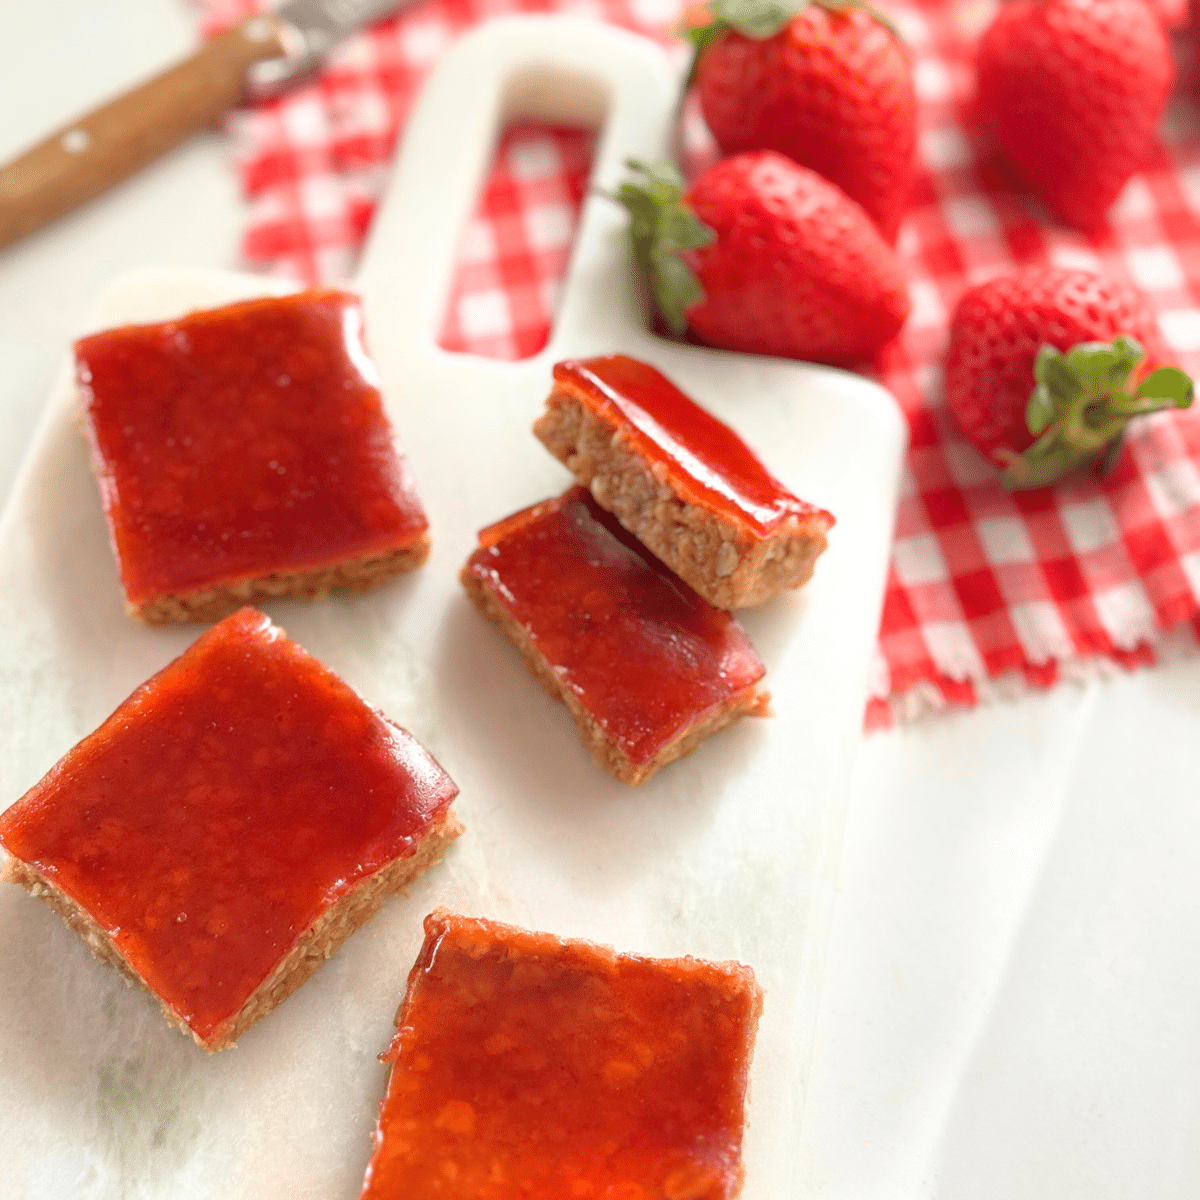
These peanut butter and jam oat bars are a no-bake twist on the classic PB&J. Soft, chewy bars topped with a velvety-rich jam, that turns simple into stunning. All from just 4 ingredients. Classic comfort, made easy
If you’ve already tried my 4-Ingredient Peanut Butter Oat Bars (No-Bake), you’ll love this jam-topped version just as much.
It uses the same soft, chewy peanut butter and oat base, but finishes with a smooth layer of jam for that nostalgic PB&J feel.
No fancy techniques, just a simple twist on a classic that slices perfectly and looks beautiful too.
Ingredient notes
- ¾ cup (190 g) Smooth peanut butter: Smooth works best, but crunchy adds extra texture if you like.
- ⅓ cup (110 g) Honey: Firms up when chilled, helping the bars hold their shape, no baking required.
- 2 cups (160 g) Old-fashioned oats: (also called rolled oats) – these give the bars a chewy texture and hold up well without turning mushy.
- ¾ cup (190 g) Jam: For that smooth, sliceable jelly-like layer, use a thick, spoonable jam or fruit spread with pectin listed in the ingredients.
Most store-bought jams include it, but if you're using a homemade or specialty spread, check the label to be sure.
When gently heated, the jam becomes pourable and sets neatly as it chills.
How to make Peanut Butter and Jam oat bars
Here’s a visual look at how easy it is to make. The full recipe with ingredients and instructions is at the end of the post.
For the peanut butter base
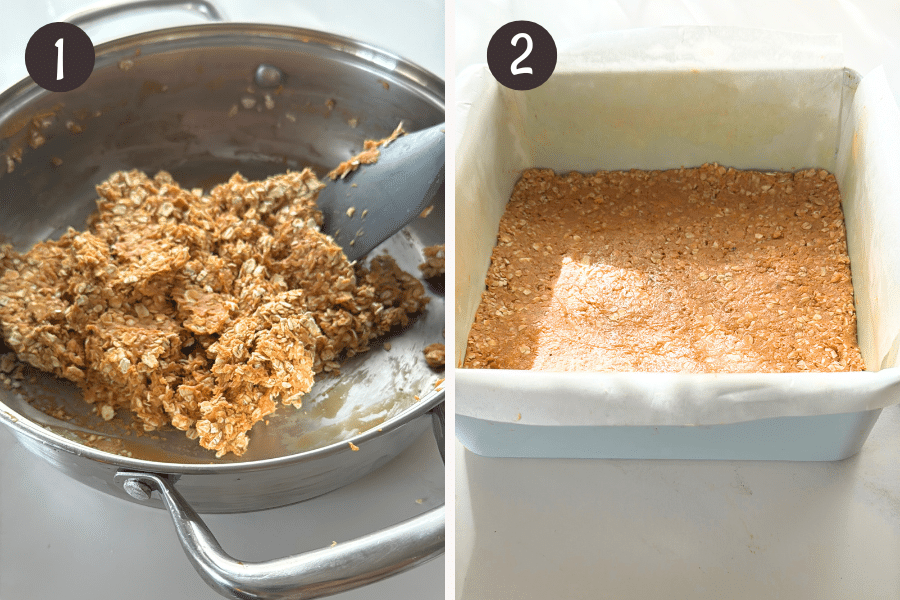
- Warm the peanut butter and honey until smooth, then take it off the heat. Stir in the oats until everything is evenly coated and thick.
- Press the oat mixture firmly into a parchment-lined 8×8 inch (20×20 cm) pan to form the base. Chill for about 30 minutes.
For the jam layer
Only warm the jam once the base is chilled and ready. If you heat it too early, it can thicken while waiting , and won’t spread as smoothly
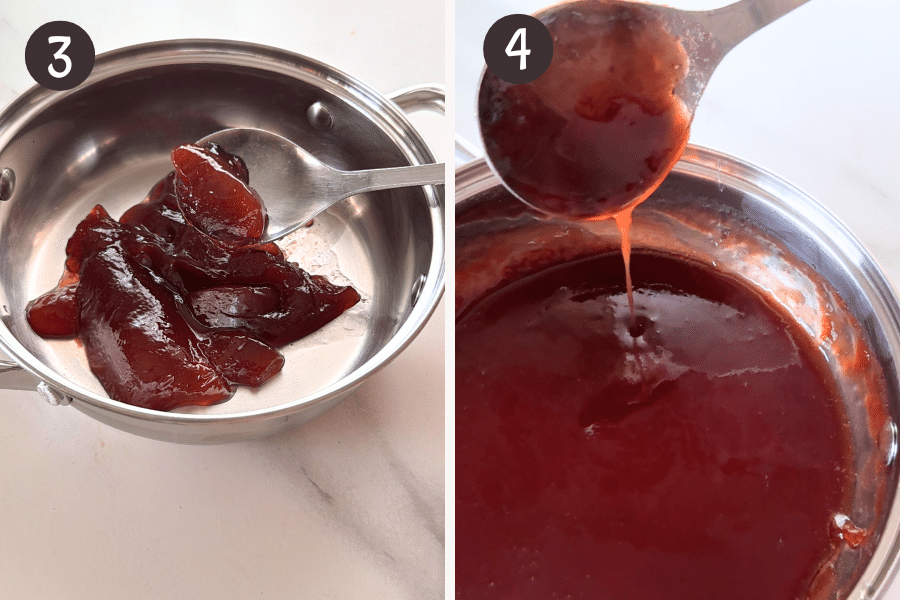
- Spoon the jam into a saucepan. It may look thick or firm straight from the jar.
- Warm the jam gently over low heat, stirring often, just until it loosens up and becomes smooth and easy to pour. This usually takes about 2 to 3 minutes. No need to boil.
Jam heating tip
- Don’t overheat the jam.
- Boiling or cooking it too long can make it sticky, clumpy, or too thick to pour and spread.
- You want it to stay pourable, so when you pour and tilt the pan in the next steps, it flows into an even layer.
- Once chilled, it sets into a neat, jelly-like finish.
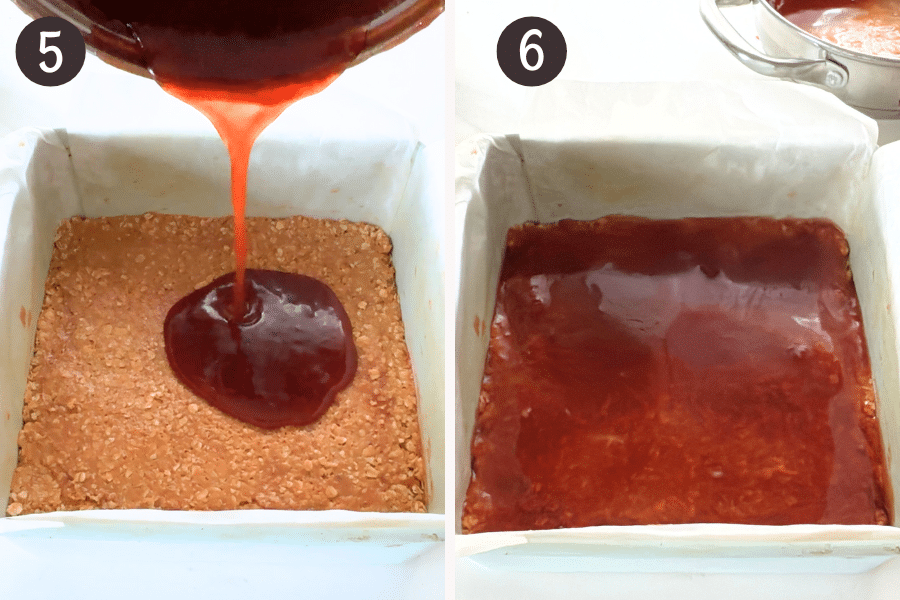
- Pour the warm jam over the chilled oat base in the pan.
- Immediately after pouring, tilt the pan gently so the jam spreads evenly over the base. Don’t wait too long or it might start to set in one spot. Refrigerate for 20–30 minutes until firm, then lift out using the parchment and slice.
The secret to smooth jam top
The jam layer looks smooth, slices clean, and adds that perfect PB&J finish but what’s the secret? It’s all thanks to pectin.
Pectin is a natural ingredient found in most store-bought jams. It’s what helps jam stay thick in the jar and lets it set into a neat, jelly-like layer once chilled.
When you warm the jam gently, the pectin loosens, making the jam soft and pourable. Once it’s poured over the cold oat base, it firms up again as it chills. No extra ingredients needed.
If you’re using a homemade or specialty jam, just check the label to see if pectin is listed. Without it, the topping might stay soft or slightly runny.
Even if your jam looks thick or lumpy straight from the jar, a quick warm-up is all it takes to get that smooth, velvety finish.
Recipe card
Peanut Butter and Jam Oat Bars (No-Bake, 4 Ingredients)
- ¾ cup (190 g) smooth peanut butter
- ⅓ cup (110g) honey
- 2 cups (160 g) old-fashioned (rolled oats)
- ¾ cup (190 g) thick strawberry or raspberry jam (See note 1)
Make the base
- Add peanut butter and honey to a saucepan. Warm gently over medium-low heat, stirring for about 30 seconds until smooth
- Remove from heat. Stir in the oats until evenly coated and thick
- Line an 8 inch (20cm) square pan with parchment. Press the mixture firmly into the pan.
- Refrigerate for 30 minutes, or until firm.
- Tip: Wait until the base is fully chilled before heating the jam. If the jam cools too much while waiting, it won’t spread smoothly.
Warm the jam
- Spoon the jam into a small saucepan. Warm gently over low heat for 2–3 minutes, stirring often, until smooth, thick, but pourable
- Avoid boiling. Too much heat can make the jam sticky or clumpy (see note 2)
- Pour the warm jam over the chilled base
- Immediately tilt the pan gently so the jam spreads into an even layer
- Refrigerate for 20–30 minutes, or until the jam is fully set
Slice and serve
- Lift the bars out using the parchment and slice into squares or bars.
Storage
- Store in an airtight container in the fridge for up to 5 days.
- Most store-bought jams include it, but if you're using a homemade or specialty spread, check the label to be sure.
- When gently heated, the jam becomes pourable and sets neatly as it chills.
- You want it to stay pourable, so when you pour and tilt the pan, it flows into an even layer.
- Once chilled, it sets into a neat, jelly-like finish.
Hungry for more?
Sign up for my free newsletter to get emails about new recipes .And don't forget to follow me on YouTube, Facebook, Pinterest, and Instagram for all the latest deliciousness


Leave a Reply