Danish Butter Cookies
Light, crisp and delicate, my recipe for these classic Danish Butter cookies are absolute melt in your mouth deliciousness. Made using just 4 basic ingredients, this is a super easy bake.
Servings 14
Equipment
- Piping nozzle
- Anti burst Piping bags
Ingredients
- ½ cup butter at room temperature
- ½ cup Powdered sugar
- 1 teaspoon vanilla extract
- 1 cup cake flour OR all-purpose flour See note 1
Instructions
- Get the butter out of the refrigerator at least an hour before baking. It should be soft to the touch, but not melted.
- Cream the butter, sugar and vanilla extract with a handheld or stand mixer for 5 to 8 minutes. The creamed butter and sugar should be light in color and fluffy in texture. SEE NOTE 2
- Use a spatula to scrape the dough of the side of the bowl. Sift the flour, ⅓ cup ( 40g at a time folding it gently into the creamed butter mixture, until you have used up all the flour.
- Transfer the dough to a sheet of plastic wrap and roll it to form a log. Cut a hole in one end of the plastic wrap and place it into a piping bag fitted with a flower tipped nozzle. SEE NOTE 3
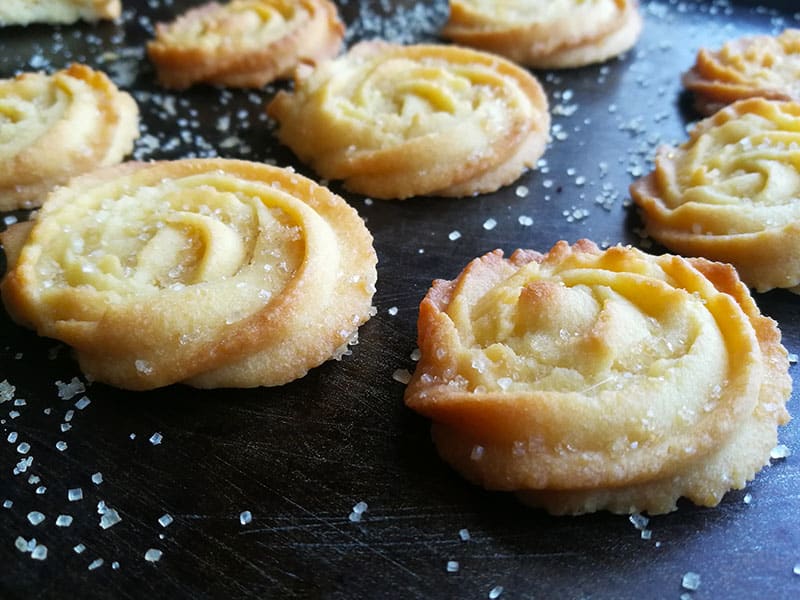
- Pipe the dough using a 1M open star piping tip onto a baking sheet lined a silicone mat or with parchment/baking paper. See note 4
- If you feeling that the dough is too stiff or hard to pipe, then just add a tablespoon of warm milk to the dough. This will make the dough softer and easier for you to pipe.) SEE NOTE 5
- Place the baking sheet into the refrigerator for 30 minutes to firm up the piped cookies. This prevents the dough from spreading while baking ensuring that the cookies keep their beautiful piped shape.
- Sprinkle granulated sugar over the cookies before baking if preferred or leave plain.
- Bake in a preheated oven of 300°F/ 150°C (148°C fan)for 15 minutes or until the edges begin to turn a golden color.
- Remove from the oven and leave the cookies on the baking sheet to cool for 10 minutes before serving or store in an airtight container.
Video
Notes
- I always prefer and use cake flour these cookies. It produces a light and delicate textured bake.
All purpose is an alternative I will suggest when cake flour is not available in a certain country. - The butter should be beaten for at least 5 to 8 minutes. An electric handheld or stand bowl mixer is helpful to aid in the creaming process. The creamed butter and sugar should be light in color and fluffy in texture. This will result in lighter cookies as opposed to a dense heavy batch of cookies.
- Do not overfill the piping bag with the dough. Rather divide the dough in half, this will make the piping easier to manage.
- Don't pipe the cookies directly on a greased pan. Brushing your baking sheet with butter creates a greasy base, causing the cookies to spread.
A silicone baking mat is really the best because they hold onto the bottom of the piped cookie dough, preventing the cookies from spreading too much. And promote even browning too. - If you do not want to go through the process of piping out the dough, then simply roll out small portions of dough and press down using a fork. Refrigerate the shaped dough for 30 minutes before baking.
Nutrition
Serving: 1cookie | Calories: 47kcal | Carbohydrates: 9g | Fat: 1g | Saturated Fat: 1g | Cholesterol: 1mg | Sodium: 9mg | Sugar: 3g | Calcium: 11mg
Tried this recipe?Mention @thegardeningfoodie or tag #thegardeningfoodie!