French Butterscotch Magic Custard Cake
Indulge in the flavors of this French Butterscotch Magic Custard Cake! A blend of textures and tastes that transforms into 3 layers of decadence with just one batter while baking!
Servings 9 servings
Ingredients
For the cake
- ½ cup salted butter
- 4 large eggs separated at room temperature
- ¾ cup brown sugar
- 1 teaspoon vanilla extract
- ¾ cup all purpose flour (same as plain flour -UK OR cake flour)
- ¼ teaspoon salt (add ½ teaspoon salt if using unsalted butter)
- 2 cups lukewarm milk
For the butterscotch topping (optional)
- 2 Tablespoons salted butter
- ½ cup brown sugar sugar
- ¼ cup of heavy cream (whipping cream)
- ¼ teaspoon salt (if using unsalted butter)
Instructions
- Grease and line an 8×8-inch (20x20cm) baking pan with parchment paper. Leave an overhang of parchment paper making it easy to lift out the cake after baking
Browning the butter
- Warm the butter in a small saucepan over medium heat until it melts.
- Stir constantly until it turns a golden-brown color with the brown residue appearing at the pan's base (usually around 2-3 minutes). It will have a deliciously nutty aroma.
- Switch off the stove and remove the pan from the heat to prevent the butter from continuing to cook and potentially burning.
- Strain the mixture through a fine sieve into a bowl.
- Let it cool to room temperature.
- Separate the eggs: Place the egg yolks in one bowl and egg whites in another.
Egg yolk mixture
- Add brown sugar to the bowl with the yolks. Beat until the mixture turns pale and creamy (about 4 to 5 minutes)
- Pour in the strained cooled browned butter and vanilla extract. Beat for 1 minute on low speed.
- Combine the all-purpose flour by gently folding it in using a spatula. Then, pour in the milk and whisk to blend the ingredients together.
- Set the bowl aside
Preheat the oven now to 325°F / 170°C (150°C)if you are using a fan assisted oven)
Egg white mixture
- Rinse out and dry the whisk or beaters (if you were using for the yolk mixture)
- In a separate bowl, beat the egg whites with salt on medium speed to stiff peaks. It usually takes 3 to 5 minutes.
- You'll know they're ready when stiff peaks form as you lift the beaters from the bowl. Be careful not to overbeat the egg whites past this stage. Or the result will be curdled egg whites.
Combine the mixture
- Use a spatula to transfer the beaten egg whites to the yolk mixture. Fold the beaten whites into the yolk mixture with a spatula. Don't use a hand or stand mixer at this stage as this will over-mix the batter and the cake will not rise properly.
- There is no need to completely fold in the egg white. In fact, it’s normal for the mixture to have clumps of egg white on the surface, as this helps the batter separate into layers.
- Pour the mixture into your prepared pan. The mixture will look thin and quite runny as you pour it into the baking pan. This is also perfectly normal.
Bake
- Bake for 40-45 minutes. If the top is browning too quickly before it's baked, then shape foil into a dome and place it over the cake. It should not touch the batter.
- Check the cake at 40 minutes as baking time may vary depending on your oven or pan. The top of the cake should be firm to the touch.
- To ensure it's fully baked, gently shake the pan. There should be no movement of batter under the surface of the cake. Do not overbake the cake, as this will cause it to become rubbery and lose its layers.
Cool and refrigerate the cake before slicing
- Remove the cake from the oven, but leave it in the pan to cool for 20 minutes
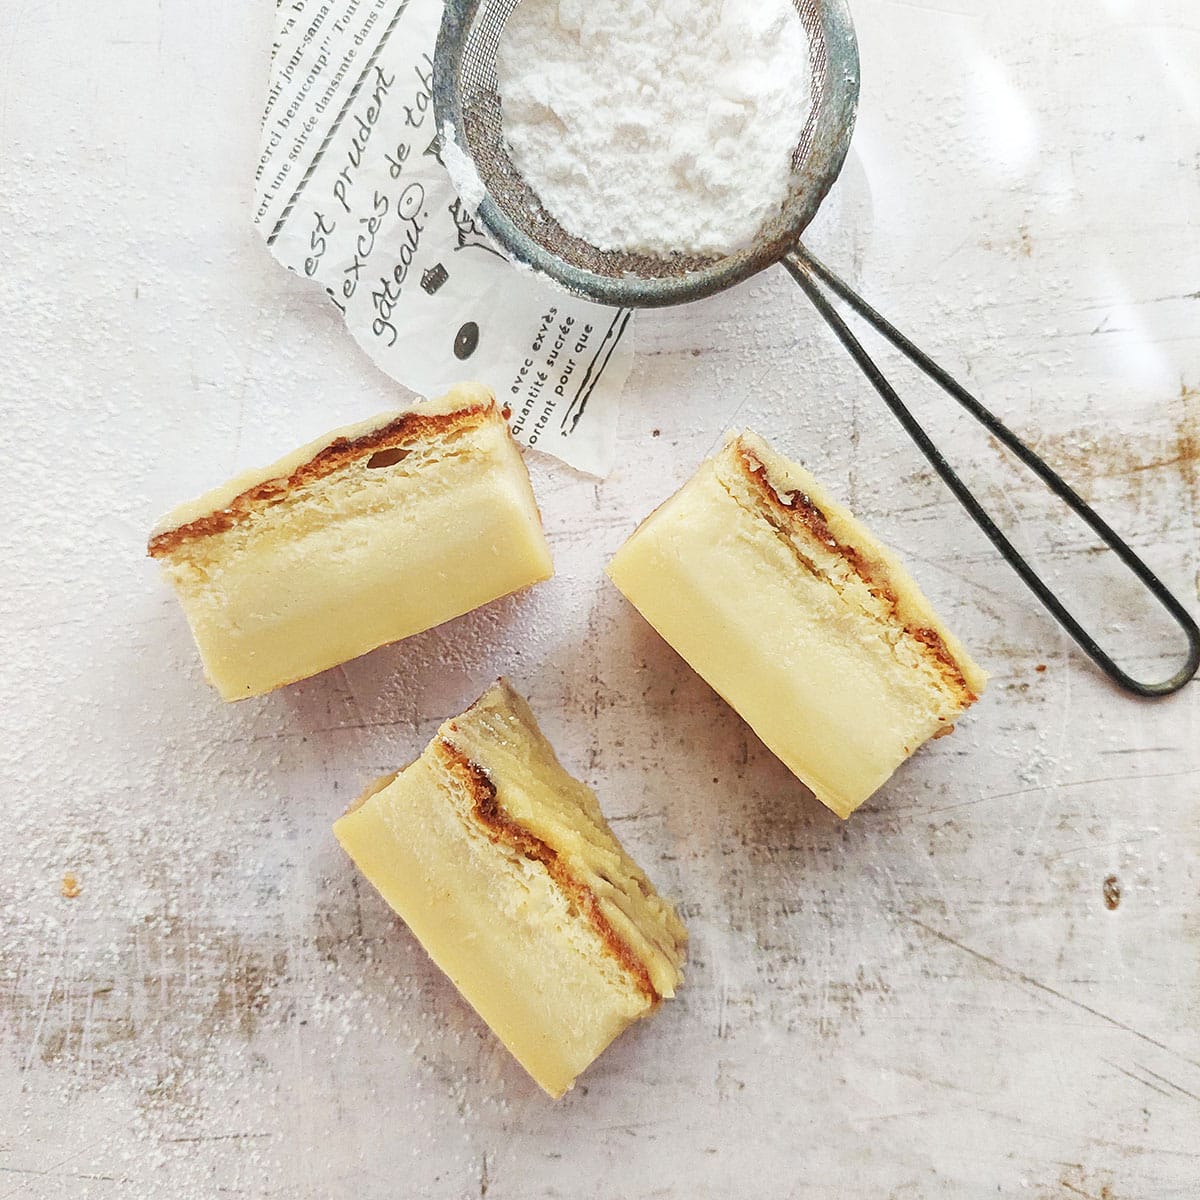
- Refrigerate: Just leave the cake in the baking pan and pop it in the fridge for an hour. That way, the custard sets nicely, and you'll get those beautiful distinct layers. The cake will shrink down slightly as it cools, and this is normal.
- Once chilled, use the overhang of the parchment paper to lift the cake out of the pan and slice it into portions.
Serve with or without butterscotch topping
- You can choose to serve the cake with or without the butterscotch frosting because the cake already has a butterscotch flavor. The butterscotch frosting is just an extra layer of decadence
- You can either sift powdered sugar or spread cooled butterscotch over individual slices.
To make the butterscotch topping (optional)
- In a saucepan place butter, brown sugar sugar and heavy (whipping) cream, and gently melt on a medium heat.
- Once the butter has melted and the sauce starts to bubble reduce the heat to low and continue to cook for a further 5 minutes without stirring.
- Remove from the heat and stir thoroughly.
- Allow the butterscotch sauce to cool down. As it cools, it will thicken further and become more spreadable.
- If the sauce thickens too much while cooling, you can gently reheat it and add a small amount (a teaspoon) of cream at a time to reach the desired consistency.
- Remember once spread over the slices of cake, the sauce will firm up to a fudge-like consistency.
- Once the butterscotch sauce has firmed up a little but still soft and spreadable you can use it to frost individual slices of the cake. (Remember to do this step only after the cake has been refrigerated for an hour after baking
Notes
Baking time: Keep in mind that ovens bake differently. Some may bake a cake faster than others. Because my oven is really fast, it took between 40 to 45 minutes for this cake to be completely baked. It can take up to 60 minutes if your oven is slower. Check the cake at 40 minutes. Then every 5 minutes after that. The top of the cake should be firm to the touch.To make sure that it's baked, very gently, shake the pan. There should be no movement of batter beneath the top of the cake. If there is, simply place it back into the oven, cover with foil (so that the top does not burn). Check on it every 5 minutes until firm.
Serving: The slices can be enjoyed either cold straight out of the fridge or left to reach room temperature before serving. Eaten cold, the texture of the entire cake is firmer. At room temp, the texture of the cake is softer and the custard creamier.
Storing: Store the cake in an airtight container in the refrigerator for up to 7 days. Freeze without topping (frosting): Freeze individual slices in an airtight container, for up to one month. When you're ready to enjoy them, simply place them in the refrigerator for a few hours or overnight to thaw.
Nutrition
Serving: 1serving | Calories: 351kcal | Carbohydrates: 41g | Protein: 6g | Fat: 19g | Saturated Fat: 11g | Polyunsaturated Fat: 1g | Monounsaturated Fat: 5g | Trans Fat: 1g | Cholesterol: 121mg | Sodium: 289mg | Potassium: 171mg | Fiber: 0.3g | Sugar: 33g | Calcium: 113mg | Iron: 1mg
Tried this recipe?Mention @thegardeningfoodie or tag #thegardeningfoodie!