I love all things homemade and this recipe for Easy Homemade Pita Bread is no different. Pita bread is readily available in grocery stores, but have you ever tried baking your own?
Homemade pita tastes so delicious straight from the oven, you will never go back to store-bought.
Pita bread is really simple to prepare. Now with the Fast Acting Instant Yeast available in stores, the rising time is actually cut in half.
So this entire recipe takes just 1 hour from start to finish!
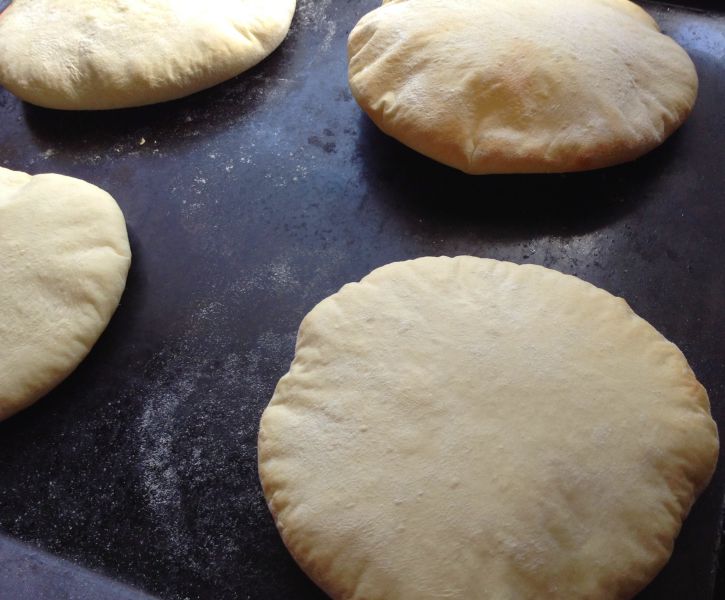
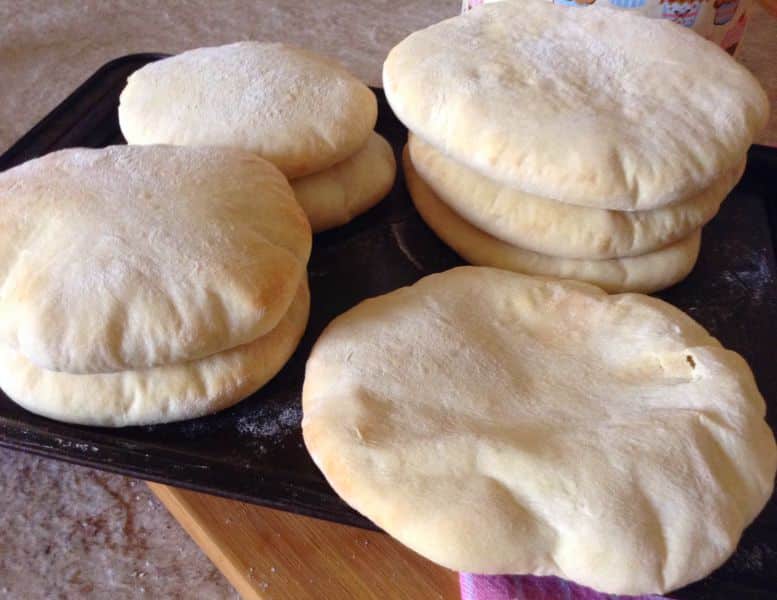
This is a great substitute for regular bread. Pitas are actually circular bread that puffs up when baked. They are slit at the top and stuffed with any filling you love.
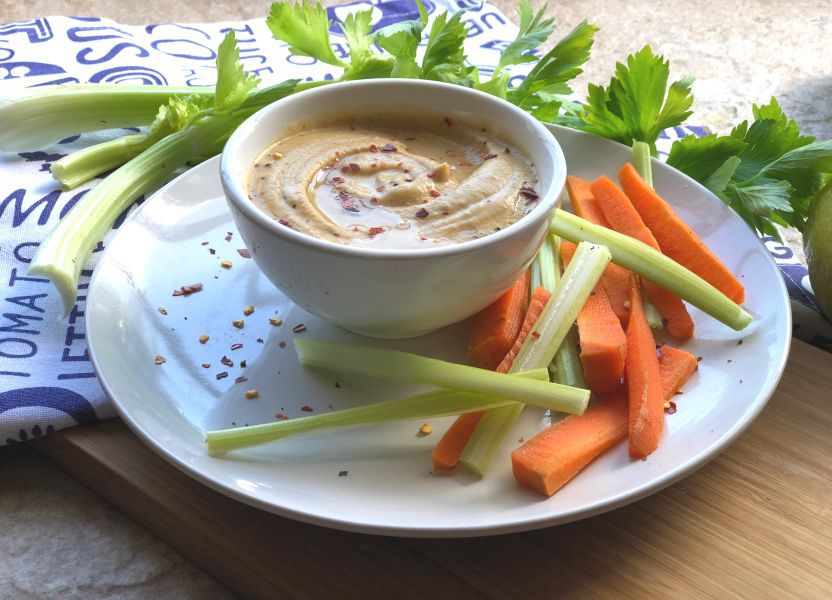
I usually cut through the bread completely, spread on some hummus, fill it with stir-fried vegetables, cheese and feta and then grill it on a pan until all the feta and cheese melts into the veg. It is simply heavenly.
Tips for making the perfect pita
- Kneading the dough is an important part of making pita or any type of bread using yeast. Kneading the dough well is important as this activates the yeast and helps stretch the gluten in the flour so that the bread can rise well. Stretch the dough by pushing the front half away with the heel of your palm, while holding the back of the dough with the other hand. Then fold the stretched part of the dough back on itself, give it a quarter turn and repeat for about 8 to 10 minutes.
- After the dough has been kneaded, it is placed in a lightly oiled bowl. Keep the bowl in a warm place for about 30 minutes, until the dough has doubled in size. Try not to leave the dough longer than 30 minutes before shaping it.
- After the dough has risen for 30 minutes, knock it down and knead it for 2 minutes. Then shape it as you like. In this case, for the pita, roll it into 6 inch disks, about 2 cm thick. Leave the rolled and shaped pita on the baking tray for 10 minutes before placing in the preheated oven.
Making the pita bread
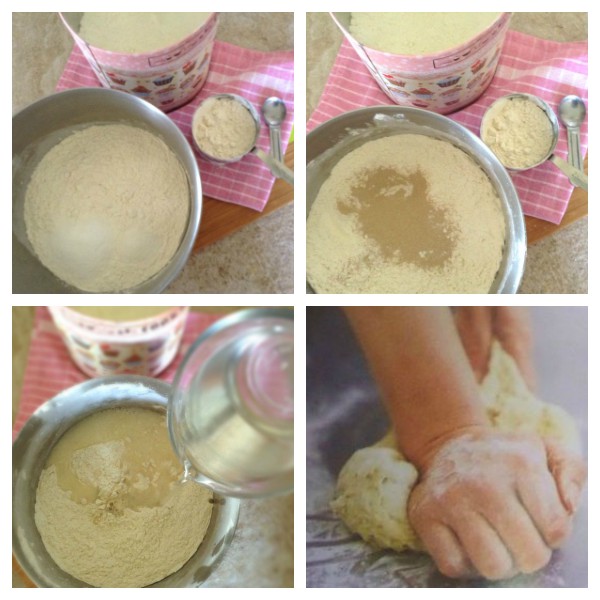
Start making the pita by sifting 5 cups of all purpose flour into a large bowl. Add 30 ml/ 2 Tablespoons of sugar and 2 teaspoons /5ml of salt, Mix all together then add 10g instant dry yeast and combine all together.
Add 2 Tablespoons of oil to 500ml of lukewarm water. Make sure that the water is not too hot or too cold. To get the perfect temperature I mix 250 ml boiling water from the kettle to 250ml cold tap water to get 500ml of perfect temperature lukewarm water.
Add the oil and water mixture to the flour and bring it together. It may feel like this is a lot of water in the beginning, but as you knead, the water is incorporated in the dough and it turns out perfectly soft. Turn out onto a lightly floured surface and knead the dough for about 8-10 minutes.
Lightly oil a bowl and place the kneaded dough into the bowl. leave in a warm place to rise for 20 to 30 minutes.
Knead lightly again for 2 minutes and roll out the dough into 6 inch disks about 1 cm thick. Leave on the baking sheet for 15 minutes to rise again while you preheat the oven to 180°C.
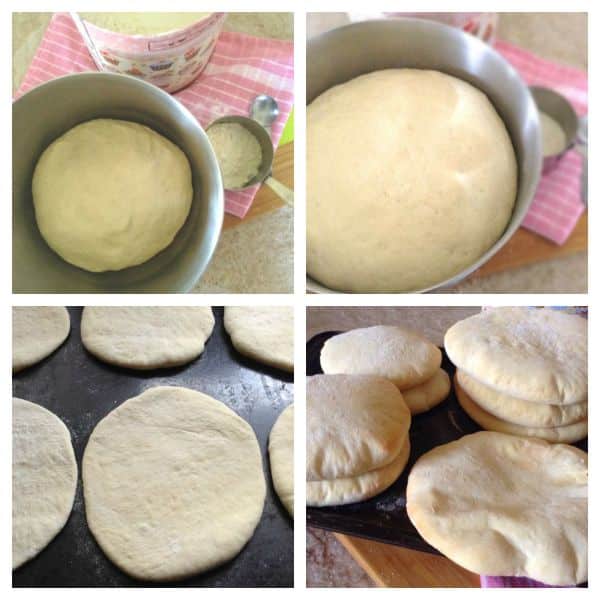
After it has risen for 15 minutes, bake the pita bread for 10-12 minutes.
Once baked remove from the oven, allow to cool for about 5 minutes and then slit the top of the pita to make a pocket. alternately, you could cut the pita all the way through, spread with hummus or mayo and veggies or any filling of your choice.
Grill on a pan for a minute on each side and serve.
Baked Pita bread can be stored for up to 3 days in an airtight container.
Hummus is a great spread for pita...try my easy recipe here
If you like this recipe, be sure to check out my other amazing muffin and bread recipes
Still hungry for more?
Follow on Facebook, Pinterest, and Instagram or Subscribe for the latest recipe updates
Enjoy ♥
Easy Homemade Pita Bread
Ingredients
- 5 cups / 600g all purpose flour / cake flour
- 2 Tablespoons / 25g white granulated sugar
- 2 teaspoons of salt
- 3 teaspoons / 10g instant dry yeast
- 2 Tablespoons / 30ml oil
- 2 cups / 500ml lukewarm water. SEE NOTE 1
Instructions
- Sift flour into a large bowl.
- Add salt and sugar. Mix all together. Mix in the instant dry yeast and combine.
- Add oil to lukewarm water. Make sure that the water is not too hot or too cold.
- Pour the oil and water mixture into the flour and mix it together. It may feel like this is a lot of water in the beginning, but as you knead, the water is incorporated in the dough and it turns out perfectly soft.
- Turn out onto a lightly floured surface and knead the dough for about 8-10 minutes.
- Lightly oil a bowl and place the kneaded dough into the bowl.
- Leave in a warm place to rise for 20 to 30 minutes.
- Knead lightly again for 2 minutes and roll out the dough into 6 inch disks about 1 cm thick. Leave on the baking sheet for 15 minutes.
- After 15 minutes, bake the pita in a preheated oven of 356°F / 180°C for 12-15 minutes.
- Once baked remove from the oven, allow to cool for about 5 minutes and then slit the top of the pita to make a pocket. Alternately, you could cut the pita all the way through, spread with hummus or mayo and veggies or any filling of your choice. Grill on a pan for a minute on each side and serve.
Notes
- Make sure that the water is not too hot or too cold. To get the perfect temperature I mix 250 ml boiling water from the kettle to 250ml cold tap water to get 500ml of perfect temperature lukewarm water.
Nutrition

heather (delicious not gorgeous) says
i love how fluffy these look!! i can imagine how good they'd be with baba ghanoush, hummus, everything....
The Gardening Foodie says
Thank you Heather, oh yes, you can really go all out with the topping, it really tastes good 🙂
Ruby & Cake says
I have never attempted making pita bread before, it looks so much less complicated than I had imagined. Yours look like perfect fluffy pillows! So delicious!!
The Gardening Foodie says
Thank you Ruby...it really is simple, and I hope that you get a chance to try out the recipe...it is really delicious 🙂
Deepika|TheLoveOfCakes says
Your pita bread looks better than store brought! It's perfectly puffed up and the texture looks lovely too! I love having a pita sandwich whenever I can..and stuffing my own pita bread would be amazing! Bookmarking to try soon!
The Gardening Foodie says
Thank you Deepika, oh yes it does taste so good as a sandwich... and I hope that you get to try it out soon as well 🙂
Patrick says
These look amazing! I love pita and there is so much you can do with it! I see this a being a staple recipe to make over and over!
The Gardening Foodie says
Thank you Patrick,oh that is so true, pita is such a versatile bread 🙂
Denise Browning says
Although pita is available at stores, as any other bread the fresh ones are way more delicious.
The Gardening Foodie says
Oh that is so true Denise, homemade is always so much tastier 🙂
Matt says
Yummmm! I saw this on instagram the other day and just had to check it out. We love pita here but always have gotten store bought. I can't imagine how good this is fresh and homemade. When I get the time (and I should be able to justify an hour haha) I will def be trying this out! Thanks for the recipe 🙂
The Gardening Foodie says
Thank you Matt... I really hope that you get to try out this recipe too, it is so different when compared to store bought 🙂
Katherine | Love In My Oven says
These are SOOO soft and fluffy looking!! I've tried pita a few times but mine never looks as good as this - I've got to try your recipe! I love toasting my pita and dipping it in hummus and/or tzatziki. So good!
The Gardening Foodie says
Thank you Katherine, oh I hope that you get to try it too...and dipping it in hummus sounds really yummy 🙂
Kelly @ Kelly Lynns Sweets and Treats says
You definitely made this look easy! I have never had homemade pita bread but it sounds so yummy!
The Gardening Foodie says
Thank you Kelly, I hope that you get a chance to try out this recipe, homemade pita is so good 🙂
neil@neilshealthymeals.com says
I love making my own pita breads Ashika. And do you know what's always good to see in a recipe, a "how to" guide like in yours, so I can check I'm making them correctly!
Thanks for this recipe and I hope you have a great weekend!
The Gardening Foodie says
Thank you Neil...I am glad that you like making your own pita breads as well, they just taste so great:)
Kelsie | the itsy-bitsy kitchen says
My grandma always made pita bread for my sister and me when we were little. We LOVED making pizza with it but it's been years since I made it on my own. I'll have to try your recipe and relive all the fun I had baking with her :). Hope you're having a great week, Ashika!
Louise - Cooking with kids says
These look so much better than shop bought pita bread ?.
The Gardening Foodie says
Thank you Louise, they taste so much better too 🙂
The Gardening Foodie says
Awww, that is so sweet Kelsie, and it sounds like you and your sister had lots of fun ...I hope that you get to try out this recipe soon as well.
Have a great weekend 🙂
2pots2cook says
Love your suggestion ! These are really easily combined with everything ! Thank you !
The Gardening Foodie says
Thank you, I am so glad that you like the recipe 🙂
Maria | kitchenathoskins says
Didn't know pita bread could be made so easily at home. You've certainly made it look so simple Ashika, these look so soft, like fluffy pillows. I can imagine how wonderful these would be stuffed with hot falafels or just plain with a bowl of hummus, yum.
The Gardening Foodie says
Thank you Maria, oh yes these are so easy to make and so good with just any filling or topping 🙂
Thao @ In Good Flavor says
These look gorgeous! They are so puffy, soft, and perfectly baked. I could eat them, plain , straight from the oven!
The Gardening Foodie says
Thank you Thao...haha, they are hard to resist when the of the oven, they taste so good plain as well 🙂
Emma - Bake Then Eat says
Very little beats homemade bread, I don’t make it often but I am tempted to make these, they look gorgeous.
The Gardening Foodie says
Thank you Emma...oh I hope that you give it a try , they are delicious 🙂